
Wainscoting Around Windows: What Goes Wrong and How to Plan It Right
Quick Answer
One of the most common wainscoting mistakes around windows is picking a standard height and panel spacing first, then letting the windows land wherever they land. In Inland Empire homes, where one room can have several window sizes and sill heights, the layout has to be planned from the windows out: sill heights, casing, where each stile falls, how the cap ends, and what window treatments are coming.
Key Takeaways
-
Plan the wainscoting from the windows out, not from a standard height in
-
There is no mandatory 36-inch wainscoting height; it's a common choice, not a rule
-
When sills sit at different heights, choose one governing height and design a clean termination at every other window
-
Decide window treatments and their mounting method before the layout is final
-
Not every gap at a window should be caulked; some clearances are intentional
-
See this in action: the Smokestone Wainscoting project in Rancho Cucamonga
In a room with several windows, the windows are usually where wainscoting goes wrong. Corners, outlets, and uneven walls matter too. Windows are just the hardest to fix after the fact.
A plain wall forgives almost any panel spacing. Put three windows on it, at three different sizes, and every decision shows: where the cap meets the casing, whether a stile lands half on the trim, how close the top of the paneling sits to the sill, and whether there's still room for the shutters you ordered.
Brian has been laying out trim around windows for 35 years, and in our experience the fix usually starts in the same place: the windows. Here's what goes wrong, what to decide before anything gets built, and the planning sequence we used on rooms like the dining room in our Smokestone Wainscoting project in Rancho Cucamonga.
The Most Common Problem: Height and Spacing Picked Before the Windows Are Measured
Most layouts start with a number. Thirty-six inches, or one-third of the wall height, or whatever the last house had. Then panels get spaced evenly across the wall. That works until a window shows up.
Now the cap runs into the casing (the trim around the window) at an awkward spot, or it stops an inch below the sill and looks like a mistake. A stile (the vertical frame piece between panels) lands half on the casing. The panel under the window ends up a different width from every other panel in the room. None of it is a construction failure. All of it is visible from the doorway.
General installation problems like uneven walls, corners, and outlets are covered in our guide to what can go wrong with wainscoting installation. This post is only about windows.
What Homeowners Are Actually Worried About
When we walk a room with a homeowner, the window questions come up fast. Here are the ones we hear most, and the honest answers.
-
"Will it look off because my windows don't match?" Only if the layout ignores them. Mismatched windows are normal in larger Inland Empire homes. They just mean the layout has to be designed window by window.
-
"Will my shutters or blinds still fit?" They will if you decide on them before the layout is final. That's the single most-skipped step we see.
-
"Do I have to replace my window casing?" Not always. But the cap and the casing have to meet cleanly, and sometimes that means adjusting the casing or building out its edge.
-
"What if something's hiding behind the drywall?" Covering a wall is the last easy chance to deal with what's in it. Check before the panels go up.
Decisions to Lock In Before Fabrication
Wainscoting around windows is a sequencing job. These are the decisions that have to be made, in writing, before panels get built.
| Decision | Must Be Locked In Before Fabrication? |
|---|---|
| Overall wainscoting height relative to the sills | Yes. Every panel, stile, and cap position depends on it. |
| Window treatment type and mounting method | Yes. Shutters, blinds, and drapery can need different clearances at the casing and sill, depending on the product and how it's installed. |
| Where each stile falls at each window | Yes. Stiles should frame the window on purpose, not land half on the casing. |
| How the cap and any crown molding end at each casing | Yes. The termination detail sets the cut list for the top of the wainscoting. |
| Whether the window casing stays, gets adjusted, or gets replaced | Yes. The cap has to meet the casing's final thickness and profile. |
| Electrical boxes to keep, move, or have an electrician address | Yes. Once panels cover the wall, changes get expensive. |
| Paint color | No. It can be finalized before paint days are scheduled. |
| Window treatment hardware and fabric | No. Only the mounting method and location need to be known during layout. |
The Window Questions, Answered
Should wainscoting line up with the window sill?
Sometimes. When the sill height is close to a height that suits the room, aligning the top of the wainscoting with the sill can look intentional and clean. Apartment Therapy's guide to wainscoting height makes the same point, and also warns that a cap sitting just above or just below a sill tends to look awkward.
The trouble starts when you force it. If aligning with the sill puts the wainscoting at a height that's wrong for the room, don't. Pick the height that's right for the room and design a deliberate gap or termination at the window instead.
What happens when windows have different sill heights?
You choose one governing height for the room and treat every window as its own condition. Usually the governing height comes from the window wall that matters most visually, often the one you see from the entry.
At windows that don't match, the paneling either stops at the casing with a clean, designed end, or the panel arrangement under the window is laid out to that window's width. What you never want is one standard panel spacing marching across the wall and colliding with whatever's there.
Should wainscoting go in before or after blinds, shutters, or drapery?
Wainscoting goes in first. Window treatments get planned first. Those are different things.
Inside-mount blinds and many shutters sit within the window opening, and some shutters mount on or around the casing. Drapery hardware may sit above the window on the wall. Before the layout is final, ask your window treatment company how and where each piece mounts, and what clearance it needs at the casing and sill. Then design the cap and stiles around that.
How should wainscoting end at window casing?
Cleanly and on purpose. The top cap of the wainscoting usually sticks out from the wall farther than the window casing does. If the cap simply butts into the casing, its end hangs past the casing face and looks unfinished.
There are a few good answers: return the cap back into the wall (cut so its profile wraps around and finishes against the wall), stop the cap at a vertical stile set beside the casing, or adjust the casing so it has the depth to receive the cap. Which one is right depends on the window, the casing profile, and the treatments. If you're looking at your casing anyway, our post on baseboard and casing proportions is a good primer.
How much clearance should be left around window trim?
Enough for whatever comes next, and that number comes from your window treatment installer, not from a rule of thumb. We won't give you a universal figure because there isn't one. A shutter frame and a cellular shade need very different things.
What matters is that the clearance is designed. An intentional gap with a crisp, painted edge reads as a detail. A random gap filled with a heavy bead of caulk reads as a fix. For more on telling the two apart, see how to judge finish carpentry quality.
What hidden problems can appear when covering an existing wall?
Old outlets, abandoned boxes, wiring from a previous remodel, patched drywall, and walls that aren't flat. Once the paneling goes on, whatever's behind it is a lot harder to reach. If something electrical turns up, stop and call a licensed electrician. Outlets, drywall, and wall flatness are covered in more depth in our wainscoting installation problems guide.
Can't I Just Install It at 36 Inches and Ignore the Windows?
You can. We wouldn't.
Thirty-six inches is a common height, not a requirement. There's no building rule that says wainscoting goes there. It's a habit. The right height depends on the room's proportions, the ceiling height, the furniture, and the windows. Our Gypsy Canyon project landed at 55 inches because that's what the room needed.
A uniform height can work fine in a room where the windows cooperate. Apply it blindly in a room where they don't, and you get caps that crash into casings and panels under the sills that are a sliver of the size of every other panel. In tall rooms the question gets bigger, and we cover it in what actually works in two-story rooms.
Five Window Mistakes We See Most
-
Choosing a height without measuring every sill. One window gets measured, the rest get assumed. In homes with mixed window sizes, that guess shows up at the first window that's different. We measure every sill and every casing before a single number goes on the drawing.
-
Spacing panels by formula. Equal spacing looks great on paper. On a wall with windows, it lands stiles in the wrong places. We lay out stiles to frame the windows first, then divide the remaining wall.
-
Running the cap into the casing with no plan. The cap's end hangs past the casing face and gets buried in caulk. We design the termination at every window before the cut list is written.
-
Caulking everything tight to the window. If shutters or blinds are coming later, caulking trim to the window frame can create problems for the installer. Some clearances are meant to stay open.
-
Covering the wall without checking what's in it. Abandoned outlets and old wiring don't fix themselves. We stop and bring in the right trade before anything gets covered.
The Window Layout Planning Checklist
This is the sequence we use. You can use it whether you hire us for wainscoting and paneling, hire someone else, or review a contractor's proposed layout. Every room is different, so treat it as a starting framework, not a rulebook.
-
Measure the actual room and every window. Not the plans. The room.
-
Record each sill height and each casing's width, thickness, and profile.
-
Set the intended visual height of the wainscoting for the room as a whole.
-
Decide where the vertical stiles fall at each window, then divide the remaining wall.
-
Design how the cap, and any crown or pediment molding, ends at each casing.
-
Confirm window treatment types, mounting methods, and required clearances.
-
Mock up the tricky windows full-scale on the actual wall with tape or cardboard.
-
Check for outlets, abandoned boxes, and other existing conditions before anything gets covered.
-
Get the homeowner's sign-off on the final field layout before fabrication.
Step 7 is the one most people skip. A drawing can't show you how a cap termination looks from the dining table. A piece of cardboard on the wall can. If a designer is part of your project, who verifies the layout and who approves changes matters here.
See This In Action — Smokestone Wainscoting, Rancho Cucamonga
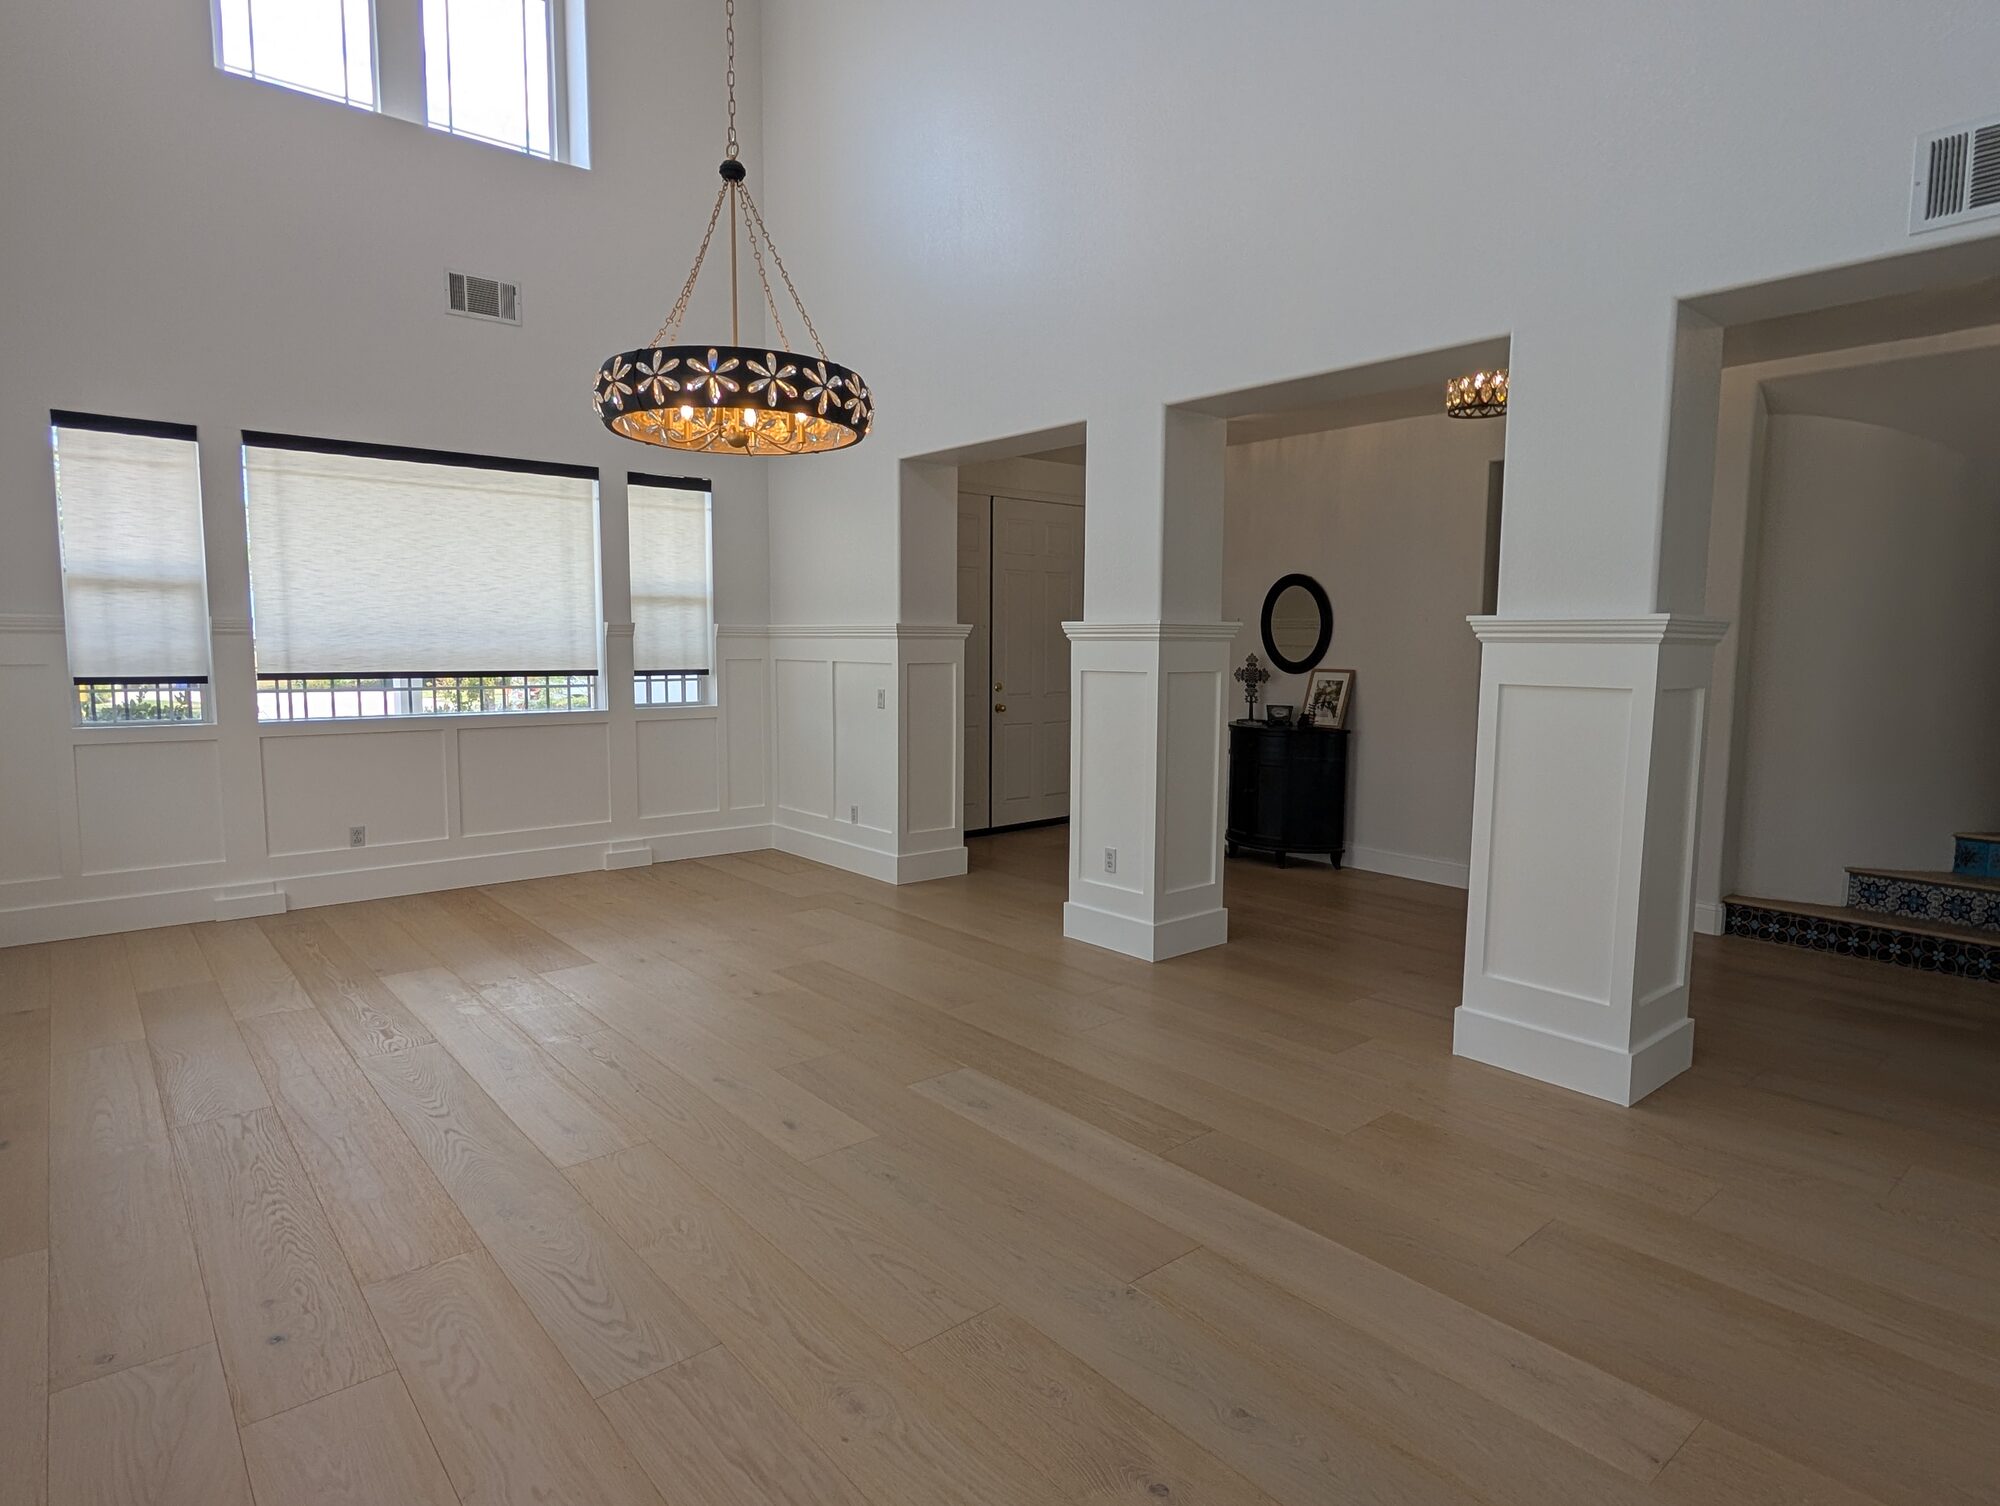
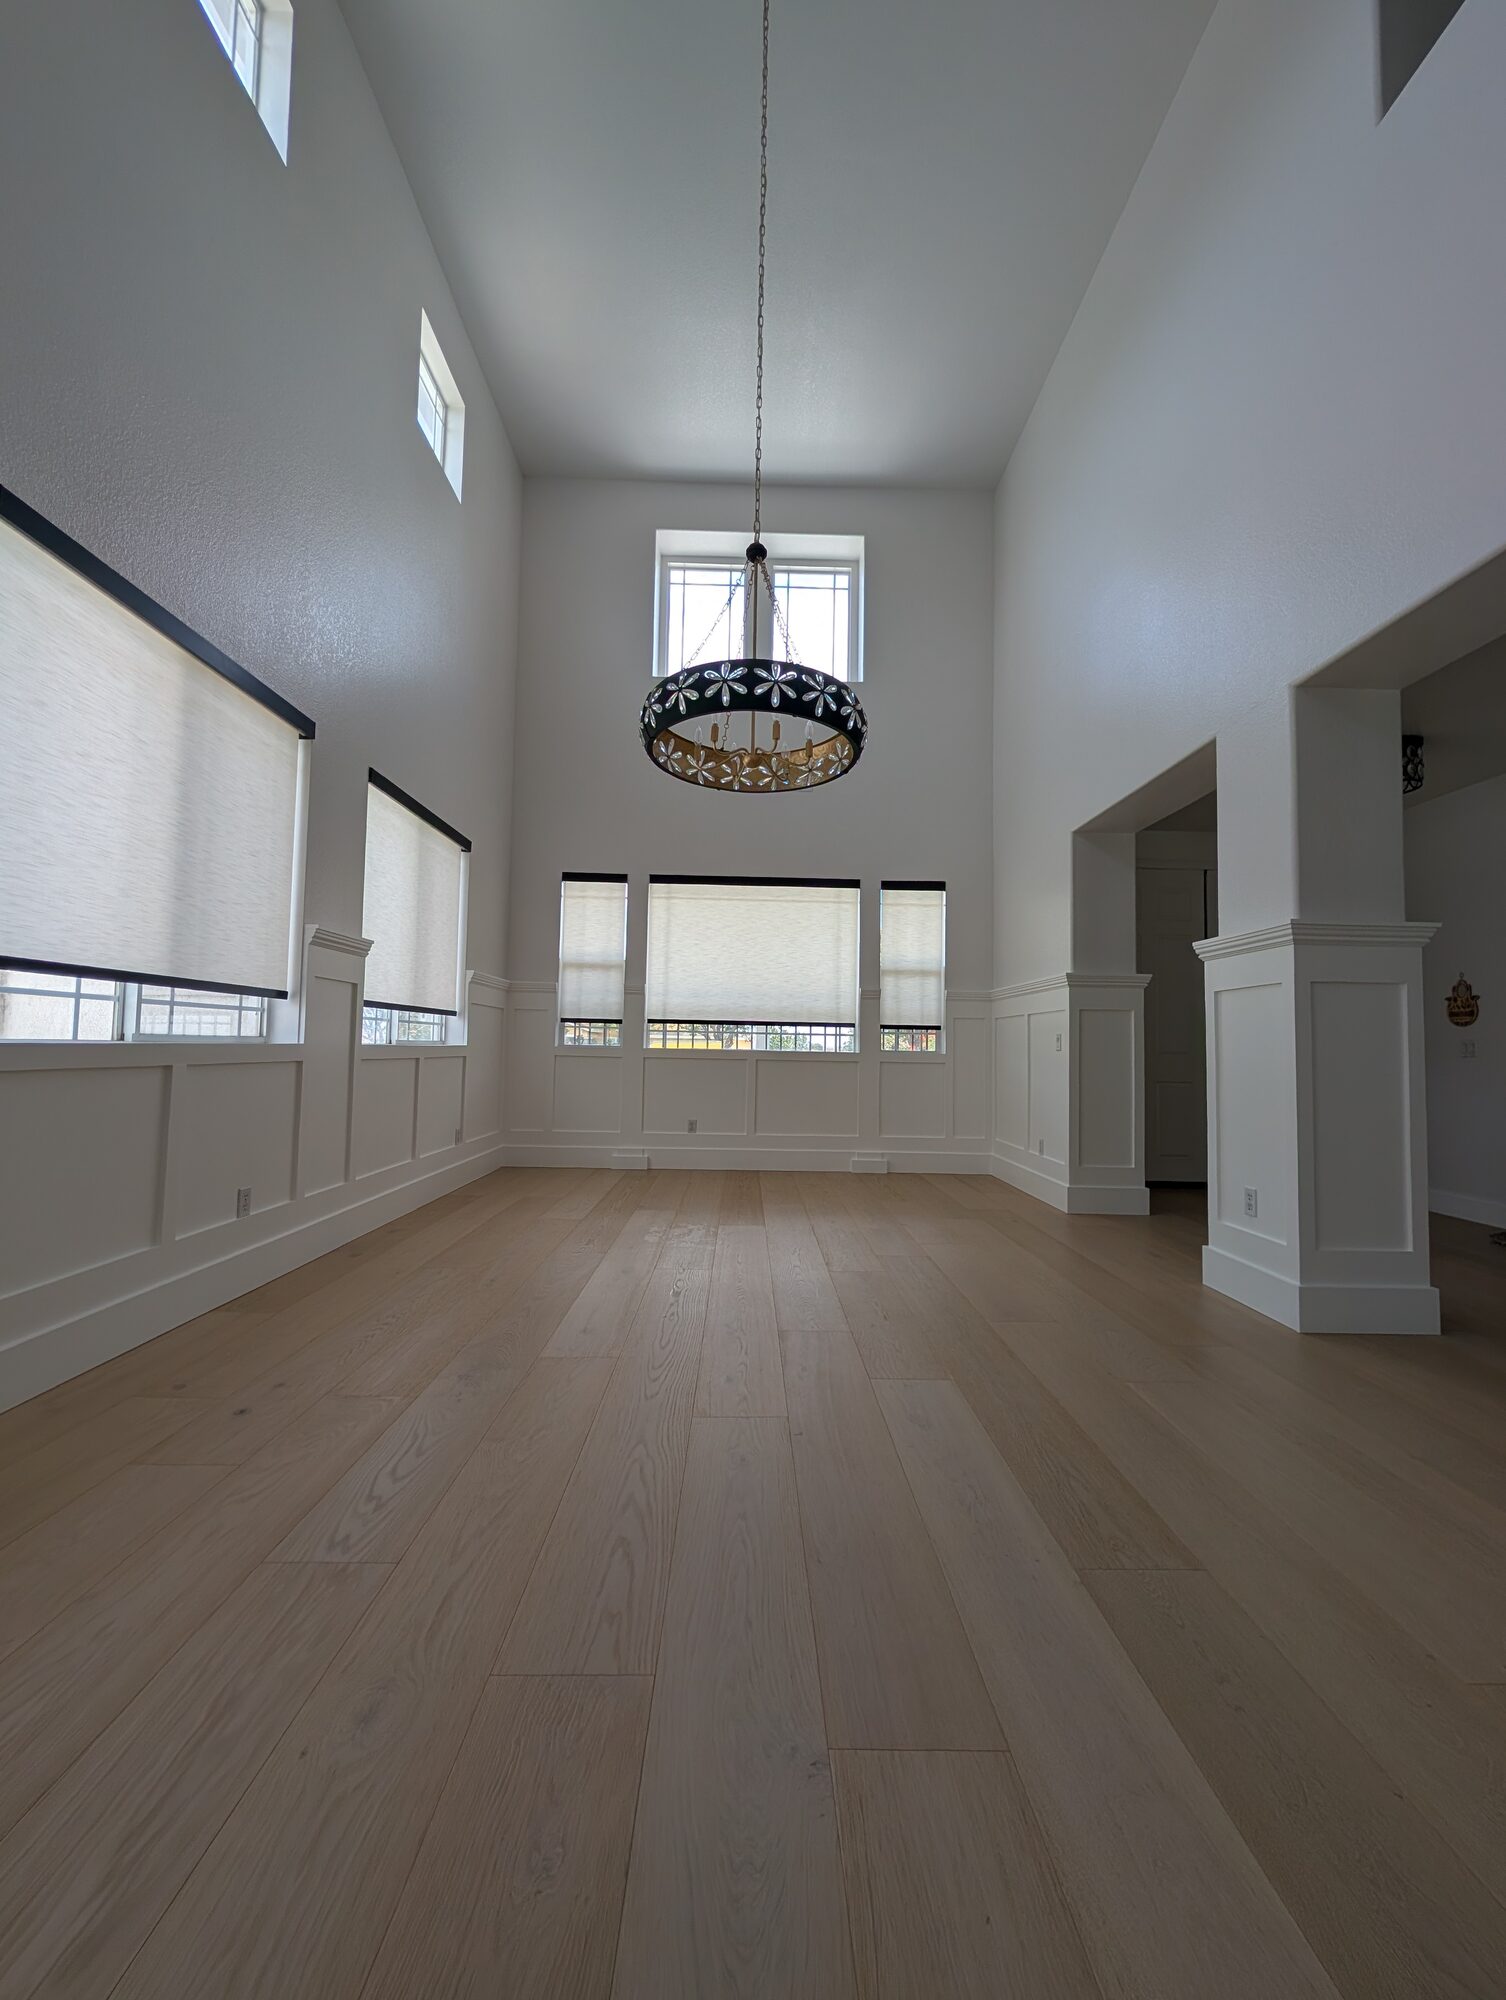
Every window in the room was a different size. Not one panel layout could be copied from one window to the next.
What we used on this project:
-
A layout built window by window, with each stile placed to end clean at its own window
-
Pediment crown and cap terminations designed for each casing
-
Terminations finished without caulk to the windows, leaving room for custom window treatments installed afterward
-
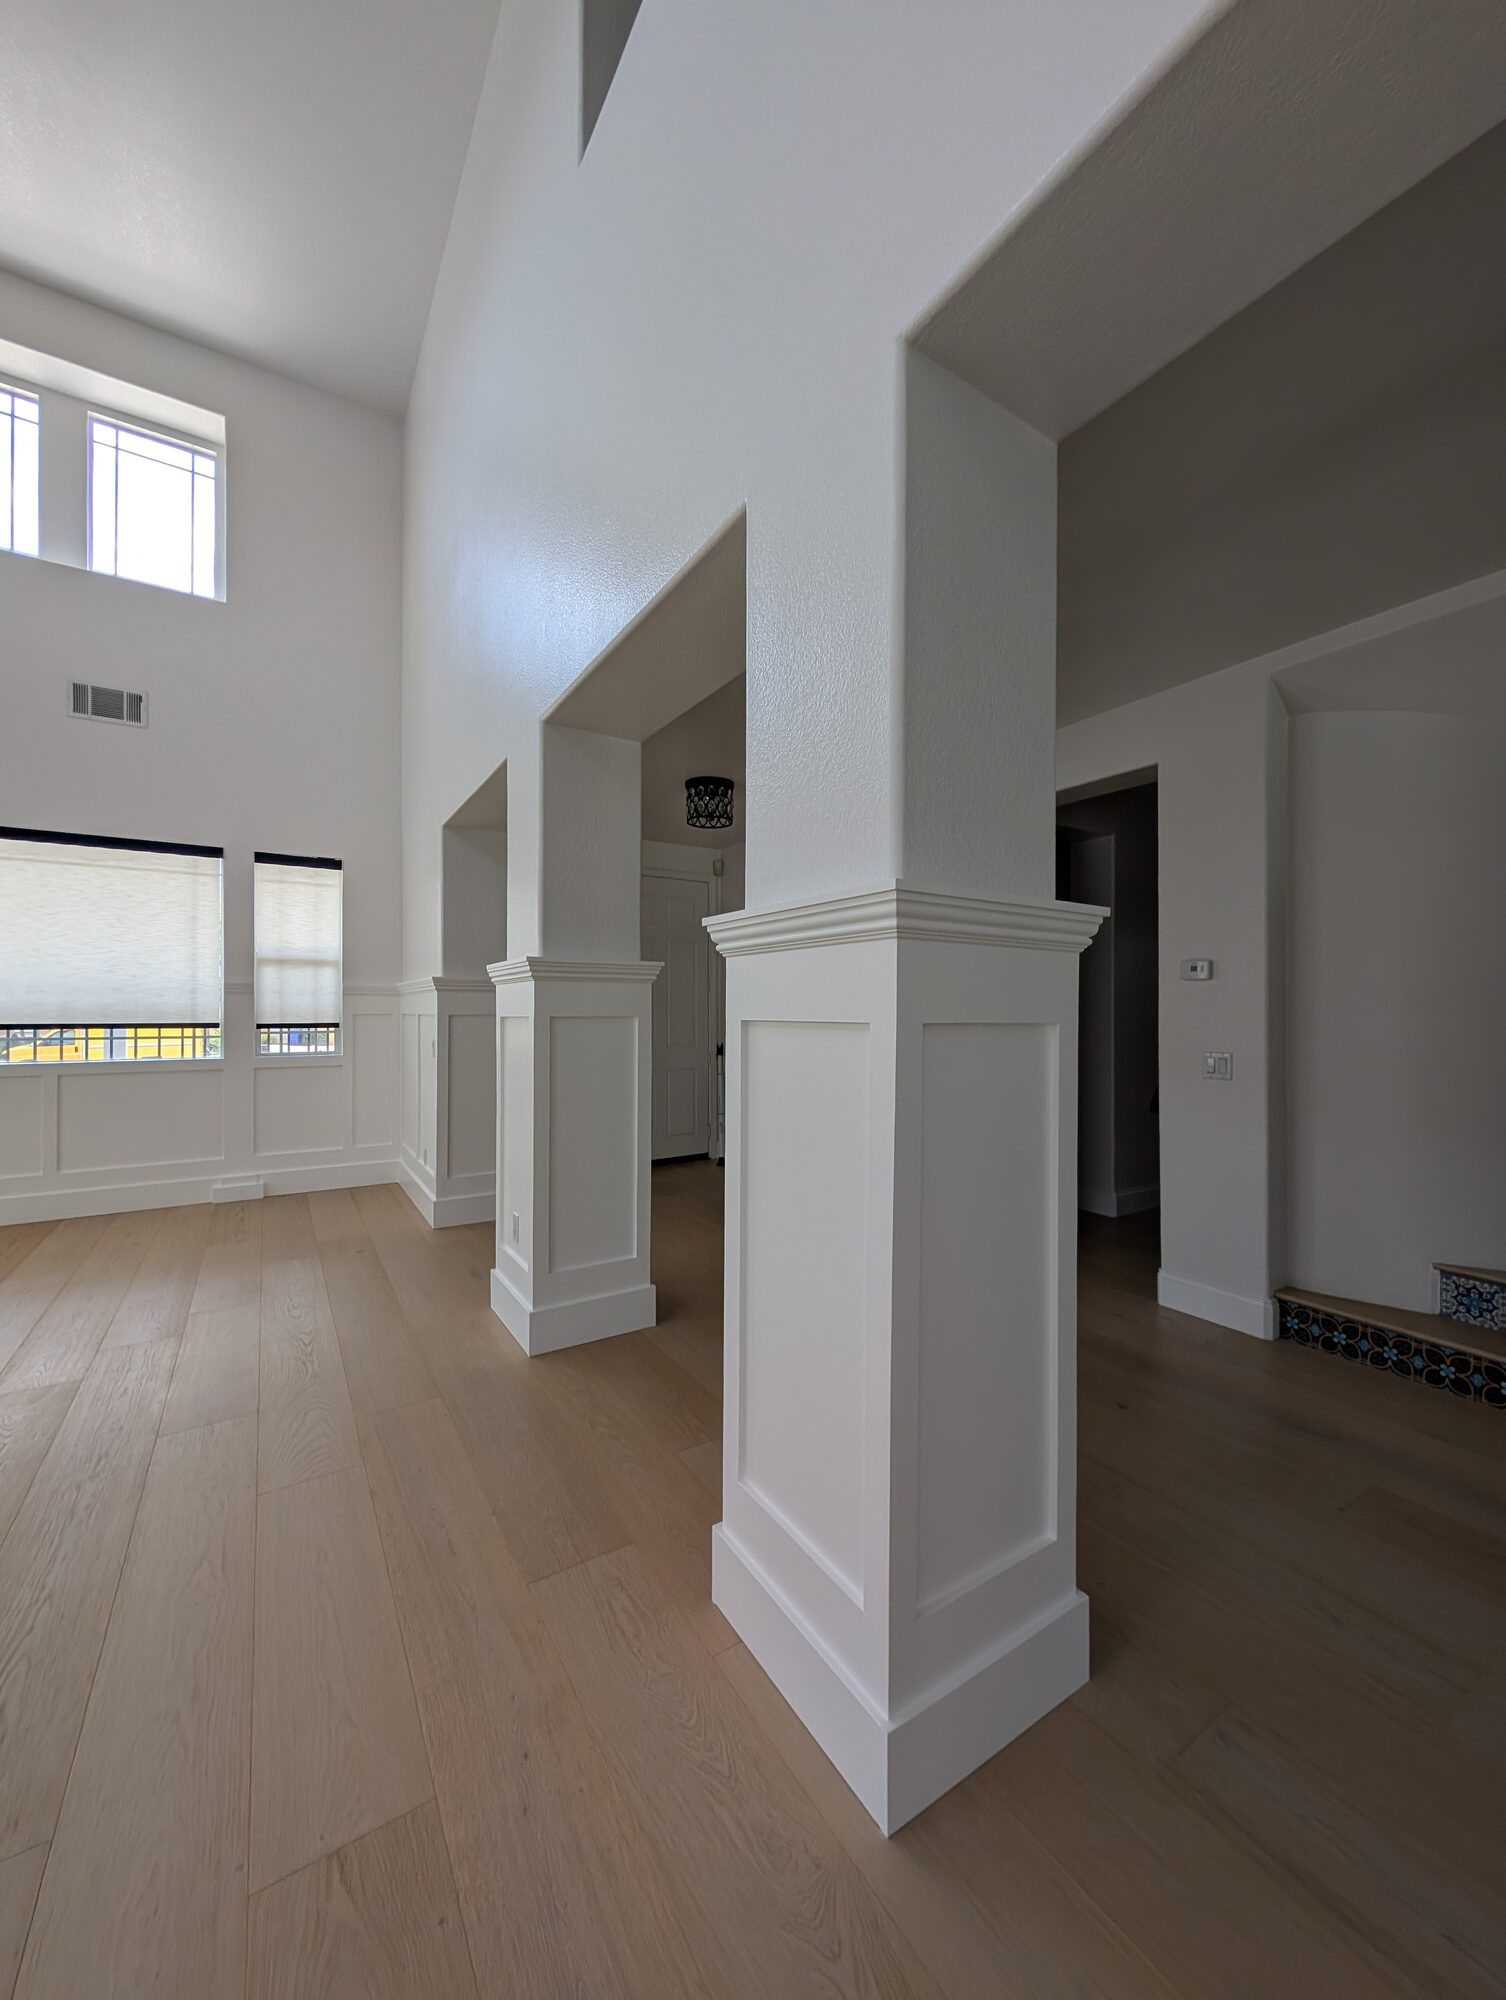
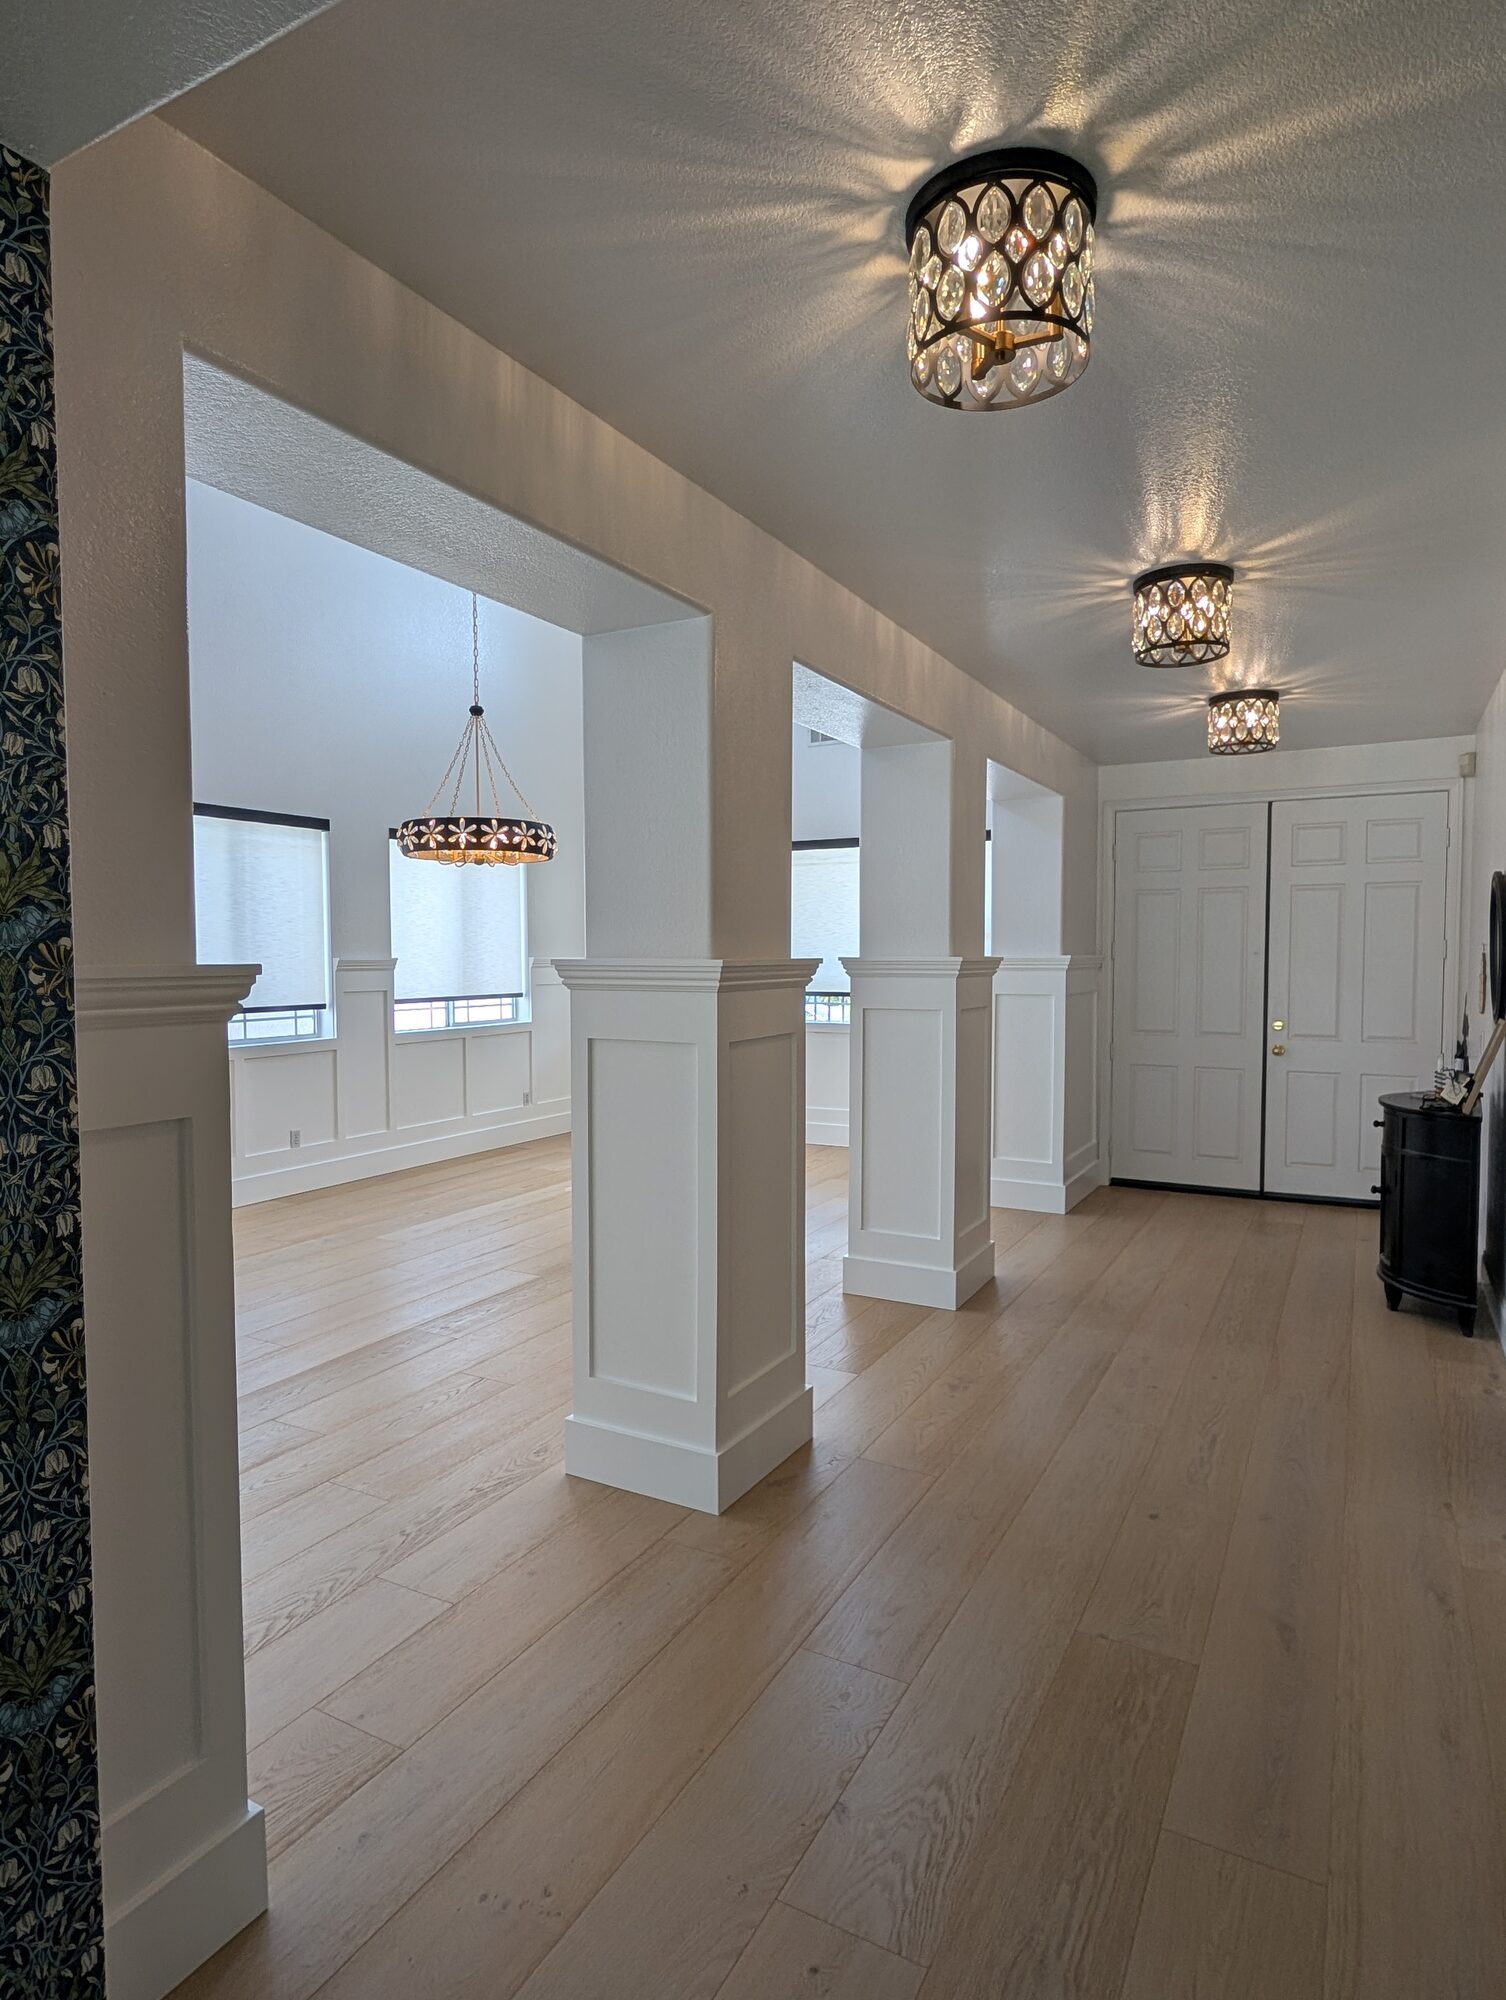
Faux columns on the front window wall so the windows read as one design
-
An abandoned outlet from a prior remodel, handed to the electrician as separate work before the wall was covered
The full project post has the photos of every window wall, the timeline, and the complete investment.
Link: See the full Smokestone Wainscoting project
The Holland & Sons Angle
On the Smokestone dining room in Rancho Cucamonga, nothing at the windows was caulked to the glass or the frame. That was a decision, made with the homeowner, because her custom window treatments were going in after us. A gap like that has to look like it was meant to be there, so every termination was designed, cut, and painted to stand on its own. Wyatt, Waylon, and Don were in the room for the layout work on this job. What they took from it is what every apprentice has to learn eventually: you measure every window, every time. The one you assume is the one that bites you.
Related Resources — Smokestone Wainscoting Guide
The Smokestone project gave us six lessons. Each one has its own guide.
-
Wainscoting in Rancho Cucamonga, CA: How We Grounded a 20-Foot Dining Room — Smokestone Wainscoting: The full project: 86 linear feet, three paneled columns, photos, timeline, and the complete investment.
-
How Much Does It Cost to Wrap Interior Columns in Wood Paneling?: Holland & Sons column-wrap investment guidance, what drives it, and when a simpler wrap makes more sense.
-
Picture Frame Molding vs. Assembled Panel Wainscoting: Which Is Worth It?: How the two construction methods differ, and when the extra investment makes sense.
-
Wainscoting and Wall Treatments for Two-Story Rooms: What Actually Works?: A proportion-based framework for rooms with unusually tall ceilings.
-
How to Judge Finish Carpentry Quality: What to Look For Before You Hire: An inspection checklist for finished trim, paneling, and painted millwork.
-
Working With an Interior Designer and a Finish Carpenter: Who Does What?: Roles, approvals, and field verification when a designer and a carpenter share a project.
Wainscoting Around Windows FAQ
Should wainscoting line up with the window sill?
Wainscoting should line up with the window sill only when the sill height also suits the room. When it does, aligning the cap with the sill can look clean and intentional. When it doesn't, pick the height that's right for the room and design a deliberate termination at the window. A cap sitting just above or below a sill usually looks like a mistake.
What do you do when windows have different sill heights?
Choose one governing wainscoting height for the room and design each window as its own condition. The governing height usually comes from the most visible window wall. At the other windows, the paneling either ends at the casing with a designed termination or the panels under that window are laid out to its width. Full-scale mockups on the wall help settle the tricky ones.
Should wainscoting be installed before or after blinds, shutters, or drapery?
Wainscoting should be installed before window treatments, but the treatments should be planned before the wainscoting layout is final. Shutters, blinds, and drapery mount in different places and need different clearances at the casing and sill. Ask your window treatment company for mounting methods and clearances first, then design the cap and stiles around them.
How should wainscoting end at window casing?
Wainscoting should end at window casing with a designed termination, not a cap butted into the trim. Good options include returning the cap back to the wall, stopping it at a stile set beside the casing, or adjusting the casing so it can receive the cap. The right choice depends on the casing profile, the cap's projection, and the window treatments.
How much clearance should be left around window trim for treatments?
The clearance around window trim should come from your window treatment installer, because it depends on the product and mounting method. There is no universal number. What matters is that the clearance is designed in: an intentional, crisply painted gap reads as a detail, while a random gap filled with heavy caulk reads as a repair.
Is 36 inches the standard height for wainscoting?
Thirty-six inches is a common wainscoting height, not a required standard. No building rule sets it. The right height depends on ceiling height, room proportions, furniture, and especially windows. A uniform height can work when the windows cooperate, but applied blindly it produces caps that collide with casings and awkward panels under the sills.
What hidden problems show up when you cover an existing wall with wainscoting?
Covering an existing wall can reveal abandoned outlets, old wiring from previous remodels, patched or wavy drywall, and other leftovers. Once panels go on, those become much harder to reach. Check the wall before fabrication, and if anything electrical turns up, have a licensed electrician address it before it gets covered.
Planning Wainscoting in a Room Full of Windows?
That's the kind of room we like. Tell us about it at hsconstruct.com/contact. Fill out the form, describe the space, and upload photos of each window wall, plus any inspiration shots you've saved. We'll set up a design meeting, lay it out with you on the real walls, and give you a clear investment figure before anything gets built.
Want to see this advice applied to a real project? Here's the full breakdown: Smokestone Wainscoting, Rancho Cucamonga
Holland & Sons works in Rancho Cucamonga, Eastvale, Corona, Riverside, Menifee, Murrieta, Temecula, Perris, and across the Inland Empire. For more finished work, follow Holland & Sons Construction on Facebook and Instagram, or browse our projects.
951-338-8058 | brian@hsconstruct.com | hsconstruct.com | CSLB #1123738
More Than Just Wainscoting
Windows are just one part of a well-planned room. Brian has been a finish carpenter since 1991, and today his sons build alongside him, which means every room in your home is fair game.
If your space needs more than wainscoting, here's what else we build:
-
Kitchen and bathroom remodels — full custom cabinetry, tile work, and finish carpentry from demo to done
-
Coffered ceilings — grid beam systems that add architectural depth to any room, sized and proportioned to the space
-
Wainscoting and wall paneling — classic raised panel, flat panel, board-and-batten, and shiplap applications
-
Reclaimed wood accents — feature walls, fireplace surrounds, and detail work using salvaged material with real character
-
Beam wraps — hollow wood wraps that give exposed beams the look of solid timber without the structural engineering
-
Crown molding, baseboards, and trim carpentry — the details that make a house feel finished, from a single room to a whole home
-
Cased openings and interior door replacements — clean transitions between spaces that most contractors overlook
-
Custom built-in entertainment walls and bookshelves — designed by hand, built in the shop, installed to last
Wood, proportion, and rooms that feel right — that's what we do.
About the Author
Brian Holland is the owner and lead carpenter of Holland & Sons Construction, a family-run finish carpentry and general contracting company serving Riverside County and the Inland Empire. He entered the trade at 17 in 1991, learned on the job, and has spent 35 years building the kind of work that makes rooms feel right — often before a homeowner can articulate why. Most projects start at his vintage drafting table, where he sketches the layout by hand with pencil and paper using a Vemco drafting machine before anything gets built. His sons now apprentice alongside him on every project. Brian and Holland & Sons Construction are members of the National Association of the Remodeling Industry (NARI), the National Association of Home Builders (NAHB), and the California Building Industry Association (CBIA). Holland & Sons is based in Perris, CA and licensed by the CSLB (#1123738).
This guide is part of our wainscoting & paneling series.
Learn more about Wainscoting & PanelingHave a project in mind? Let's start a conversation.
Tell us what you are thinking about and we will give you a straight answer about scope, timeline, and investment.
Start a Conversation