
How to Judge Finish Carpentry Quality: What to Look For Before You Hire
Quick Answer
Good finish carpentry shows tight, consistent miters, even reveals, aligned stiles and rails, flat panels, thin and straight caulk lines, and paint that looks uniform under low-angle sunlight. Before hiring a finish carpenter in Rancho Cucamonga or anywhere in the Inland Empire, look at their finished work in person, in daylight, up close and from across the room.
Key Takeaways
-
Judge finished work, not photos alone; see it in daylight, up close and from across the room
-
Caulk is a normal part of painted trim; heavy, wavy, or uneven caulk lines are the warning sign
-
Consistent reveals and aligned stiles matter more than any single perfect miter
-
Low-angle sunlight is the toughest inspector; it shows seams, waves, and thin paint
-
Seasonal hairline movement in painted wood is normal; open joints and lips are not
-
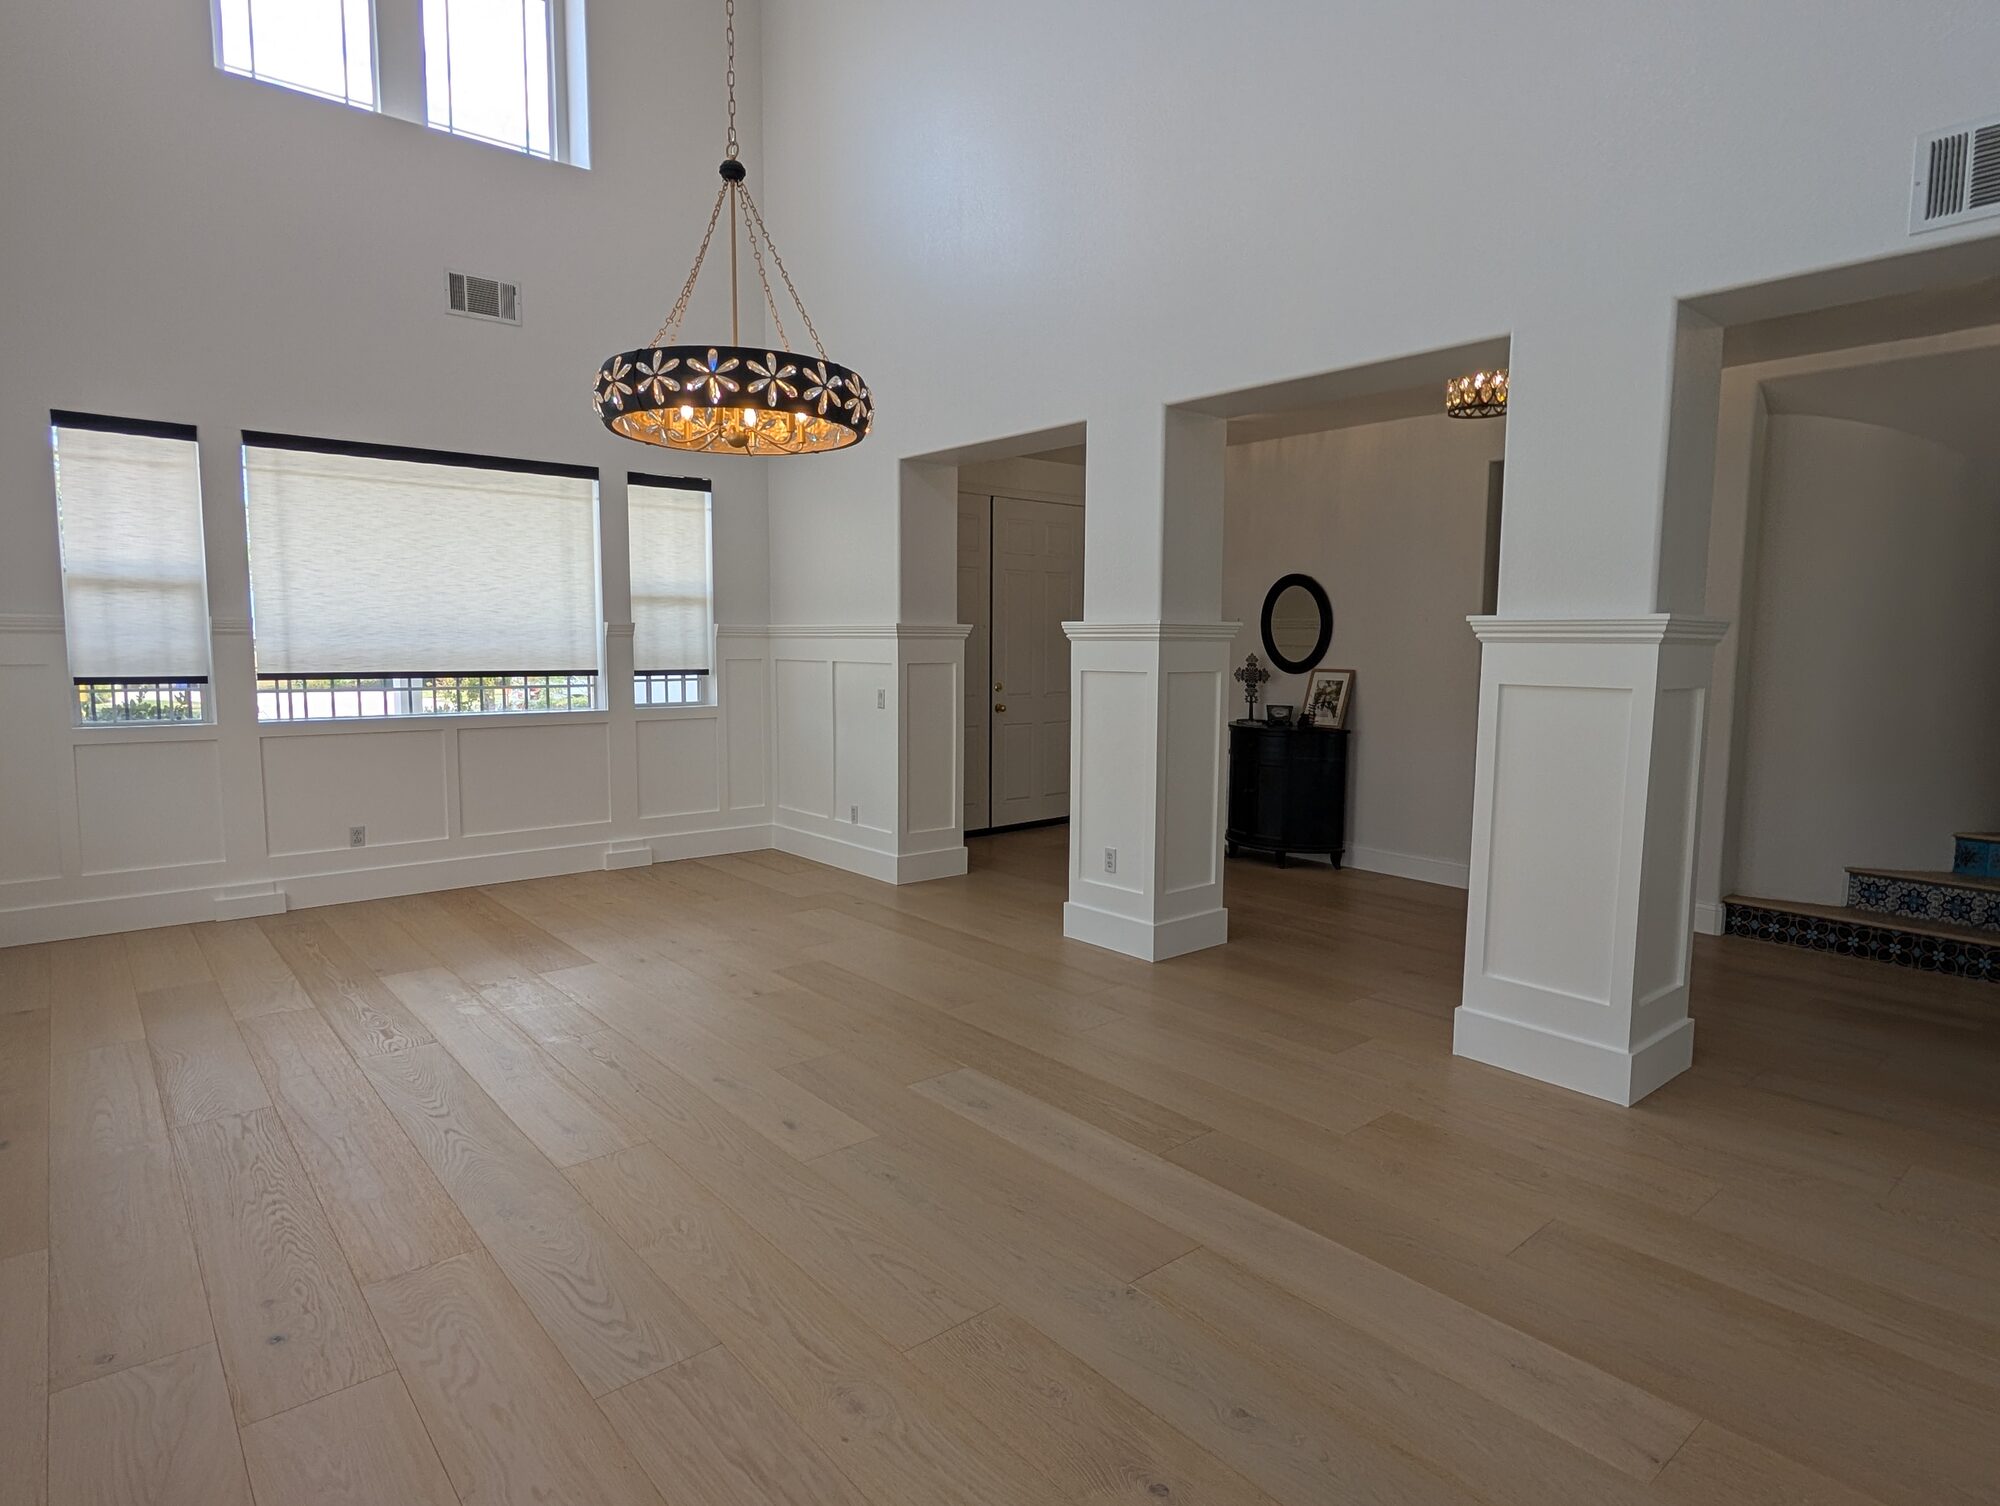
See this in action: the Smokestone Wainscoting project in Rancho Cucamonga
The best way to judge a finish carpenter is to look at the finish. Not the website, not the pitch, not the bid. The work.
Most homeowners don't know what to look for, so they look at the overall picture and go with their gut. That's a start. But the overall picture is made of a few hundred small decisions: where a miter closes, how wide a reveal is, whether a seam disappears or telegraphs through the paint. Once you know where to look, you can read a room in five minutes.
This guide teaches you how. It works for wainscoting, trim, crown, casing, built-ins, and any other finish carpentry. If you're evaluating quotes and proposals, our wainscoting contractor scorecard covers that side. This post is about the work itself, and it's the same standard we hold our own interior doors and trim work to, including the paneling on our Smokestone Wainscoting project in Rancho Cucamonga.
What Excellent Looks Like
Use this as a checklist when you're looking at a contractor's finished project, or at your own room after the work is done.
-
Miters close tight and stay closed. A miter is the angled joint where two pieces meet at a corner. Good ones read as a single line. Outside miters have a crisp, sharp edge, not a rounded blob of filler.
-
Reveals are consistent. A reveal is the small step where one piece sits back from another, like the edge of a casing on a jamb. Good work keeps that step the same width all the way around.
-
Stiles and rails line up. Frame pieces run plumb (perfectly vertical) and level, and they align from section to section and wall to wall.
-
Panel spacing is even and intentional. Panels are the same width, or vary on purpose around windows and openings.
-
Seams disappear. Where long pieces join, you shouldn't see a line, a lip, or a ghost through the paint.
-
Surfaces are flat. Panels and frames read flat under light. No waves, no dips around nail holes.
-
Caulk lines are thin and straight. Caulk belongs where trim meets drywall or where painted parts meet. Lines should be narrow, even, and clean.
-
Paint is uniform. One sheen, one color, even coverage, no brush drag, no thin spots where primer shows.
-
Transitions are resolved. Where trim meets a column, a window, or a different material, the joint looks designed.
What Adequate Looks Like, and Why It Isn't Enough
Adequate work passes a walk-through from the doorway. It fails the closer look. Miters that are mostly closed but filled. Caulk that's carrying the joints instead of finishing them. Panels slightly off from one wall to the next. Paint that looks fine at night and shows every roller lap at 4 p.m.
The problem isn't today. It's year two. Filler-heavy joints are more likely to show cracks as the wood moves with the seasons. Paint over poorly prepped surfaces shows wear first. And once you notice an uneven reveal, you see it every time you walk past. If your trim already has some of these signs, our post on signs your builder-grade trim is dragging down your home is worth a read.
The Finished-Work Scorecard
This scorecard is Holland & Sons educational guidance, not an industry standard. Use it two ways: to inspect a prospective contractor's completed work before you hire, or to review your own installation after it's finished. Score each line 1 to 3: 1 means a clear problem, 2 means acceptable with a few flaws, and 3 means clean throughout.
| What to Evaluate | Look For or Ask Directly | Good Sign vs. Red Flag |
|---|---|---|
| Miters | Look at outside corners at eye level and up close | Good: one crisp line. Red flag: filler blobs, rounded corners, visible gaps. |
| Reveals | Sight along casing edges and panel frames | Good: same width all the way around. Red flag: wide at one end, gone at the other. |
| Alignment | Check stiles and rails from section to section | Good: lines continue across walls. Red flag: frames that step up or down between sections. |
| Seams and joints | Ask: how do you join long runs and panel sections? | Good: a specific method like glued and aligned joints. Red flag: "the caulk takes care of it." |
| Surface flatness | Look across the surface toward a window | Good: flat, even reflection. Red flag: waves, dips, or visible fastener spots. |
| Caulk lines | Look where trim meets wall and where painted parts meet | Good: thin and straight. Red flag: thick, wavy beads hiding gaps. |
| Paint finish | Ask: what product, sheen, and how many coats? | Good: names the system and coats. Red flag: "whatever's on the truck." |
| Transitions | Look where trim meets columns, windows, and other materials | Good: designed endings. Red flag: pieces butted together and filled. |
Scoring: 21 to 24 is excellent work. 16 to 20 is solid work with a few things to discuss. 15 or below means you should keep looking or have a frank conversation about why.
Questions to Ask a Finish Carpenter About Their Work
-
Can I see a finished project in person, in daylight?
-
How do you build and join panel sections and long runs?
-
Where do you use caulk, and where don't you?
-
How do you handle a wall or column that isn't plumb or flat?
-
What paint system do you use on trim, and how many coats?
-
Who does the painting, your crew or a separate painter?
-
How do you protect floors and keep the job clean?
-
What happens if a joint opens up after the job is done?
Contractors who know the work answer these fast and specifically. Contractors who are guessing answer them with adjectives.
What a Complete Quote Should Include for Finish Quality
Our contractor scorecard covers the full quote checklist. For finish quality specifically, make sure the quote names:
-
Materials for frames, panels, and moldings
-
How sections and joints are built
-
Fill, sand, and caulk scope
-
The paint product, sheen, and number of coats
-
Who paints, and how long the finish needs to cure before cleaning
-
Floor and room protection
Red Flags in Finished Work
-
Thick, wavy caulk lines, especially at miters and inside corners
-
Outside corners rounded over with filler instead of a sharp edge
-
Panels that change width from wall to wall for no reason
-
Visible seams or lips in long runs of cap or base
-
Paint sheen that differs between trim and panels
-
Nail holes you can see from standing height
-
Trim butted into windows or columns with no designed ending
-
A contractor who only shows photos and never finished work in person
Some of what you see in finished work starts long before the paint. How the construction method shows up in the finish covers the build side, and if a designer is part of your project, how designers and finish carpenters split the work explains who owns fit and finish.
The Quality Questions, Answered
How can you tell good trim carpentry from bad?
Look at the corners, the edges, and the light. Corners tell you about cutting and fitting. Edges, meaning reveals and alignment, tell you about layout. Light tells you about surface prep and paint. If all three are clean, the work is good.
Isn't caulk just a cover-up for bad carpentry?
No. Caulk is a normal part of painted trim. It seals the line where trim meets drywall, which is never perfectly straight, and it finishes the joint between painted parts. Every good paint-grade job uses it.
The warning sign is dependence on it. When caulk is filling gaps instead of finishing lines, you see thick, wavy beads at miters, inside corners stuffed with it, and lines that shrink and crack. Thin and straight is finishing. Thick and lumpy is hiding.
What should a properly finished miter look like?
Like one line. On painted work the joint should be closed and filled flush, with the outside corner still crisp. For context, Fine Homebuilding reports that the National Association of Home Builders' Residential Construction Performance Guidelines say gaps between mitered edges in trim and molding will not exceed 1/8 inch. Those guidelines are a reference builders and remodelers use to define the minimum acceptable result, mostly for warranty questions. Fine Homebuilding's editor describes that number as the worst acceptable, not a goal. Careful finish carpentry is usually much tighter, but we don't publish our own tolerance, because what's achievable depends on the material, the finish, and the conditions.
How should a homeowner inspect a carpenter's previous work?
In person, in daylight, and at two distances. Stand across the room and look at the overall layout: proportion, alignment, consistency. Then walk up and look at corners, seams, and caulk lines at arm's length. Ask how long ago it was finished. Work that still looks clean after a few seasons tells you more than work finished last week.
What should painted trim look like under direct sunlight?
Even. Low-angle sun, or raking light, skims across the surface and shows everything: waves, sanding marks, thin coats, and seams. Good painted trim reads as one uniform surface in that light. A hard trim enamel helps. Sherwin-Williams describes its Emerald Urethane Trim Enamel as a water-based, urethane-modified alkyd with a hard, durable finish, available in satin, semi-gloss, and gloss. The full finish system is covered in our paint and finish system guide.
Which installation defects should a homeowner question?
Question open joints, lips where two pieces meet, panels or frames out of alignment, visible fasteners, and paint that isn't uniform. Don't panic over a hairline crack in a caulk line after the first big season change. Painted wood moves as its moisture content changes, as the USDA's Wood Handbook explains, and a little seasonal movement is normal. A joint that keeps opening, or a lip you can catch with a fingernail, is worth a conversation.
See This In Action — Smokestone Wainscoting, Rancho Cucamonga
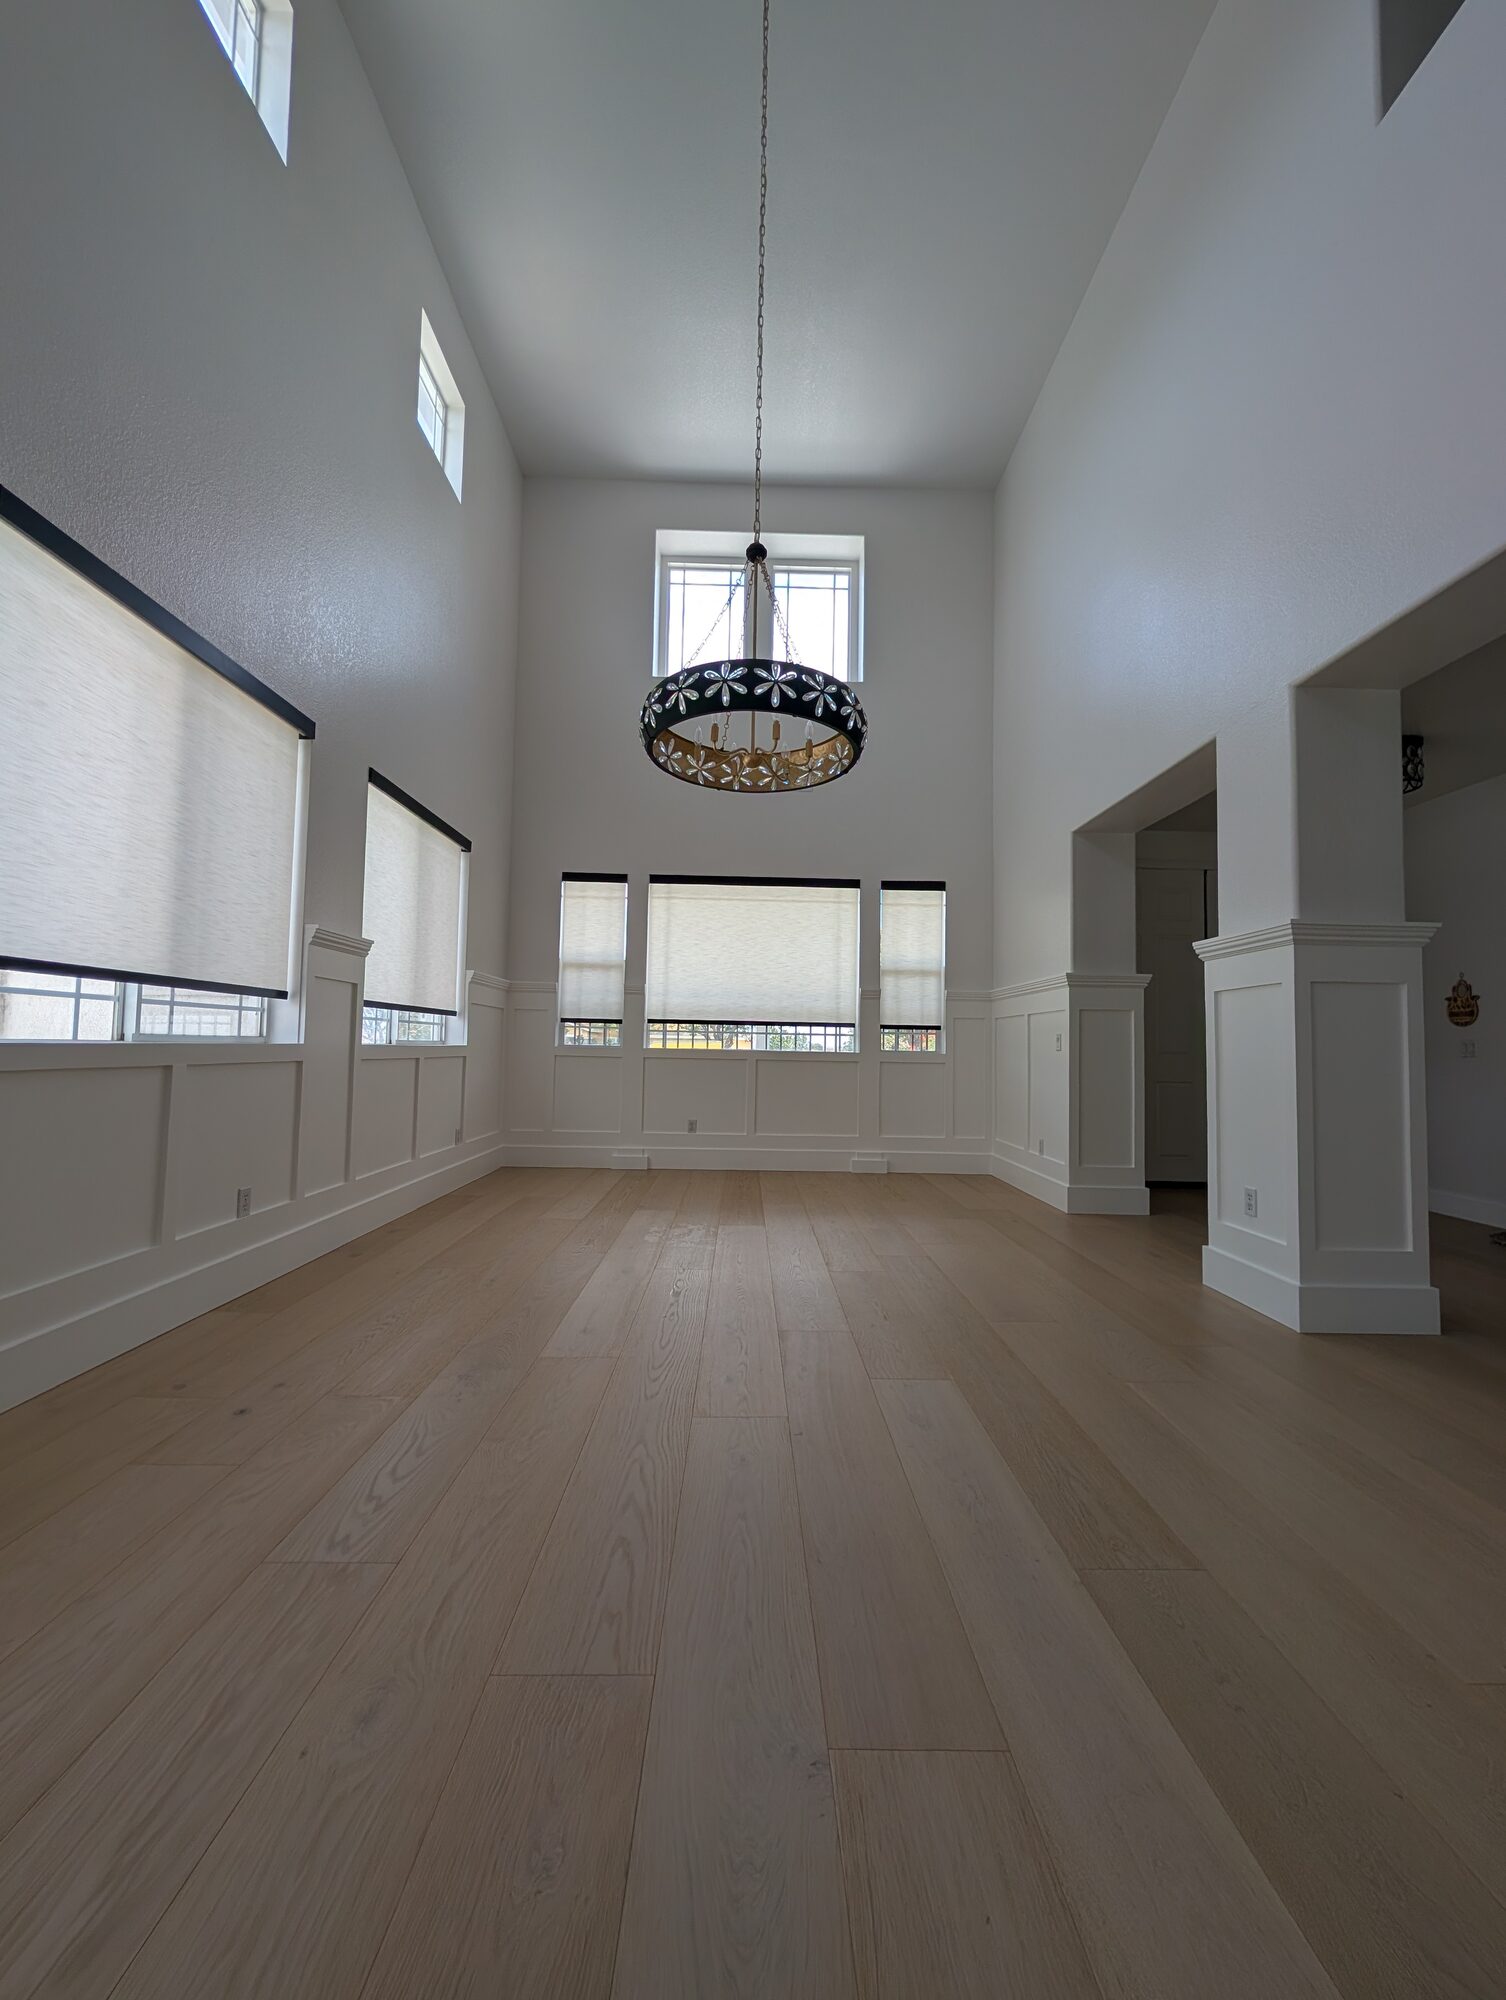
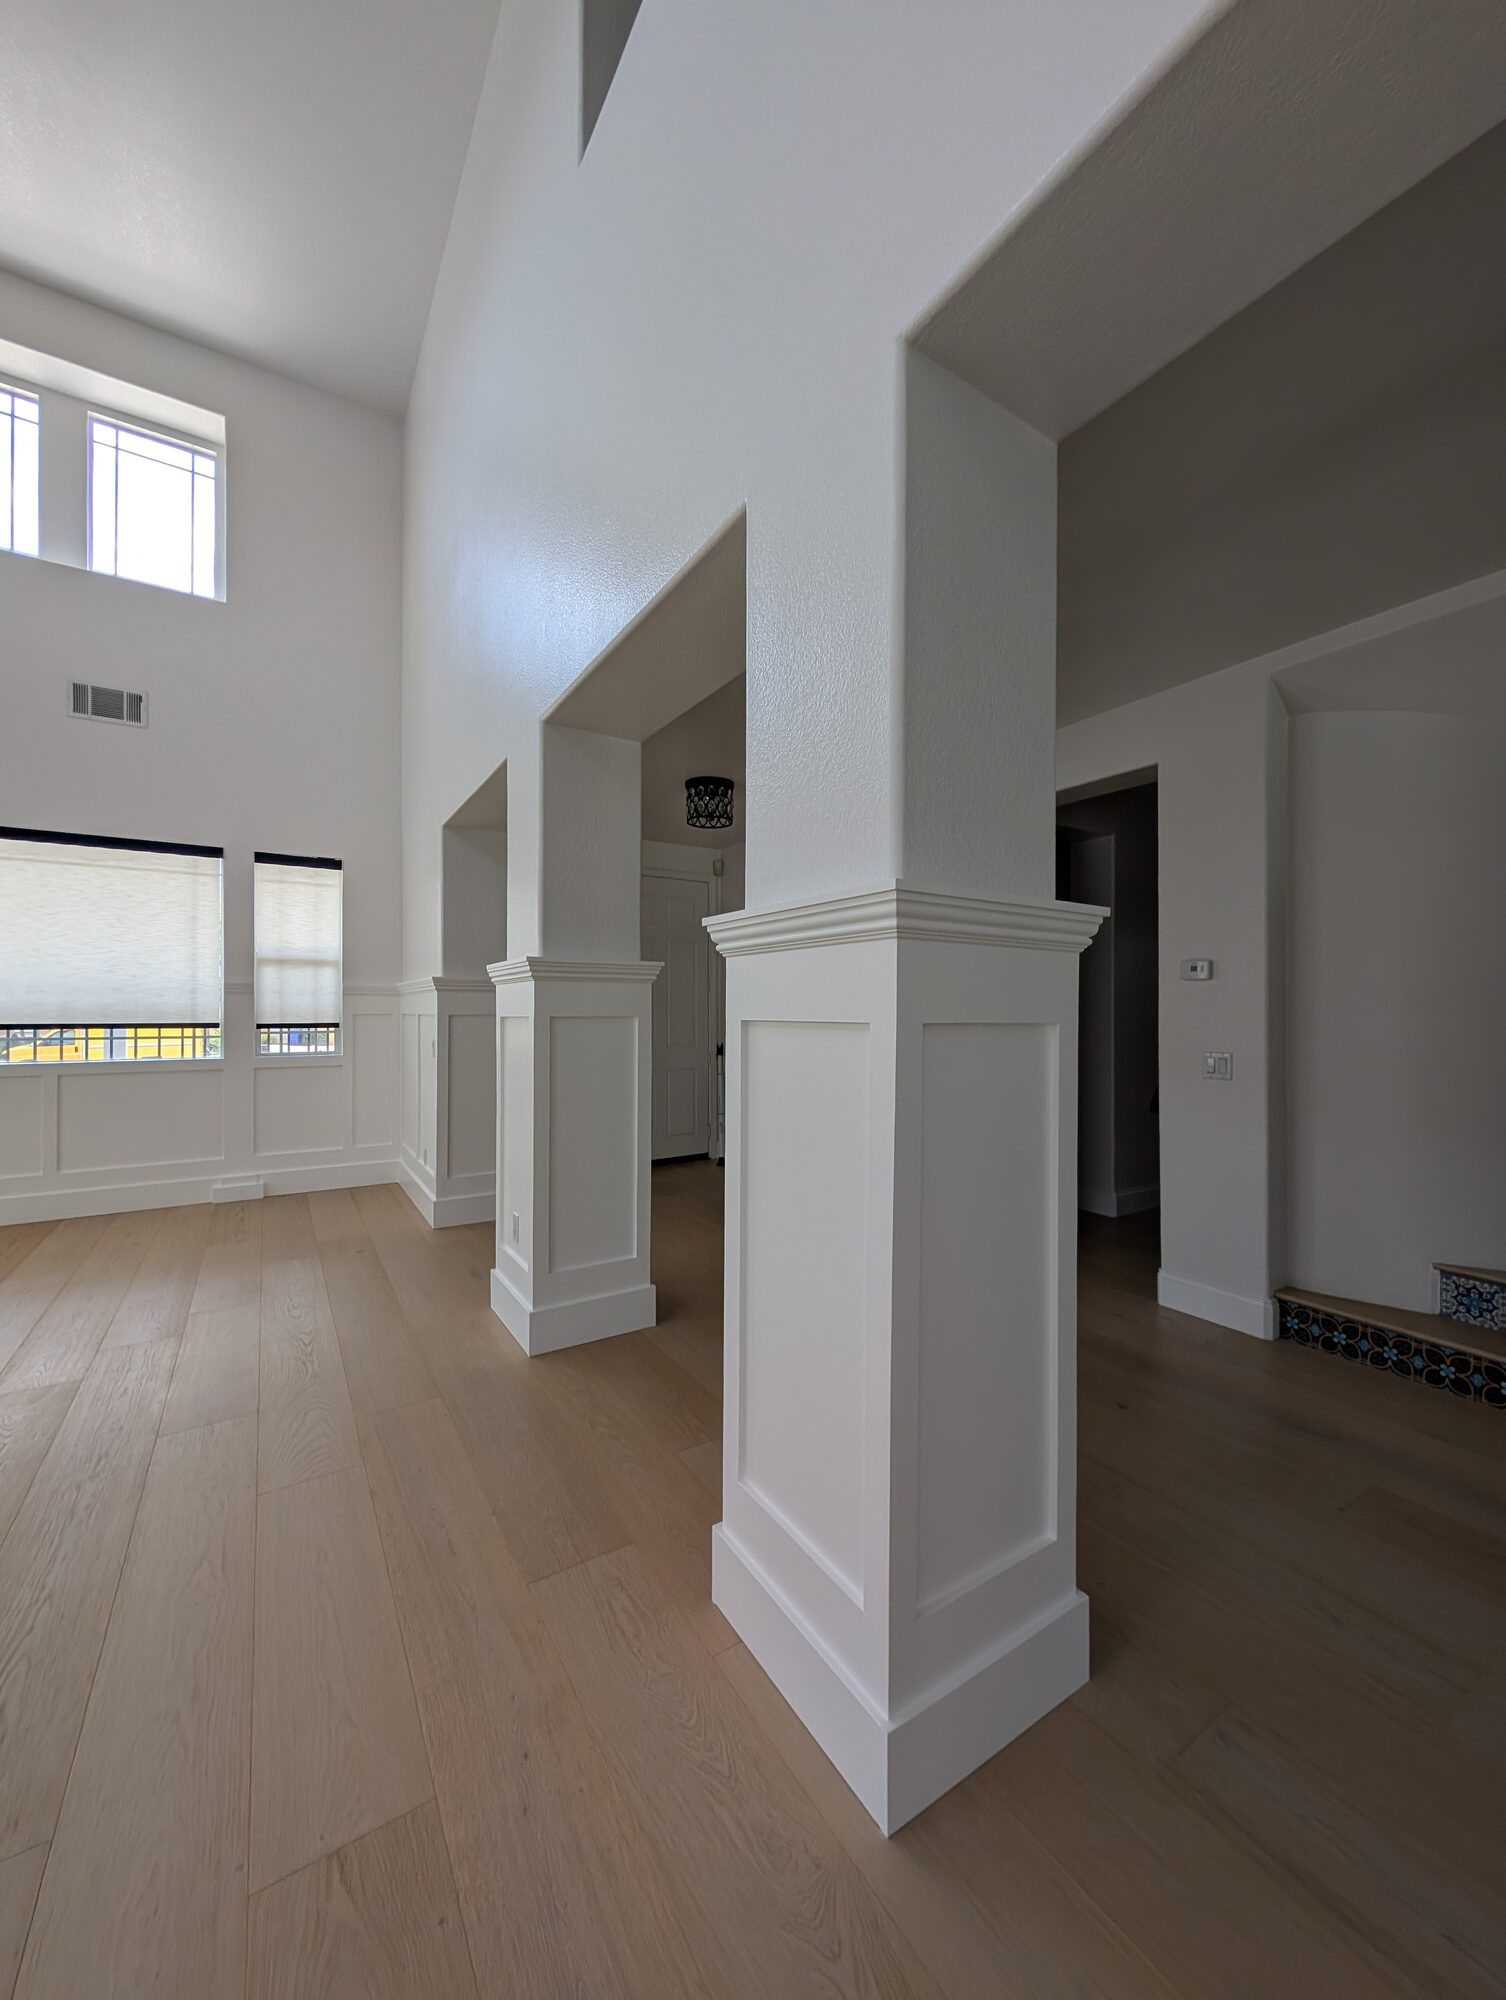
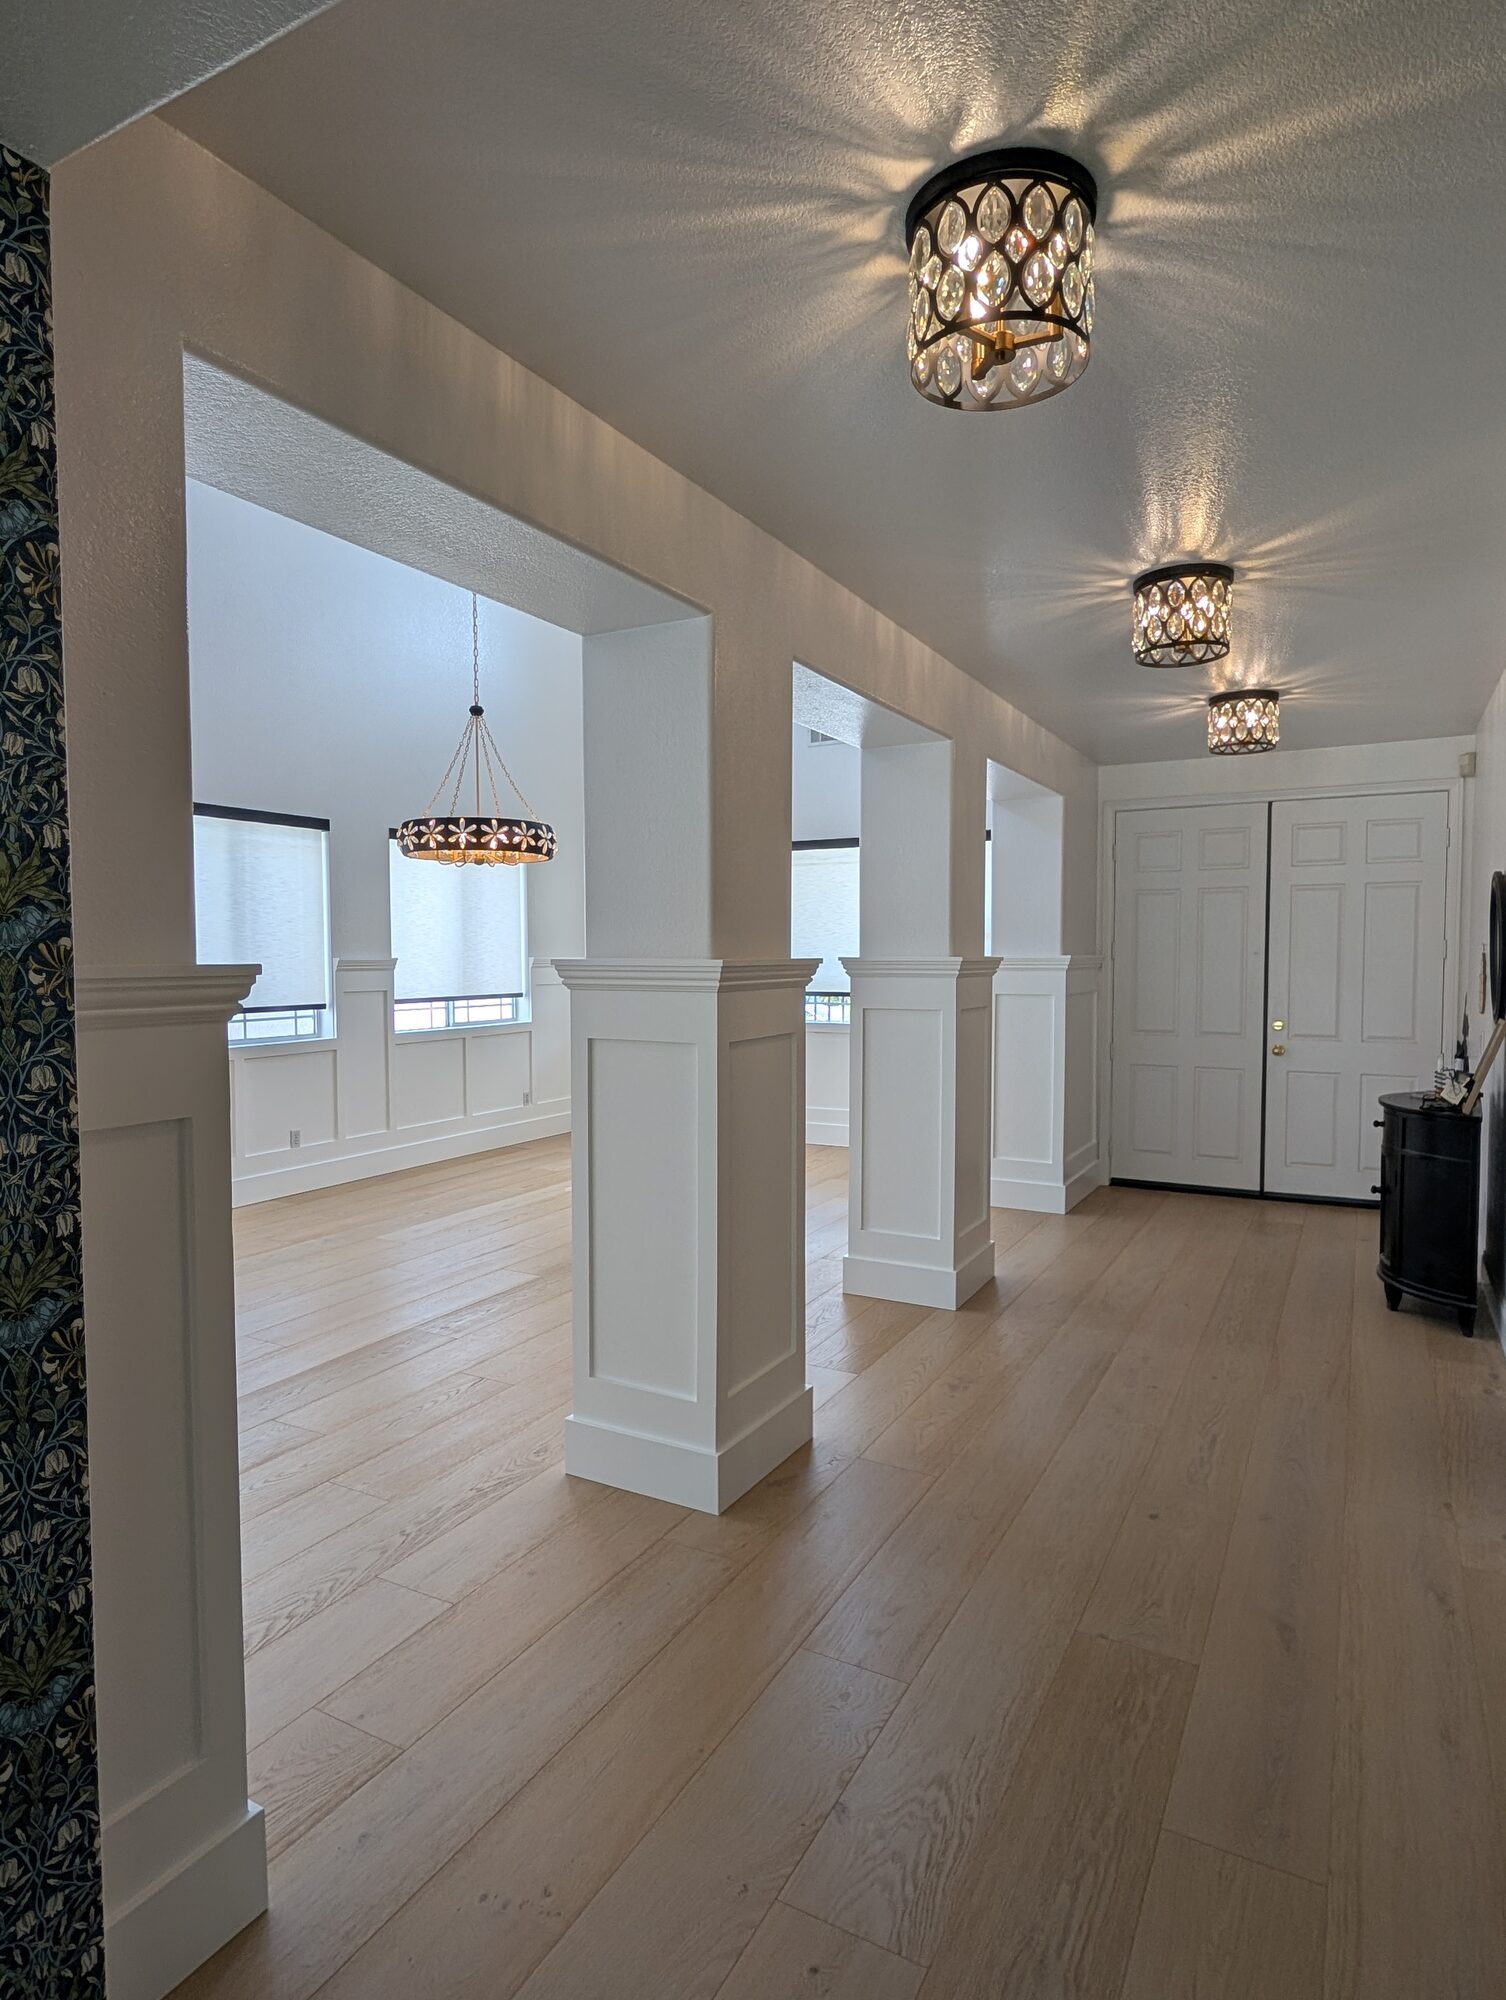
Sun on the paneling most of the day, through high windows on two walls. In a room that bright, every seam shows, so every seam had to be dead-on.
What we used on this project:
-
Panel sections assembled with glue and biscuits to keep faces aligned and flush
-
Fill and sand to a consistent surface before any paint went on
-
Sherwin-Williams Emerald Urethane Trim Enamel in satin, Pure White (SW 7005)
-
Satin sheen chosen so a sunny room doesn't turn every surface into a mirror
-
Stacked molding profiles with tight miters at every column cap
The full project post has close-ups of the finished work, the timeline, and the complete investment.
Link: See the full Smokestone Wainscoting project
The Holland & Sons Angle
The week we fabricated the Smokestone paneling in Rancho Cucamonga, a heat wave hit. Seven straight days, up to about 107 degrees, cutting, gluing, and assembling on site. Heat like that rushes everything: glue open time, your patience, your focus. Wyatt, Waylon, and Don kept the quality where it needed to be anyway. That's the relationship between field experience and workmanship in one week. Conditions don't get to set the standard. The work does. When a homeowner looks at those columns in full afternoon sun, nobody knows what the thermometer said the day they were built. They only see whether the seams are tight. That's what Brian expects the next generation of Holland & Sons carpenters to carry forward.
Related Resources — Smokestone Wainscoting Guide
The Smokestone project gave us six lessons. Each one has its own guide.
-
Wainscoting in Rancho Cucamonga, CA: How We Grounded a 20-Foot Dining Room — Smokestone Wainscoting: The full project: 86 linear feet, three paneled columns, photos, timeline, and the complete investment.
-
How Much Does It Cost to Wrap Interior Columns in Wood Paneling?: Holland & Sons column-wrap investment guidance, what drives it, and when a simpler wrap makes more sense.
-
Wainscoting Around Windows: What Goes Wrong and How to Plan It Right: Sill heights, mismatched windows, terminations, and planning around window treatments.
-
Picture Frame Molding vs. Assembled Panel Wainscoting: Which Is Worth It?: How the two construction methods differ, and when the extra investment makes sense.
-
Wainscoting and Wall Treatments for Two-Story Rooms: What Actually Works?: A proportion-based framework for rooms with unusually tall ceilings.
-
Working With an Interior Designer and a Finish Carpenter: Who Does What?: Roles, approvals, and field verification when a designer and a carpenter share a project.
Finish Carpentry Quality FAQ
How can you tell good trim carpentry from bad?
Good trim carpentry has tight, crisp miters, consistent reveals, aligned frames, flat surfaces, thin straight caulk lines, and uniform paint. Bad trim carpentry shows open or filler-rounded corners, uneven reveals, wavy caulk, visible seams, and paint that changes in sunlight. Check the corners, the edges, and how the work looks in daylight.
Is caulk in trim joints a sign of poor workmanship?
Caulk in trim joints is not automatically a sign of poor workmanship. It's a normal part of painted trim, sealing where trim meets drywall and finishing joints between painted parts. The warning sign is heavy reliance on it: thick, wavy beads at miters and inside corners usually mean the caulk is hiding gaps rather than finishing a line.
What should a properly finished miter look like?
A properly finished miter reads as a single tight line with a crisp outside corner. On painted work it should be closed and filled flush. Fine Homebuilding reports that NAHB's Residential Construction Performance Guidelines set 1/8 inch as the maximum gap between mitered edges in trim, a minimum-acceptable benchmark used mostly for warranty questions, not a quality target. Careful work is usually much tighter.
How should I inspect a carpenter's previous work?
Inspect a carpenter's previous work in person, in daylight, from two distances. From across the room, judge layout, proportion, and alignment. Up close, check corners, seams, reveals, and caulk lines. Ask when the work was finished; trim that still looks clean after a few seasons says more than a job finished last week.
What should painted trim look like in direct sunlight?
Painted trim in direct sunlight should look like one uniform surface, with no waves, sanding marks, thin coats, or visible seams. Low-angle sunlight, called raking light, is the toughest test because it skims across the surface and exaggerates every flaw. Good surface prep and a hard trim enamel make the difference.
Are hairline cracks in painted trim normal?
Small hairline cracks in caulk lines or paint at trim joints can be normal after a big seasonal change, because wood moves as its moisture content changes. What's not normal is a joint that keeps opening, a lip you can catch with a fingernail, or frames pulling out of alignment. Those are worth raising with the carpenter.
Which trim defects should a homeowner ask to have fixed?
A homeowner should ask about open joints, lips where pieces meet, frames or panels out of alignment, fasteners visible from standing height, and paint that isn't uniform in sheen or coverage. Raise them during the final walkthrough, in writing if possible, so they're addressed before the job is closed out.
Want Us to Look at Your Room?
We're happy to walk your space and show you what we'd do differently, whether that's new work or fixing old work. Start at hsconstruct.com/contact. Fill out the form, describe the room, and upload photos, including a few close-ups of the trim or paneling you're unsure about. We'll set up a design meeting and give you a clear investment figure before anything gets built.
Want to see this advice applied to a real project? Here's the full breakdown: Smokestone Wainscoting, Rancho Cucamonga
Holland & Sons works in Rancho Cucamonga, Eastvale, Corona, Riverside, Menifee, Murrieta, Temecula, Perris, and across the Inland Empire. For more finished work, follow Holland & Sons Construction on Facebook and Instagram, or browse our projects.
951-338-8058 | brian@hsconstruct.com | hsconstruct.com | CSLB #1123738
More Than Just Trim
Finish carpentry quality shows up in every room, not just the one with paneling. Brian has been a finish carpenter since 1991, and today his sons build alongside him, which means every room in your home is fair game.
If your space needs more than new trim, here's what else we build:
-
Kitchen and bathroom remodels — full custom cabinetry, tile work, and finish carpentry from demo to done
-
Coffered ceilings — grid beam systems that add architectural depth to any room, sized and proportioned to the space
-
Wainscoting and wall paneling — classic raised panel, flat panel, board-and-batten, and shiplap applications
-
Reclaimed wood accents — feature walls, fireplace surrounds, and detail work using salvaged material with real character
-
Beam wraps — hollow wood wraps that give exposed beams the look of solid timber without the structural engineering
-
Crown molding, baseboards, and trim carpentry — the details that make a house feel finished, from a single room to a whole home
-
Cased openings and interior door replacements — clean transitions between spaces that most contractors overlook
-
Custom built-in entertainment walls and bookshelves — designed by hand, built in the shop, installed to last
Wood, proportion, and rooms that feel right — that's what we do.
About the Author
Brian Holland is the owner and lead carpenter of Holland & Sons Construction, a family-run finish carpentry and general contracting company serving Riverside County and the Inland Empire. He entered the trade at 17 in 1991, learned on the job, and has spent 35 years building the kind of work that makes rooms feel right — often before a homeowner can articulate why. Most projects start at his vintage drafting table, where he sketches the layout by hand with pencil and paper using a Vemco drafting machine before anything gets built. His sons now apprentice alongside him on every project. Brian and Holland & Sons Construction are members of the National Association of the Remodeling Industry (NARI), the National Association of Home Builders (NAHB), and the California Building Industry Association (CBIA). Holland & Sons is based in Perris, CA and licensed by the CSLB (#1123738).
This guide is part of our wainscoting & paneling series.
Learn more about Wainscoting & PanelingHave a project in mind? Let's start a conversation.
Tell us what you are thinking about and we will give you a straight answer about scope, timeline, and investment.
Start a Conversation