
What Can Go Wrong With Wainscoting Installation? 9 Problems and How to Prevent Them
Quick Answer
The most common wainscoting problems are not structural — they are proportion, prep, and process failures. Wrong panel height, uneven wall surfaces, poor joint prep, and the wrong paint sheen are responsible for most of the wainscoting that looks cheap rather than custom. Every one of these problems is preventable if your contractor runs a proper design phase and builds with the right sequence. The Gypsy Canyon project in Menifee is a live case study in what happens when something does go wrong mid-project — and how a contractor who is accountable to the finished result handles it.
Key Takeaways
| Key Takeaways | Details |
| Most common failure mode | Wrong panel height — chosen by formula rather than by the room |
| Second most common failure | Skipped joint prep — nail holes and scarf joints visible under raking light |
| Landmine question answered | Wainscoting does not look cheap — bad proportions and poor prep do |
| Gypsy Canyon case study | Scarf joints read through semi-gloss; remediated before homeowner had to ask |
| Design phase importance | Locks panel height, layout, and outlet conflicts before any cuts are made |
Does Wainscoting Look Cheap? The Honest Answer.
This is the landmine question in every wainscoting conversation. The answer is direct: wainscoting does not look cheap. Bad proportions look cheap. Thin pine with no structural integrity looks cheap. Nail holes filled with latex caulk instead of Bondo look cheap. A semi-gloss sheen under raking light that shows every joint line looks cheap. The material and concept are not the problem. The execution is.
A shop-built flat-panel installation with correct proportions, solid pine framing, MDF panel fields, and a properly prepared paint surface does not read as cheap to anyone who walks past it. What it reads as is: intentional. Architectural. Finished. The homes in Audie Murphy Ranch, Spencer's Crossing, and Harveston were not built with that feeling. That is exactly why homeowners add it.
The Most Common Wainscoting Problems — and What Causes Them
Problem 1: Wrong Panel Height
Panel height is the single most consequential decision in any wainscoting project, and it is the one most contractors get wrong by defaulting to a formula. The standard rule of thumb — one-third of wall height — works in rooms where that ratio produces a height that actually looks right. In a ten-foot ceiling Menifee new-build with strong crown molding and a long entry hallway, 40 inches of wainscoting can feel lost. Thirty-three inches almost always does.
What goes wrong: contractors set height based on standard dimension lumber (33 or 36 inches) or a quick calculation rather than visual confirmation in the actual space. The result is wainscoting that feels like it is floating in the lower portion of the wall rather than anchoring the room.
What prevents it: a design phase. The Gypsy Canyon project used a laser at three different heights and painters tape on the actual walls. The homeowners lived with the tape for several days and confirmed 55 inches. That is not a formality. It is the only reliable way to get the answer.
Problem 2: Skipped or Inadequate Joint Prep
Every wainscoting installation has joints — where rails meet stiles, where cap meets wall, where baseboard meets floor, and on long runs, where scarf joints splice horizontal members longer than stock length. Every one of those joints is a potential failure point under paint.
What goes wrong: contractors fill nail holes and joints with latex caulk, which stays slightly flexible and does not sand flat. Under direct light or a semi-gloss sheen, every joint reads as a line in the finished surface.
What prevents it: Bondo body filler at every joint, sanded flush before primer. Bondo is rigid when cured — it sands flat and takes paint without a profile. This is the difference between a paint-ready surface and a surface that reveals its construction under raking light.
Problem 3: Wrong Paint Sheen
This one has a real Menifee case study attached to it. The Gypsy Canyon project went up in semi-gloss per the original plan. The entry floods with natural light from the front door and sidelights, and semi-gloss amplifies every surface imperfection. The scarf joints — four of them, across the long wall — were reading under those conditions despite being correctly made and properly filled. Brian made the call before the homeowner had to say anything: sand down, re-Bondo, repaint in satin.
What goes wrong: semi-gloss is chosen for perceived durability without accounting for the light conditions in a specific room. Semi-gloss in a north-facing bedroom with no windows is a different proposition than semi-gloss in an entry with multiple light sources hitting the wall at an angle.
What prevents it: assess the light in the specific room before specifying sheen. For entries, hallways, and any space with raking natural light, satin is the right answer. Sherwin-Williams Emerald Urethane Trim Enamel in satin provides the durability and washability of semi-gloss without broadcasting every surface variation.
Problem 4: Uneven Wall Surfaces
New-build tract construction is generally plumb, but drywall texture, minor waviness in the framing, and improperly set corner bead all create surface variation that wainscoting will follow if the installer does not address it first.
What goes wrong: panels are installed against an uneven surface without shimming or prep. The result is shadow lines of varying width along rail edges — visible from across the room under any raking light.
What prevents it: a proper pre-installation inspection with a straightedge and level. High spots are sanded or planed. Low spots are shimmed or furred. On walls with significant texture, texture knockdown or skim-coat prep may be needed before panels go up. This adds time and investment — but the alternative is visible in the finished product.
Problem 5: Cracking Joints Over Time
Wainscoting in Southern California is subject to seasonal temperature and humidity swings that are more significant than coastal climates. Menifee, Murrieta, and Temecula are inland — summer temperatures exceed 100 degrees, and indoor humidity drops significantly in the heating season. Wood moves with those changes.
What goes wrong: joints are glued with inadequate adhesive coverage or left with gaps that allow seasonal movement to work open over time. A joint that looks fine at installation in October can show a hairline crack by July.
What prevents it: proper joint construction. Rails and stiles joined with construction adhesive and pocket-hole screws — not just nails. Bondo fill at all joints after assembly, not just after installation. Shop fabrication in a controlled environment so the panel section arrives on site as a rigid unit with fully cured adhesive rather than a fresh build that will settle in place.
Problem 6: MDF Moisture Issues
MDF is the right material for painted panel fields in dry interior spaces. It is the wrong material for any space with consistent moisture exposure — bathrooms, laundry rooms, and rooms adjacent to exterior walls with condensation issues.
What goes wrong: MDF is specified for a bathroom or kitchen without moisture-resistant MDF or adequate sealing. The edges of MDF panels absorb moisture, swell, and telegraph through the paint as a raised ridge along the perimeter of every panel. This is not a paint problem — it is a material selection problem that cannot be fixed after the fact.
What prevents it: specify moisture-resistant MDF for any space with humidity exposure, and seal all exposed MDF edges with shellac-based primer before installation. For painted wainscoting in dry interior spaces like entries, living rooms, and bedrooms, standard MDF with proper edge sealing performs excellently.
Problem 7: Outlet and Switch Plate Layout Conflicts
Electrical boxes are where they are. Wainscoting panel layout has to work with them — and that means the design phase needs to account for outlet and switch locations before the panel count and spacing are locked.
What goes wrong: panel layout is finalized without walking the wall to locate all electrical boxes. An outlet lands in the middle of a panel field. Now you have three choices: cut a custom opening in the MDF panel, shift the layout and accept unequal panel spacing, or extend the outlet box depth to accommodate the panel thickness. All three are fixable, but all three are harder and more expensive after fabrication than before.
What prevents it: a full wall walk during the design phase, with electrical box locations marked on the layout drawing before panel count and spacing are finalized. Standard outlet boxes can be extended with a low-voltage box extender to accommodate panel thickness — a $3 part that solves the problem in ten minutes if you plan for it.
Problem 8: Poor Corner and Transition Terminations
Where wainscoting ends matters as much as where it runs. An inside corner needs a properly mitered return. An outside corner needs a coped or mitered wrap. Where paneling terminates at a column base, door casing, or room opening, the transition detail determines whether the installation looks intentional or abandoned.
What goes wrong: panels run to corners without proper returns. The raw edge of a rail or stile is visible from a perpendicular angle. At column bases, panels butt into the column face without a termination detail.
What prevents it: detailing the termination condition in the design drawings before fabrication. Every corner and transition is called out. Shop fabrication can account for return pieces and wrap details before anything arrives on site.
Problem 9: Repairability — What Happens After
Wainscoting in a high-traffic entry will take damage over time — door hardware contact, furniture moves, everyday wear. How repairable the installation is depends entirely on how it was built and what it was painted with.
What goes wrong: standard latex trim paint on MDF wainscoting is difficult to touch up without a visible sheen and color patch. The paint film is soft and scuffs rather than withstanding contact. Touch-up paint in a slightly different lot matches poorly under raking light.
What prevents it: Sherwin-Williams Emerald Urethane Trim Enamel is specifically formulated with a urethane-modified alkyd system that cures harder than standard latex. It withstands cleaning and moderate contact. Touch-up is straightforward with the same product and same sheen — keep a quart on the shelf. The harder the initial cured film, the less touch-up the installation will need over its life.
Decision Sequencing: What to Lock In Before Work Begins
Every decision in a wainscoting project has a downstream consequence. Here is the sequence that prevents problems:
| Decision | Must Be Locked Before Next Phase Begins |
| Panel height | Yes — confirmed through laser and tape mock-up before any drawings are finalized |
| Outlet and switch plate locations | Yes — mapped during design phase so panel layout can work around them |
| Corner and transition conditions | Yes — every termination called out in drawings before shop fabrication |
| Material specification (pine vs. hardwood, MDF vs. moisture-resistant MDF) | Yes — determines shop fabrication method and paint prep requirements |
| Paint sheen | Yes — assessed based on light conditions in the specific room before primer is applied |
| Scarf joint locations on long runs | Yes — long walls over 16 feet require scarf joints; locations must work with panel layout |
| Cap and baseboard profiles | No — can be adjusted during fabrication if needed, but earlier is better |
| Paint color | No — can be confirmed after installation before primer coat |
See This In Action — The Gypsy Canyon Project, Menifee, CA
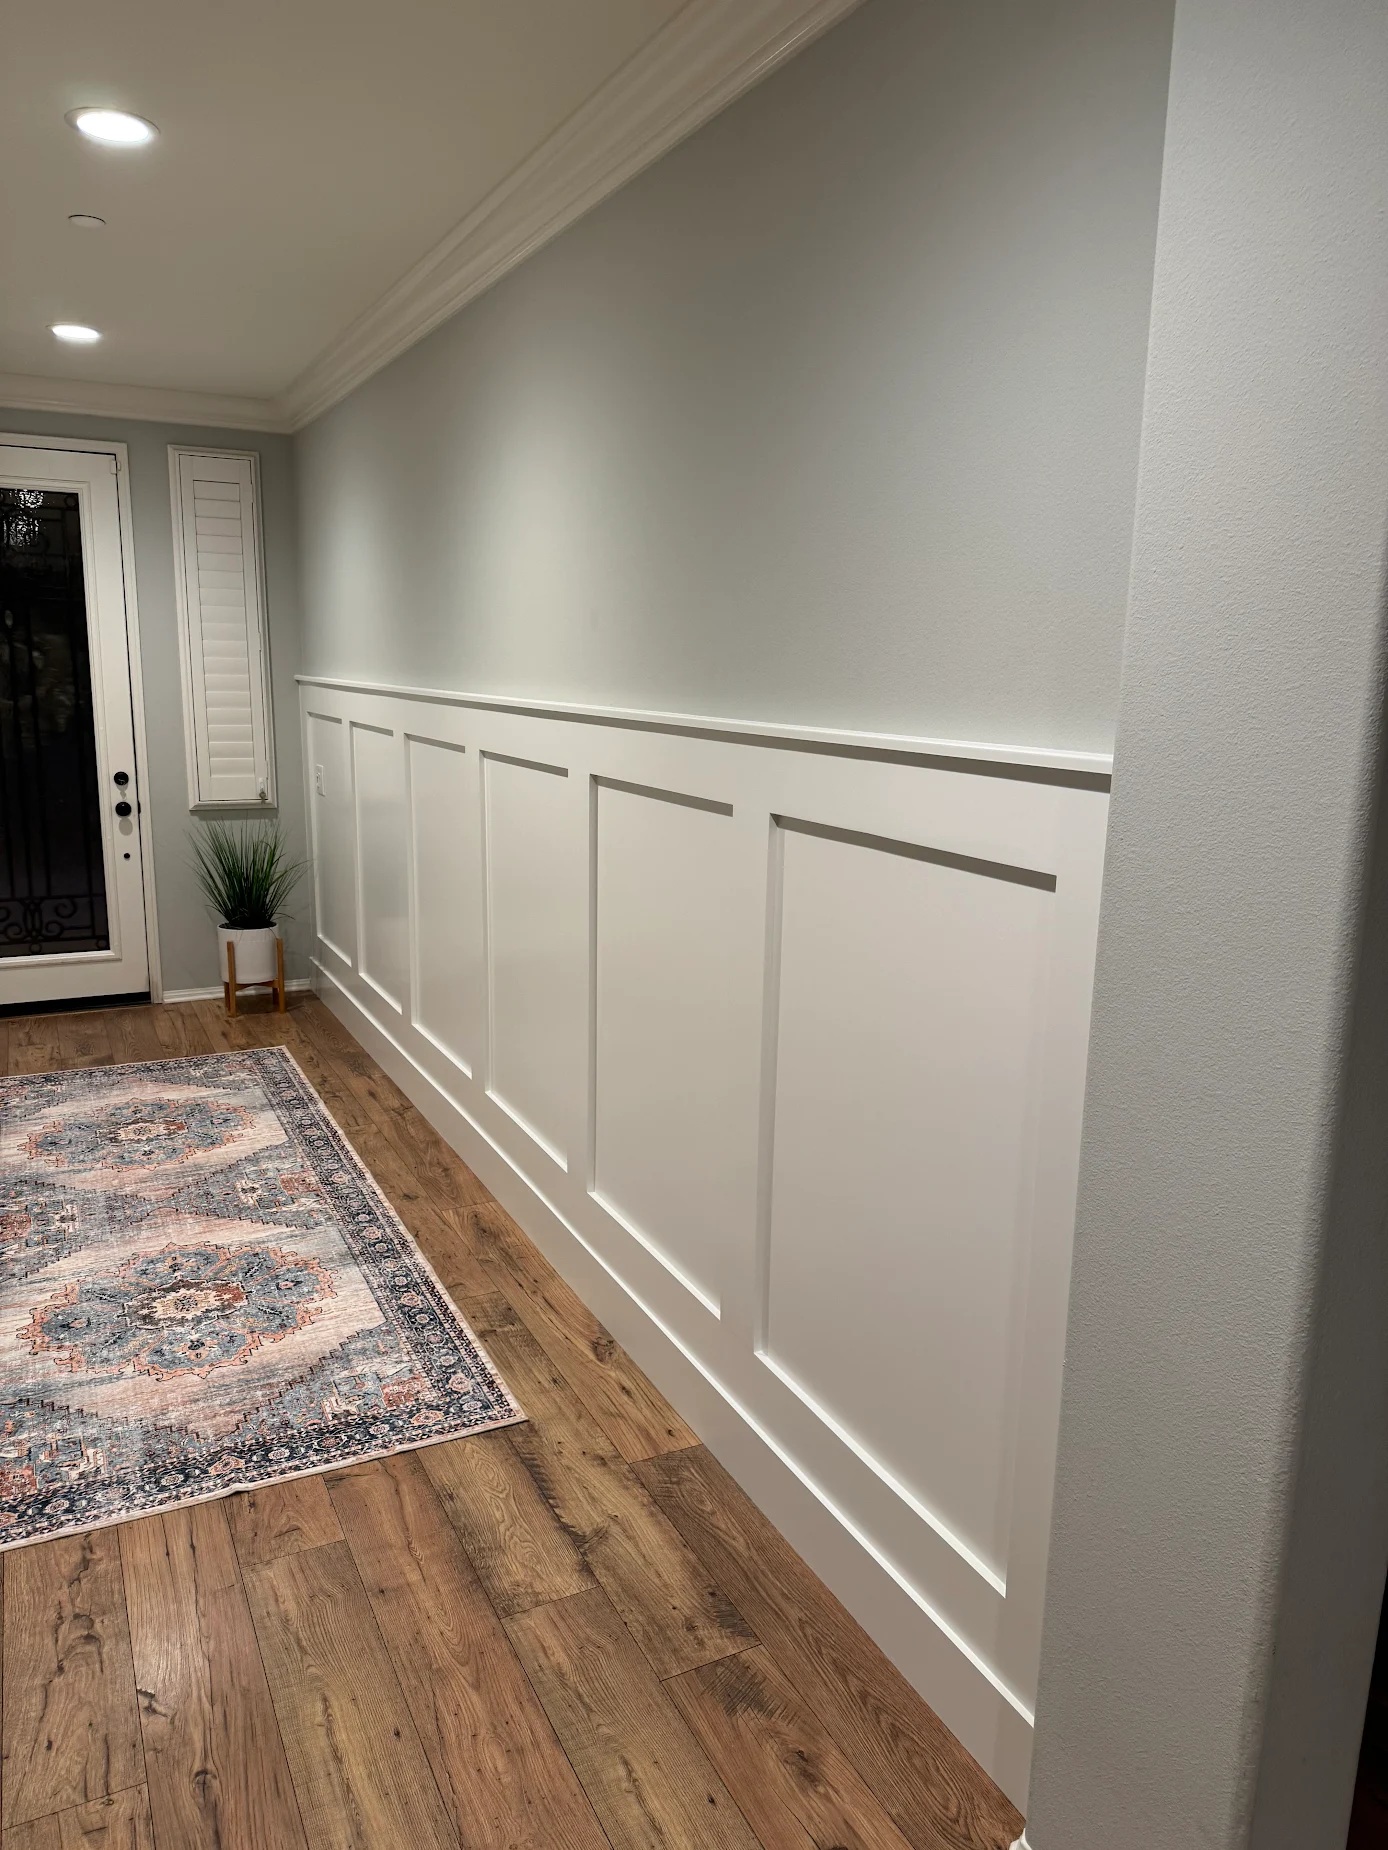
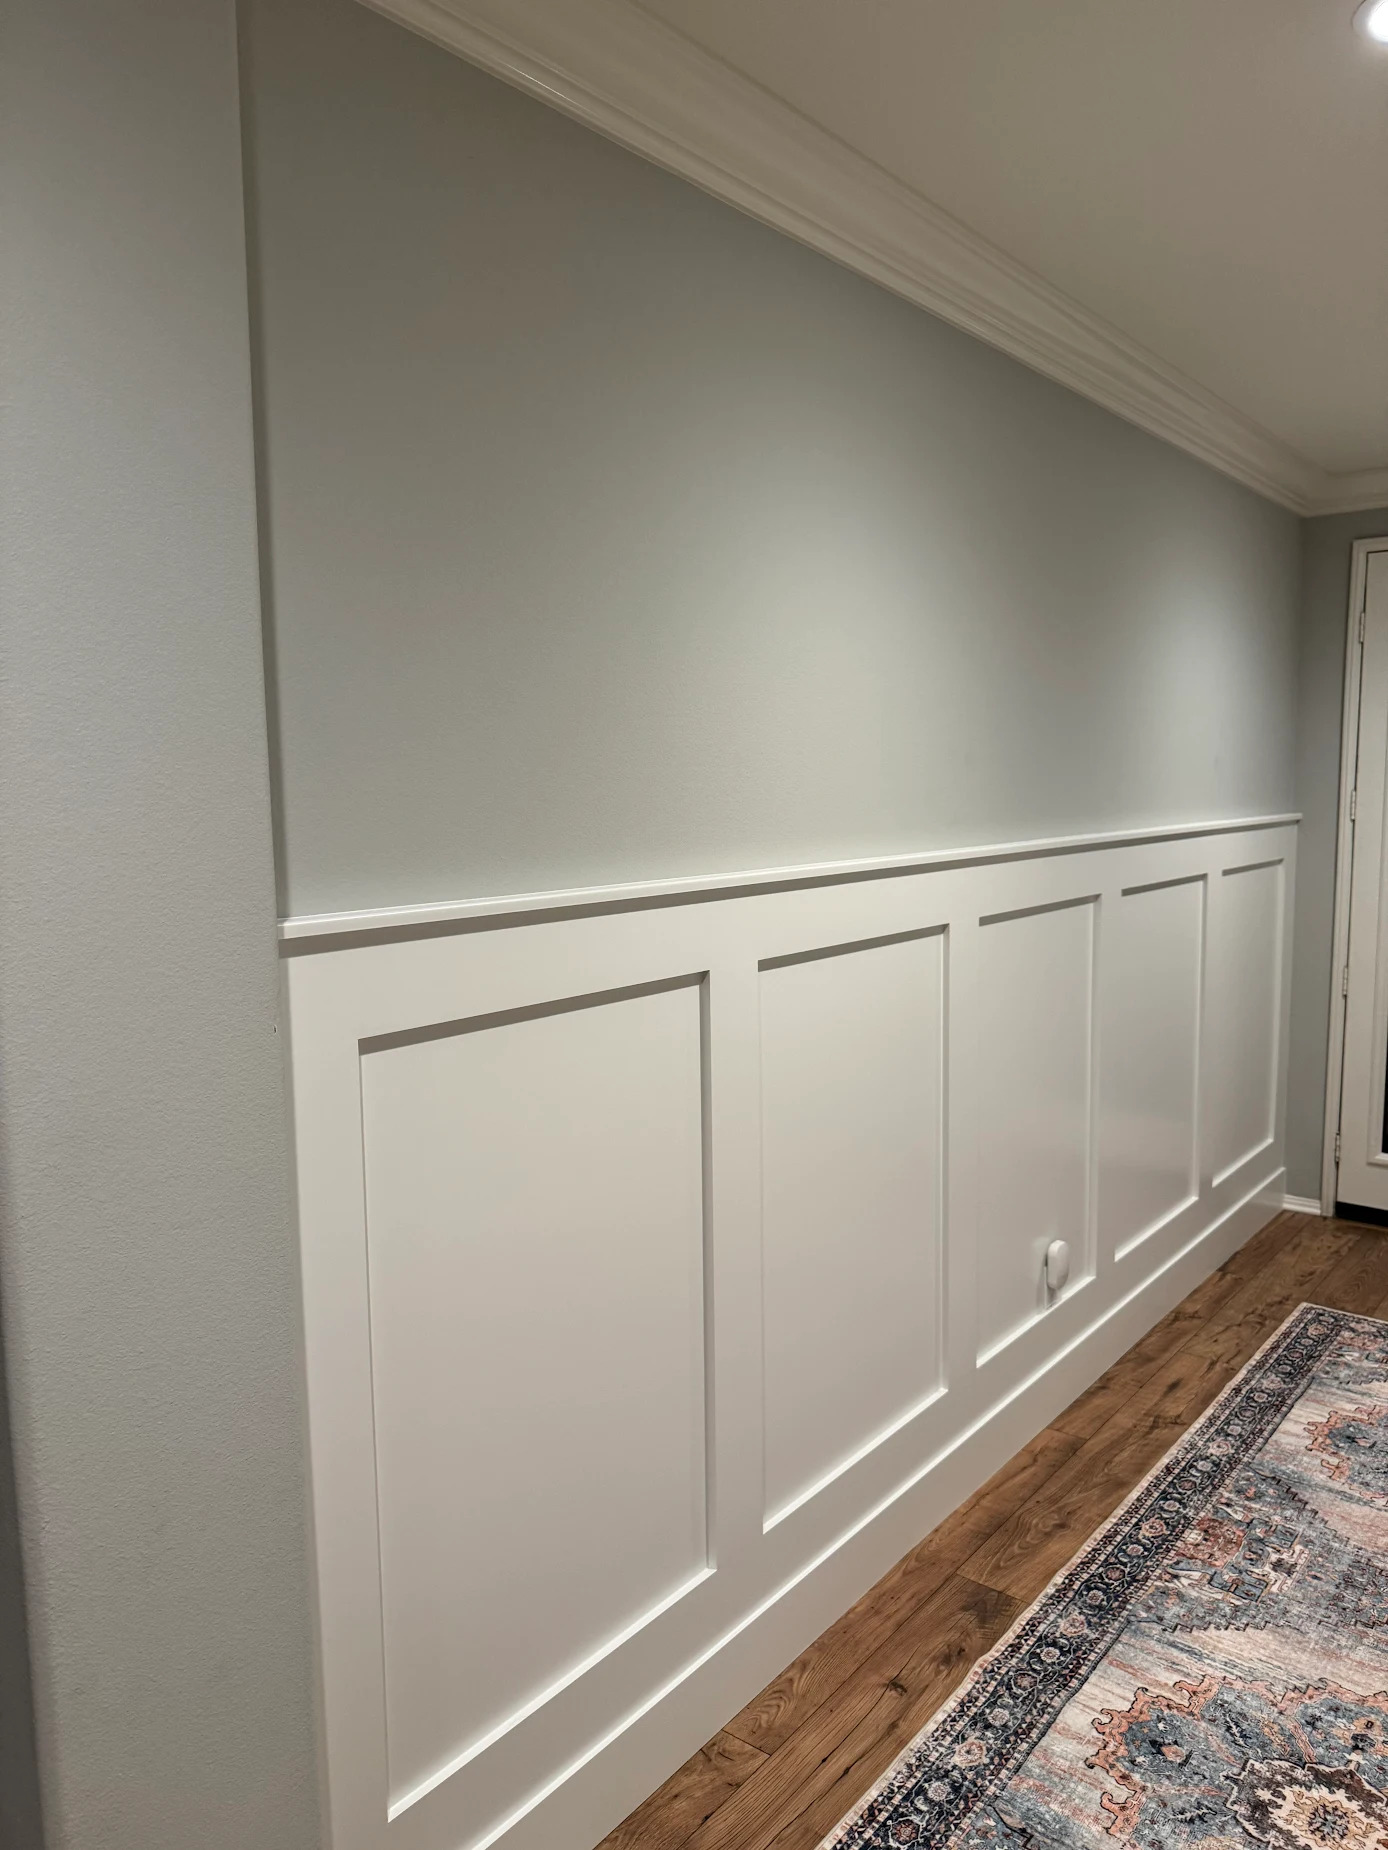
The Gypsy Canyon project in Audie Murphy Ranch put seven of these nine problems to the test across 34 linear feet of entry hallway. The long wall — just under 18 feet — required scarf joints in all four horizontal members. A semi-gloss sheen in a light-flooded entry revealed those joints after the first paint pass. The response was immediate and unprompted: sand down, re-Bondo, repaint in satin. No charge, no argument, no waiting for the homeowner to notice.
What the project demonstrates:
-
Panel height confirmed through a three-option laser-and-tape design phase — not a formula
-
Shop fabrication produced rigid, fully prepped panel units before site delivery
-
Bondo at all joints, sanded flush — including four scarf joints on the long wall
-
Paint sheen adjusted mid-project based on real light conditions, not the original spec
-
Accountability without being asked — Brian made the remediation call proactively
Read it here: Full project breakdown — photos, investment, construction details, and the scarf joint story
DIY Assessment: Where Wainscoting Goes Right and Where It Gets Handed Off
Wainscoting is not beyond a skilled DIY carpenter. Flat-panel installations in standard rooms with good walls, no long runs, and no complex corners are achievable for someone with finish carpentry experience. Here is where it typically gets handed off:
-
Long runs requiring scarf joints: four horizontal members, all needing 45-degree cuts that align and take paint invisibly. This requires a quality miter saw and an understanding of what the joint will look like under raking light.
-
Design phase rigor: the laser, tape, and visual confirmation process is not hard, but it requires the discipline to do it rather than default to standard height.
-
Joint prep: Bondo fill and sanding to a paint-ready surface is a learnable skill. It is also the step most DIY installations skip, and it is the step most visible in the finished product.
-
Accountability: the question is not whether you can build it — it is whether you will catch the scarf joint issue after the first paint pass and fix it before you call it done.
Most homeowners who start a wainscoting project themselves finish it themselves. The ones who call a contractor are usually the ones who saw the joint prep and sheen problem in their first attempt and decided the result was not what they wanted.
Holland & Sons Angle
The Gypsy Canyon project is the clearest illustration of what field accountability looks like. The scarf joints across the long wall were correctly made and correctly filled. The problem was the sheen — semi-gloss in a room with too much directional light hitting those joints at exactly the wrong angle. Brian caught it before the homeowner did. That is not a heroic story. That is what 35 years of watching finished work under every light condition looks like in practice. His sons were on site for both days and watched that call get made. That is what the apprenticeship is for: not just the cuts and the joints, but the standard.
Frequently Asked Questions
Does wainscoting look cheap?
Wainscoting does not look cheap — bad execution does. The factors that make wainscoting look cheap are predictable and preventable: wrong panel height chosen by formula rather than visual confirmation, inadequate joint prep that shows under raking light, semi-gloss paint sheen in a room with directional light, and panel spacing that was not worked out across the full wall before installation began. A shop-built installation with correct proportions, solid pine framing, MDF panel fields, and a properly prepared satin paint surface reads as intentional and architectural.
What are the most common wainscoting installation mistakes?
The most common mistakes are wrong panel height, skipped joint prep, wrong paint sheen for the room's light conditions, and failure to account for outlet locations in the panel layout. Behind those are moisture-wrong material selection (standard MDF in a bathroom), poor corner terminations, and inadequate adhesive at joints that results in cracking over time in the low-humidity Inland Empire climate.
How do I prevent scarf joints from showing through paint?
Scarf joint visibility is a joint prep and sheen problem, not a construction problem. A properly made 45-degree scarf joint fills and sands the same as any other joint — the key is using Bondo body filler rather than latex caulk, sanding to a flat profile, and applying a satin rather than semi-gloss topcoat. In rooms with strong directional light, satin is the only reliable choice for concealing any joint line under raking conditions.
Can wainscoting be installed on uneven walls?
Yes, but the unevenness must be addressed before installation — not worked around. High spots on drywall can be sanded or planed. Significant low spots may require shimming the panel substrate. Walls with heavy texture need knockdown or skim-coat prep before panels go up. Skipping this step results in shadow lines of varying width along panel edges that are visible under any raking light.
What happens if MDF wainscoting gets wet?
Standard MDF absorbs moisture through its edges, causing the fiber core to swell. This telegraphs through the paint surface as a raised ridge at panel perimeters. In dry Inland Empire interior spaces — entries, hallways, living rooms, bedrooms — standard MDF with properly sealed edges performs well. For bathrooms or laundry rooms, specify moisture-resistant MDF and seal all edges with shellac-based primer before installation. Standard MDF in a high-humidity space will fail over time regardless of paint quality.
What should I do if I see a crack forming in my wainscoting joints?
A cracking joint in a painted wainscoting installation typically means the original fill was latex caulk rather than Bondo, or the adhesive bond was incomplete at installation. The repair is the same as the original: dig out any loose fill, apply Bondo body filler, sand flush when cured, spot prime, and repaint with the original product and sheen. In the low-humidity summer conditions common in Menifee and Murrieta, joint cracking is more common than in coastal climates — the dry heat stresses wood movement more aggressively.
How do I handle outlet boxes in wainscoting?
Electrical box locations need to be mapped during the design phase so the panel layout can work around them. Standard outlet boxes can be extended with a low-voltage box extender to accommodate panel thickness — these are inexpensive and widely available. The worst outcome is discovering the conflict after fabrication is complete. A full wall walk during design, with every outlet and switch marked on the layout drawing, prevents that.
Is wainscoting hard to repair after it is painted?
Wainscoting finished with a hard-cure paint like Sherwin-Williams Emerald Urethane Trim Enamel is straightforward to repair. Keep a quart of the original product on the shelf. Clean the damaged area, apply Bondo if structural fill is needed, feather in the touch-up coat with a quality brush, and the repair is nearly invisible. Installations painted with standard latex are harder to touch up because the softer film scuffs more readily and the paint lot can vary enough to show under raking light.
Ready to Talk About Your Project?
Fill out the contact form at hsconstruct.com/contact, describe your project, and upload any inspiration photos. Brian will come out, take measurements, and put together a scope and investment range based on your actual walls.
Holland & Sons serves Menifee, Murrieta, Temecula, Perris, Riverside, and the greater Inland Empire.
Find us on Facebook and Instagram for project photos from recent Inland Empire installations.
951-338-8058 | brian@hsconstruct.com | hsconstruct.com | CSLB #1123738
More Than Just Wainscoting
Wainscoting is one of the most satisfying projects we do — the before and after is immediate and impossible to miss. But it is one chapter in a much longer story. Brian and his sons have been finish carpenters since 1991, which means every room in your home is fair game.
If your space needs more than wainscoting, here is what else we build:
-
Kitchen and bathroom remodels — full custom cabinetry, tile work, and finish carpentry from demo to done
-
Coffered ceilings — grid beam systems that add architectural depth to any room, sized and proportioned to the space
-
Wainscoting and wall paneling — classic raised panel, flat panel, board-and-batten, and shiplap applications
-
Reclaimed wood accents — feature walls, fireplace surrounds, and detail work using salvaged material with real character
-
Beam wraps — hollow wood wraps that give exposed beams the look of solid timber without the structural engineering
-
Crown molding, baseboards, and trim carpentry — the details that make a house feel finished, from a single room to a whole home
-
Cased openings and interior door replacements — clean transitions between spaces that most contractors overlook
-
Custom built-in entertainment walls and bookshelves — designed by hand, built in the shop, installed to last
Wood, proportion, and rooms that feel right — that is what we do.
About the Author
Brian Holland is the owner and lead carpenter of Holland & Sons Construction, a family-run finish carpentry and general contracting company serving Riverside County and the Inland Empire since 1991. He entered the trade at 17, learned on the job, and has spent 35 years building the kind of work that makes rooms feel right — often before a homeowner can articulate why. His sons now apprentice alongside him on every project. Holland & Sons is based in Perris, CA and licensed by the CSLB (#1123738).
Related project
This guide is part of our wainscoting & paneling series.
Learn more about Wainscoting & PanelingHave a project in mind? Let's start a conversation.
Tell us what you are thinking about and we will give you a straight answer about scope, timeline, and investment.
Start a Conversation