Custom Flat-Panel Wainscoting in Menifee, CA: How 34 Linear Feet Gave a Builder Entry the Character It Deserved — The Gypsy Canyon Project
Quick Answer
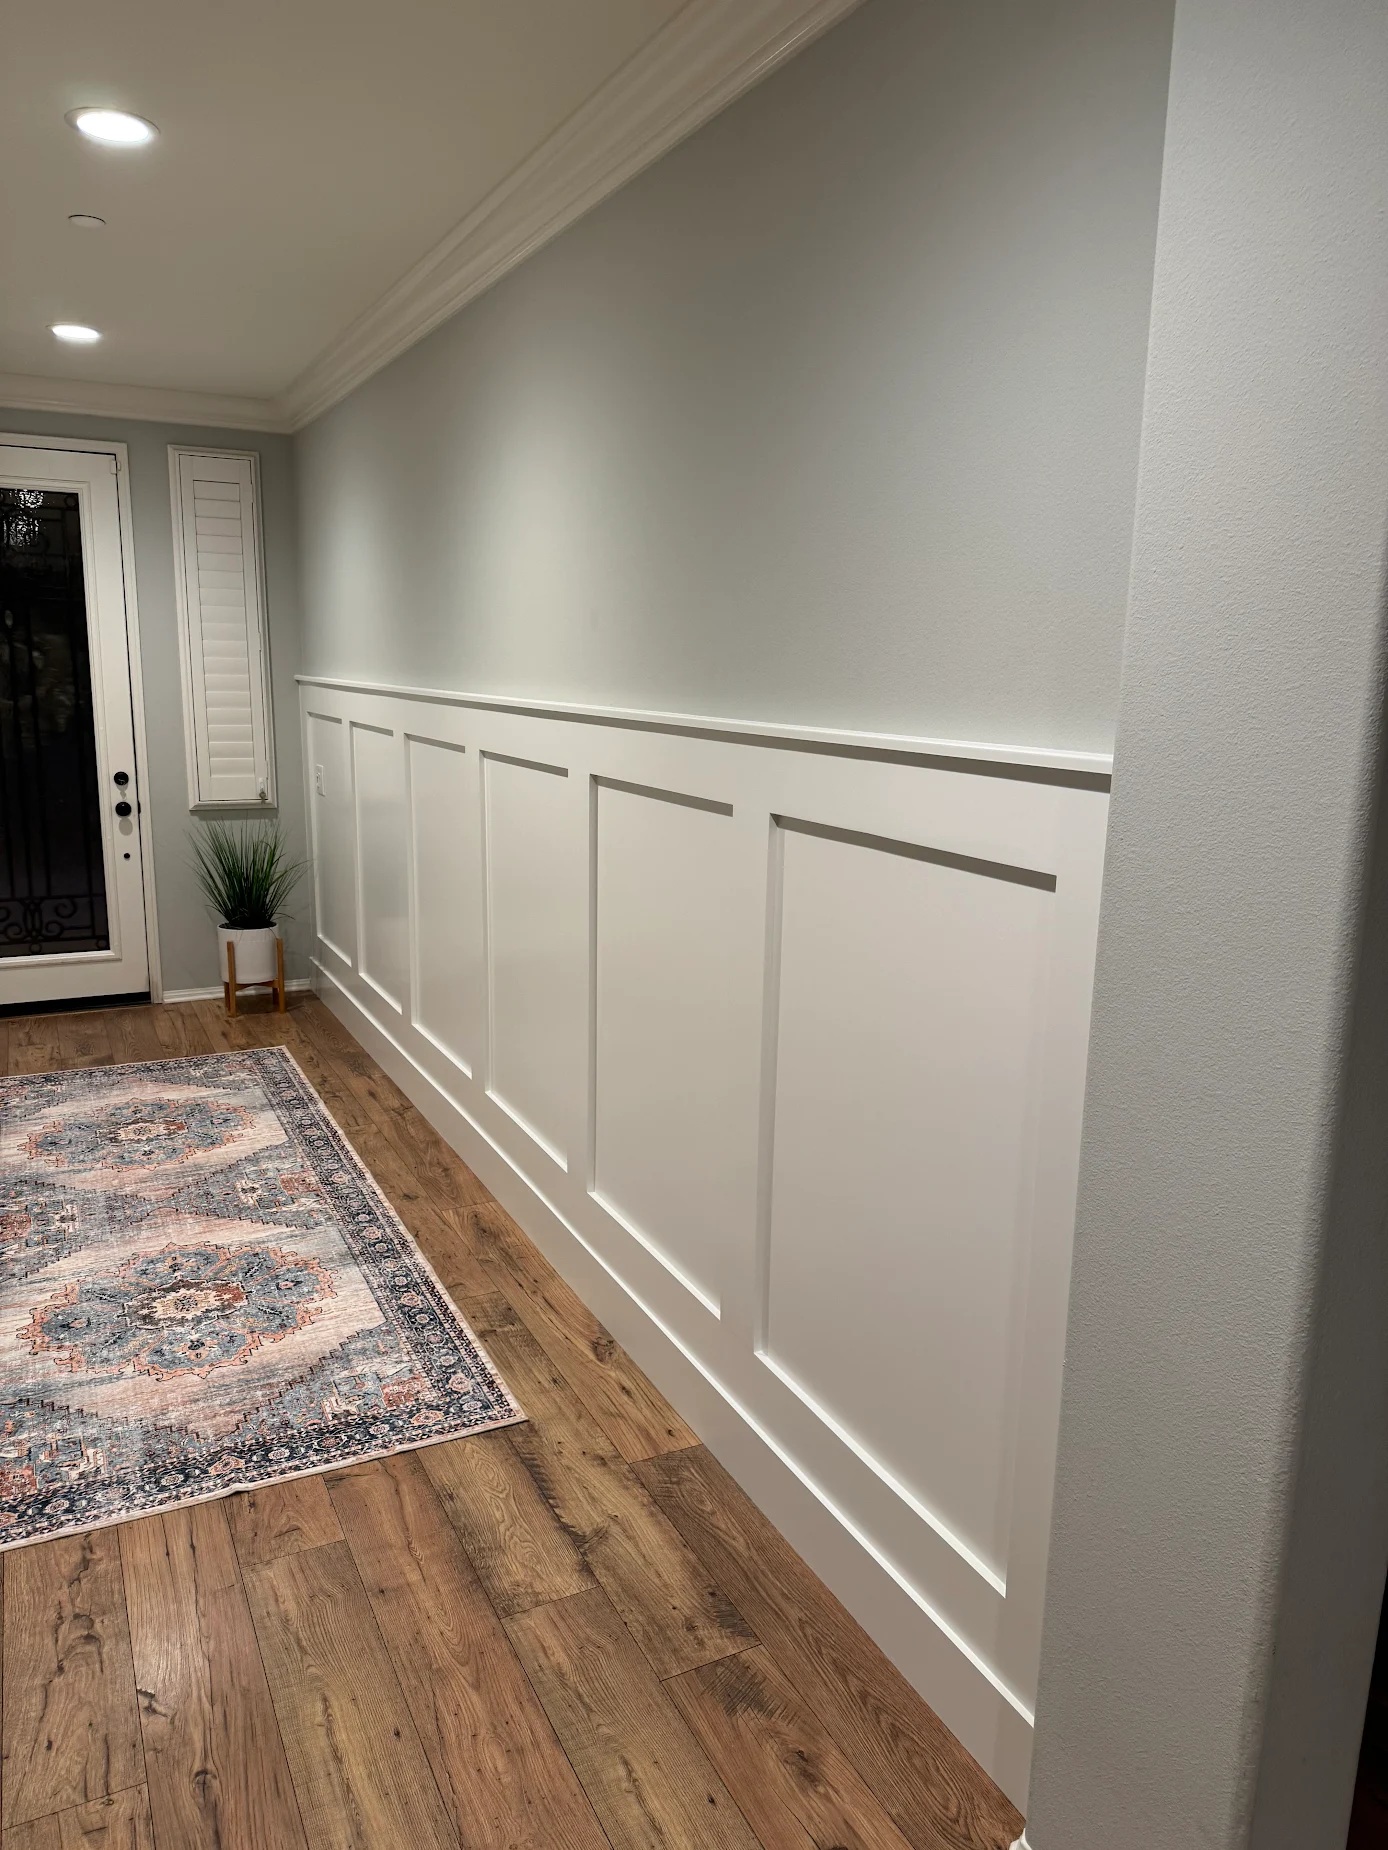
Holland & Sons Construction installed 34 linear feet of shop-built flat-panel wainscoting throughout the entry of a home in the Audie Murphy Ranch neighborhood of Menifee, CA. The project — which runs 55 inches tall across both walls of the entry corridor — was completed for an investment of $8,180, with 1 day of shop fabrication and 2 days on site. Materials include pine rails, stiles, and baseboards, 1/4-inch MDF recessed panel fields, and Sherwin-Williams Emerald Urethane Trim Enamel in Pure White.
Fast Facts
| Project Investment | $8,180 |
|---|---|
| Similar Projects | $5,000 – $12,000+ — scope, panel height, and material choices can push this higher |
| Financing | 0% interest, zero payments for 12 months — or fixed monthly payment options, on approved credit |
| Ready to talk? | hsconstruct.com/contact |
Project at a Glance
| Location | Menifee, CA — Audie Murphy Ranch |
|---|---|
| Investment | $8,180 |
| Shop Fabrication | 1 day in the shop |
| On Site | 2 days (1 install, 1 paint) |
| Scope | 34 linear feet of shop-built flat-panel wainscoting, entry corridor, both walls |
| Key Feature | The entryway now has genuine architectural character that reflects the quality and design sensibility the homeowners love |
| Rails & Stiles | Pine, 5-1/2" width throughout |
| Panel Fields | 1/4" MDF recessed panels — perfect paint-grade surface |
| Cap | Simple 2" flat cap |
| Baseboard | 6" pine baseboard |
| Panel Height | 55 inches — determined through a full design phase with laser and tape |
| Paint | Sherwin-Williams Emerald Urethane Trim Enamel, Pure White, Satin |
| Permit | Not required — cosmetic finish carpentry |
| Built By | Holland & Sons Construction |
| Financing | 0% interest / 12 months, or fixed monthly plans, on approved credit |
| Service Area | Temecula, Murrieta, Menifee, Perris, Riverside, Inland Empire |
| License | CSLB #1123738 |
Ready to move forward? <span class="underline">hsconstruct.com/contact</span>
Key Takeaways
-
Custom flat-panel wainscoting in Menifee, CA typically ranges from $5,000 – $12,000+
-
This project: $8,180 — 2 days on site, 1 day shop fabrication, 34 linear feet total
-
Key Feature: Shop-built panel units assembled as complete, rigid sections — transported and installed as single pieces
-
Included: Design phase with laser and tape layout, full shop fabrication, site installation, and paint with joint remediation
-
Permit: Not required for cosmetic finish carpentry in California — always verify your specific scope with your contractor
-
Key materials: Pine rails/stiles, 1/4" MDF panel fields, Sherwin-Williams Emerald Urethane Trim Enamel Pure White Satin
-
Panel height determined through a full design phase — laser at multiple heights, painter's tape on the wall, confirmed before any cuts were made
What This Project Solved
Audie Murphy Ranch is one of the newer master-planned communities in Menifee — development began in 2012, with homes built through 2024. Over 2,000 single-family homes make up the neighborhood, most in a Southwestern style with consistent finishes throughout. The homes are well-built and well-maintained. But consistent also means the builder interiors tend to look alike. Flat drywall. Standard baseboard. Crown molding at the ceiling line. Nothing wrong with any of it — and nothing that tells you anything about the person who lives there.
That was the problem here. The homeowner had put real thought and money into his home. Nice floors. Good furniture. A front entry door with wrought-iron detailing. And then you stepped inside — and the entry was just wall. Flat gray wall from the baseboard to the crown, with nothing in between.
Specifically, here's what wasn't working:
-
No architectural detail in the entry — the first 34 linear feet of wall a guest sees had zero character
-
The space had all the bones of a quality home with none of the finish to match
-
Builder-standard baseboard — functional but invisible — was the only trim element in the corridor
-
The wall proportions felt wrong: too much flat plane, no visual division between floor zone and upper wall
The homeowner knew what he wanted. He just needed someone who could design it right and build it to last.
How We Designed It
Before anything goes to the shop, it gets designed. On this project, Brian tried something different — the elevation and section were drawn using CAD software instead of the usual pencil-and-paper process at the Vemco drafting table. The result is the same: a fully dimensioned scaled drawing at 1/2" = 1'-0", with both walls laid out, a 107-inch wall with two recessed panels and a 210-inch wall with seven evenly spaced panels at 23-3/4" wide. Every rail, stile, cap, and baseboard called out. The panel count, spacing, and proportions worked out before a single piece of pine hit the saw. The tool was different. The discipline was the same.
But the sketch only settled the geometry after the height question was answered — and that took a design phase most contractors skip entirely.
The original concept called for 33-inch wainscoting — a common height for flat-panel work in contemporary homes. But something felt off when we talked through the proportions of this particular entry: high ceilings, long walls, strong crown molding already in place. Thirty-three inches would have felt lost.
Brian set up a laser at three different heights and ran painters tape across sections of the wall at each one. Then he left it alone and told the homeowners to live with it for a few days. Look at it in the morning. Look at it at night. Walk past it. See how it feels.
They chose 55 inches. The right answer — confirmed by the room itself, not a guess.
That's what a design phase does. It's not a formality. It's how you avoid building something beautiful that still feels wrong.
Photo 1 — Before
Photo 2 — Before (Adjacent Wall)
Photo 3 — Shop Fabrication
Photo 4 — During Installation (Entry Corridor, Both Walls)
Photo 5 — During Installation (Closeup, Son Nailing)
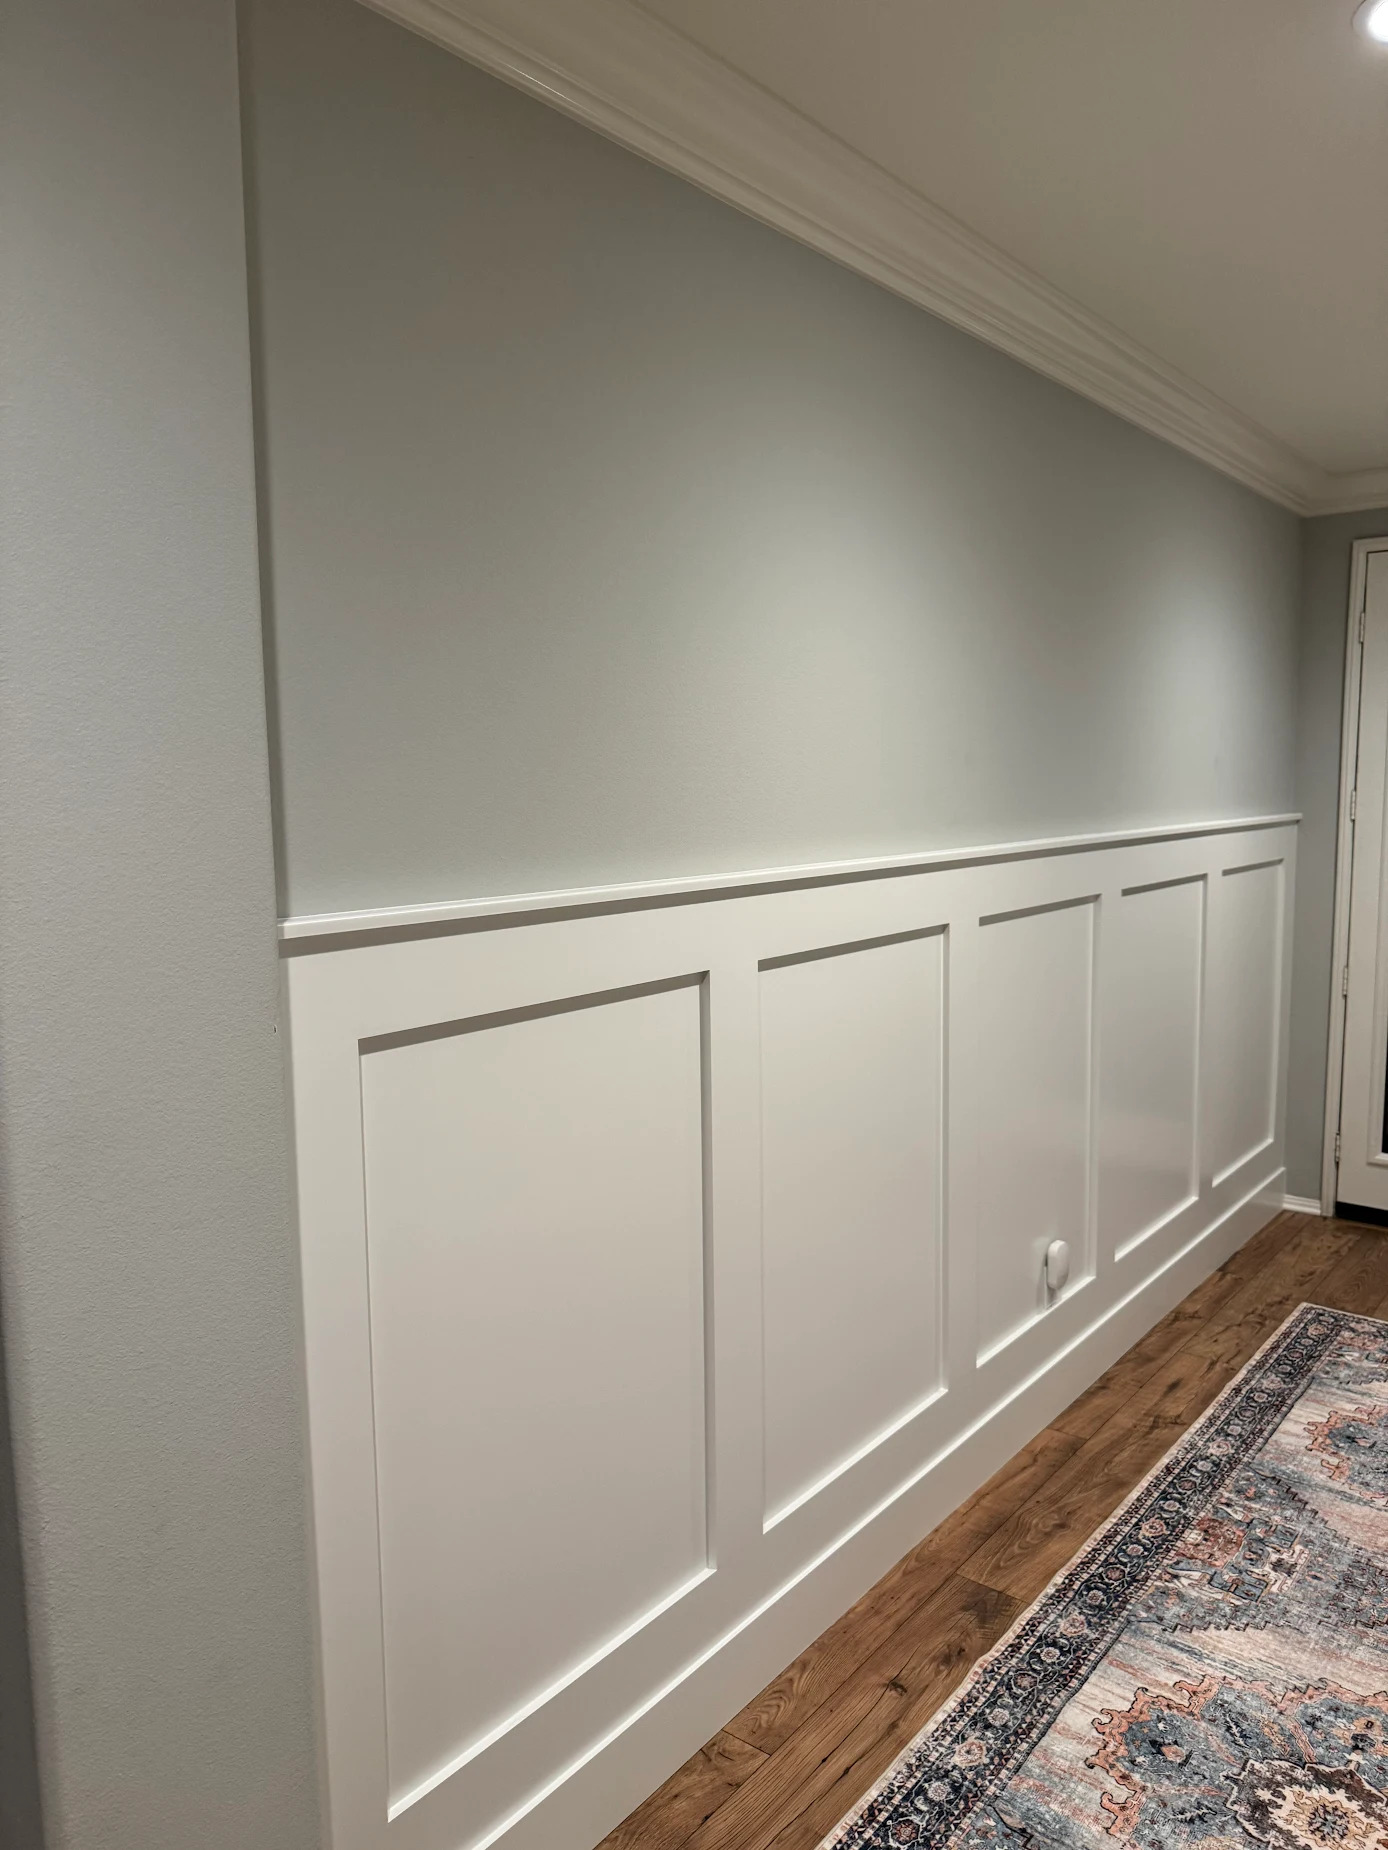
Photo 6 — After (Long Wall, Finished)
Photo 7 — After (Entry Corridor, Looking Toward Door)
Photo 8 — After (Column Base Detail)
What We Built
The design came first — fully dimensioned and drawn to scale before anything was cut. Once the panel height was confirmed at 55 inches through the laser and tape design phase, the geometry was locked and shop fabrication could begin.
A. Why We Chose These Materials
For painted wainscoting, the material choices aren't complicated — but they matter. Pine, MDF, and Sherwin-Williams Emerald aren't flashy choices. They're the right ones.
| Material | Why We Chose It | Alternative Considered | Why This Won |
|---|---|---|---|
| Pine rails & stiles | Real wood for structural members — glued and pocket-hole screwed joints need wood, not MDF | MDF stiles throughout | MDF cannot hold the joinery the way solid wood can; pine gives the assembly structural integrity |
| 1/4" MDF panel fields | Unbeatable paint-grade surface — no grain, no texture bleed from drywall behind, no seasonal movement | Drywall-applied molding only (no panel infill) | MDF eliminates drywall texture from showing through and creates a dead-flat field for paint — there is no better painted panel surface |
| SW Emerald Urethane Trim Enamel | Hardest, most durable water-based trim finish available — levels like oil, cleans like tile | Standard latex trim paint | Emerald Urethane is formulated with a urethane-modified alkyd system — it cures harder and holds up to cleaning in high-traffic areas like entryways |
Material Performance Comparison:
| Material | Best For | Pros | Considerations |
|---|---|---|---|
| Pine (rails/stiles) | Structural framing of panel system | Strong joinery, holds screws and nails, takes paint well | Requires proper priming and filling at joints |
| 1/4" MDF (panels) | Paint-grade recessed panel fields | Dead-flat surface, no grain, stable, takes paint perfectly | Not for wet areas; must be sealed at edges |
| SW Emerald Urethane | High-traffic painted trim in entry/hall spaces | Extremely hard cure, excellent leveling, resists yellowing, washable | Premium price point; requires proper surface prep |
B. Materials / Specifications
| Element | Material | Finish / Color |
|---|---|---|
| Rails & stiles | Pine, 5-1/2" width | Primed and painted |
| Recessed panel fields | 1/4" MDF | Paint-grade — dead flat surface |
| Cap | Pine, 2" flat cap profile | Primed and painted |
| Baseboard | Pine, 6" profile | Primed and painted |
| Paint — all surfaces | Sherwin-Williams Emerald Urethane Trim Enamel | Pure White, Satin sheen |
| Joint treatment | Bondo body filler at all joints | Sanded flush before paint |
| Fasteners | Pocket-hole screws + construction adhesive | All joinery glued and mechanical-fastened |
C. Project Specs
-
Total linear footage: 34 linear feet — 107" short wall (2 panels) and 210" long wall (7 panels)
-
Panel height: 55 inches — confirmed through laser and tape design phase
-
Rail and stile width: 5-1/2" throughout — top rail, bottom rail, and all stiles
-
Panel field: 1/4" MDF, recessed flat panel
-
Cap: Simple 2" flat profile
-
Baseboard: 6" pine
-
Paint: Sherwin-Williams Emerald Urethane Trim Enamel — Pure White, Satin sheen
-
Joint treatment: Bondo body filler at all joints, sanded flush
-
Assembly method: Shop-built as complete panel units — glued, pocket-hole screwed, Bondo'd — rigid enough to transport and handle as single large pieces
D. Craft Detail
The shop-build approach is what separates this kind of wainscoting from stick-built site work. Every panel section is assembled at the Holland & Sons shop in Perris as a complete, self-contained unit — rails, stiles, and MDF panel fields joined with construction adhesive, pocket-hole screws, and Bondo at every joint. By the time a panel section arrives on site, it's rigid enough to pick up and carry without any racking or movement. That's not how most contractors do it. Most build in place, which means every nail hole and joint gets handled twice — once when you put it up and again when you come back to fill and sand. Shop-building means the fill and prep work happens in a controlled environment before the panel ever sees the wall.
The 210-inch long wall — just under 18 feet — required scarf joints in all four horizontal members: the top cap, both rails, and the baseboard. Trim comes in 16-foot lengths. When your wall is longer than your stock, you have two choices: use a butt joint (faster, visible, wrong) or use a scarf joint. A scarf joint is an angled cut on both joining pieces — typically 45 degrees — that creates more glue surface and a joint line that runs diagonally across the face of the trim rather than straight across it. Done right, the diagonal line is far easier to disappear under paint than a perpendicular one. On a wall this long, that means four separate scarf joints, all of them needing to land in the right place, align correctly, and take paint without reading.
The first paint pass revealed a problem. The entry floods with natural light from the front door and sidelights, and the homeowner had chosen a semi-gloss finish. Semi-gloss is unforgiving — it amplifies every imperfection, every texture variation, every joint line. The scarf joints, despite being correctly made, were reading under those conditions — all four of them, stacked vertically on the same wall. Brian made the call before the homeowner had to say a word: sand them down, re-Bondo the joints, reprime, switch to satin sheen. The painters came back and did it right. The homeowner noticed the difference — and appreciated that no one waited to be asked.
That's the difference between a contractor who builds it and walks away, and one who's accountable to what it looks like finished.
How Much Does Custom Wainscoting Cost in Menifee, CA?
This project: $8,180
A. Line-Item Cost Breakdown
| Scope Item | Investment Contribution |
|---|---|
| Shop fabrication — materials (pine, MDF, fasteners, adhesive, Bondo) | $1,500 |
| Shop fabrication — labor | $1,200 |
| Site installation — labor (1 day) | $2,200 |
| Paint labor (1 day, including joint remediation and repaint) | $1,900 |
| Paint materials — SW Emerald Trim Enamel, primer, Bondo, sundries | $580 |
| Design phase, laser layout, site measure | $800 |
| Total | $8,180 |
B. What That Included
-
Full design phase — laser at multiple heights, tape layout on wall, client review before anything was built
-
Complete shop fabrication — all panels assembled as rigid units at the Holland & Sons shop
-
Site installation — panels transported, set, leveled, and secured to wall
-
Bondo and joint prep at all rail, stile, and scarf joint connections
-
Full paint — primer and two finish coats of Sherwin-Williams Emerald Urethane Trim Enamel Pure White Satin
-
Joint remediation — scarf joint re-prepped and repainted to Holland & Sons standard before client sign-off
-
Floor protection throughout
C. What Was Not Included
-
Flooring — existing hardwood floors were protected but not touched
-
Painting of walls above the cap rail — existing wall color was retained
-
Electrical — existing switch plates were worked around; no electrical work performed
-
Crown molding — existing crown was already in place
D. Pricing Tier Comparison
| Build Level | Investment Range | What You Get |
|---|---|---|
| Standard Flat Panel | $5,000+ | Shorter runs (under 25 LF), standard height (33"–42"), pine and MDF, painted |
| Extended Custom Flat Panel | $6,500 – $12,000 | Longer runs like this project, taller panels (48"–55"+), full design phase, shop-built quality |
| Raised Panel / Stained Hardwood | $12,000+ | Classical raised-panel profiles, stain-grade hardwood species, significantly more shop time and finishing labor |
E. Material Upgrade Impact
| Material Choice | vs. Budget Alternative | Approximate Investment Impact |
|---|---|---|
| Pine rails/stiles (solid wood) | Finger-jointed or MDF stiles | +$300–$500 |
| 1/4" MDF panel fields | Drywall-applied molding only (no panel infill) | +$400–$600 |
| SW Emerald Urethane Trim Enamel | Standard latex trim paint | +$150–$250 |
| Shop-built panel units | Stick-built on site (not recommended — amateur approach) | +$600–$900 |
| Full design phase with laser/tape | Measure and go | +$400–$700 — but the benefit in proportion, fit, and build quality far exceeds the cost difference |
F. Investment Drivers
What increases the investment:
-
More linear footage — every additional foot adds material and labor
-
Taller panels — anything over 42" adds shop time and material
-
Raised panel profiles vs. flat panel — significantly more shop fabrication
-
Stain-grade hardwood species vs. paint-grade pine and MDF
-
Multiple rooms or stairways — setup and layout time multiplies
-
Scarf joints on long runs — additional prep, fill, and finishing labor
What lowers the investment:
-
Shorter runs under 25 linear feet
-
Standard 33"–36" panel height
-
Flat panel profile vs. raised or beaded
-
Single wall vs. full room or corridor
The Biggest Problems with Wainscoting in the Inland Empire
1. Sheen Choice That Exposes Every Imperfection
Semi-gloss looks clean in the store sample. In a flooded-light entry with scarf joints in four horizontal members — top cap, both rails, and baseboard — it looks like a mistake. Inland Empire homes — especially newer builds in Audie Murphy Ranch — tend to have generous natural light from front entries, transom windows, and open floor plans. Semi-gloss amplifies joint lines, drywall texture variation, and any inconsistency in the panel surface under that light. We learned this the hard way on this project. The fix was straightforward — sand, re-Bondo, repaint in satin — but it's the kind of thing that doesn't happen when you think through the finish decision before the paint goes on, not after. Satin is the right sheen for painted wainscoting in high-light California interiors. Holland & Sons walks clients through this choice at the design phase, every time.
2. Stick-Built vs. Shop-Built
Most wainscoting contractors build in place — rail by rail, stile by stile, directly on the wall. It's faster to set up. It's also harder to control quality, especially at joints. Shop-building means every panel assembly is complete, Bondo'd, and prep-ready before it arrives on site. The joints happen in the shop, where conditions are controlled and there's no clock running on a homeowner's schedule. The result is a tighter, cleaner installation that takes paint better. On a job like this one — 34 linear feet, two walls, complex scarf joint situation — the shop-build approach is the only way to guarantee the level of finish the homeowner expected.
3. Panel Height Guessed Instead of Designed
The most common wainscoting mistake isn't a craft problem — it's a proportion problem. A 33-inch panel on a 9-foot ceiling in a long corridor looks like an afterthought. A 55-inch panel on the same wall looks like it was always meant to be there. The difference is a design phase. At Holland & Sons, the full design phase — laser layout, tape on the wall, client review — is part of a signed contract. It's not a free consultation or a pre-sale favor. It's a committed part of the project, which means it gets the time and attention it deserves. On this project, the difference between the original 33-inch concept and the final 55-inch height is the difference between trim work that fills the eye and trim work that feels like it belongs. Holland & Sons walks through all of this in the design phase, before the contract is signed. No surprises mid-job.
Why This Entry Works Now
A. Usability
-
The entry now gives guests a defined arrival experience — there's something to look at from the moment the door opens
-
The 55-inch panel height creates a strong visual datum that the eye follows naturally down the length of the corridor
-
The wainscoting protects the lower wall from scuffs, bag handles, and foot traffic — a functional benefit in a high-traffic entry
-
Switch plates and outlet covers sit cleanly within the panel system — nothing was disrupted or relocated
-
The satin finish is washable — important in an entry that sees daily use
The homeowner's reaction when the paint was done and the floor protection came up said everything. He'd imagined it for a long time. When it was finished, it looked exactly like what he'd been trying to describe — and better than he expected it to. That's the goal every time.
B. Beauty and Visual Weight
| Element | Before → After |
|---|---|
| Visual weight | Flat, unbroken gray wall — nothing for the eye to anchor to |
| Layered panel system — baseboard grounds the wall, panels carry the eye horizontally, cap provides clean terminus | |
| Eye movement | Forced straight to the end of the corridor — nothing to slow the eye down |
| Natural rhythm — the panel stiles create vertical beats that pace the walk through the entry | |
| Room feeling | Generic builder interior — could be any house in the neighborhood |
| Architectural presence — the room reflects the taste of the person who lives there |
The wall that had nothing to say now says something. Not loudly — that's the point. The flat panels, the 5-1/2" stiles, the simple cap all stay quiet. They just make the entry feel finished in a way it never did before.
C. Home Value
Well-executed wainscoting in an entry contributes to buyer appeal by improving first impressions and demonstrating care for the home's finish quality. Research on wainscoting and home value consistently shows that while wainscoting may not produce a dollar-for-dollar return at appraisal, it contributes to the overall quality impression that influences buyer interest and offer behavior. In a community like Audie Murphy Ranch — where median sale prices run around $720,000 and homes compete in a relatively consistent aesthetic range — details that differentiate one home from the next carry real weight with buyers. Results vary by home, market, and project scope.
The Holland & Sons Angle
This project didn't need to be complicated. Flat panel wainscoting is a well-understood system — pine, MDF, paint. Brian has built versions of this in foyers, dining rooms, and hallways across the Inland Empire for 35 years. He knows the proportions that work and the ones that don't.
What made this one worth thinking about was the sheen decision — and the willingness to redo it when the first answer wasn't right. Semi-gloss is the default choice for trim. It's what painters assume. It's what most people don't think to question. But in a light-flooded California entry with scarf joints in four horizontal members — top cap, both rails, and baseboard — default isn't good enough. Brian caught it. The painters came back. The joints disappeared.
The height decision mattered too. Thirty-three inches would have been easier to sell. It's what people expect. Fifty-five inches required a design phase, a few days of tape on the wall, and a homeowner willing to look at it and sit with it. The entry is better for it.
Brian's son was on the job for both installation days. He set cap rail, ran the nail gun, and learned what it looks like when scarf joints across four horizontal members telegraph under paint — and what it takes to fix them the right way. That's the education that doesn't happen in a classroom. It happens on a job, when something goes sideways and you don't walk away from it.
Wainscoting FAQ — Menifee and Inland Empire
How much does custom wainscoting cost in Menifee, CA?
Custom flat-panel wainscoting in Menifee, CA typically ranges from $5,000 to $12,000+, depending on linear footage, panel height, profile type, and material choices. This project — 34 linear feet at 55 inches tall, shop-built with pine, MDF, and Sherwin-Williams Emerald Urethane — came in at $8,180. Raised-panel designs or stain-grade hardwood finishes push investment higher.
How long does wainscoting installation take?
This project required 1 full day of shop fabrication and 2 days on site (1 install day, 1 paint day). Total time from shop start to finished paint: 3 days. Larger installations with more linear footage or multiple rooms will require additional time. Holland & Sons builds all panels as shop-fabricated units, which keeps the on-site timeline efficient.
Do I need a permit for wainscoting in California?
No permit is required for cosmetic finish carpentry like flat-panel wainscoting in California — it is decorative trim work, not a structural or electrical modification. However, permit requirements vary by scope and location. Always confirm with your contractor and, when in doubt, verify with your local building department before work begins.
What's the difference between flat-panel and raised-panel wainscoting?
Flat-panel wainscoting — like this project — uses a recessed MDF or plywood field set within a pine rail-and-stile frame. The surface is flush or slightly recessed behind the framing, with clean shadow lines where the stile meets the panel. Raised-panel wainscoting features a panel field that is profiled and raised above the surrounding frame, creating a more formal, classical appearance. Raised-panel is more labor-intensive to fabricate and typically costs significantly more. Flat-panel is the right choice for most contemporary and transitional homes.
Why use MDF for the panel fields instead of solid wood?
MDF is the best paint-grade panel surface available — it has no grain, no knots, and no seasonal movement. Unlike solid wood, MDF will not expand and contract with humidity changes, which means the panel field stays flat and the paint film stays intact. Solid wood panel fields are appropriate for stain-grade applications; for painted wainscoting, MDF is the professional standard. Rails and stiles are still built in solid pine because the joinery requires real wood — MDF cannot hold pocket-hole screws the way solid wood does.
What sheen should I choose for painted wainscoting?
Satin is the right answer for painted wainscoting in most California interiors — particularly in entries and hallways with natural light. Semi-gloss amplifies every surface imperfection, joint line, and texture variation under direct or raking light. Satin provides the durability and washability needed for a high-traffic entry without broadcasting every flaw. Sherwin-Williams Emerald Urethane Trim Enamel in satin is what Holland & Sons specified for this project.
What is a scarf joint and why does it matter on long wainscoting runs?
A scarf joint is an angled splice used when two pieces of trim must meet end-to-end to span a length longer than standard stock (typically 16 feet for trim lumber). The joint is cut at an angle — usually 45 degrees — on both mating pieces, creating a diagonal glue line that is far less visible than a straight butt joint. On this project, one wall ran just under 18 feet, requiring scarf joints in all four horizontal members: the top cap, both rails, and the baseboard. Scarf joints are standard practice in professional finish carpentry for long molding runs — the key is proper prep, Bondo fill, and the right paint sheen to keep the joint invisible in the finished product.
How do I maintain painted wainscoting?
Painted pine and MDF wainscoting finished with Sherwin-Williams Emerald Urethane Trim Enamel is easy to maintain. Wipe down with a damp cloth or mild cleaning solution — the urethane-modified formula is specifically designed to resist cleaning and daily wear. Avoid abrasive scrubbers. Touch-up paint should match the original sheen (satin in this case) and be applied with a quality brush for a smooth finish. More on Sherwin-Williams Emerald Urethane Trim Enamel.
Can wainscoting work in newer construction homes?
Yes — and it often makes the biggest difference there. Builder-standard interiors in newer communities like Audie Murphy Ranch in Menifee are constructed efficiently and consistently, which means they can feel interchangeable. Wainscoting gives a newer home architectural character it wasn't built with, and it does it without any structural work. It is one of the highest-impact per-dollar trim upgrades available for a builder-grade interior.
Do you offer financing?
Yes. Holland & Sons offers 0% interest financing with zero payments for 12 months, or fixed monthly payment options, on approved credit. Ask about financing when you reach out for your estimate.
What areas do you serve near Menifee?
Holland & Sons serves Menifee, Temecula, Murrieta, Perris, Riverside, and the surrounding Inland Empire and Riverside County. If you're in the area and have a project in mind, reach out at hsconstruct.com/contact.
Ready to Give Your Entry Some Character?
If your entry looks like every other house on the street — flat wall, standard baseboard, nothing to look at — that's fixable. Holland & Sons has been doing this work since 1991. Every project starts with a real design phase, gets built in the shop, and gets installed to last.
We serve Menifee, Temecula, Murrieta, Perris, Riverside, and the Inland Empire.
Get started at <span class="underline">hsconstruct.com/contact</span> — or call or text Brian directly.
Follow our work on Instagram and Facebook for project photos from across the Inland Empire.
951-338-8058 | brian@hsconstruct.com | hsconstruct.com | CSLB #1123738
More Than Just Wainscoting
Wainscoting is one of the most satisfying projects we do — the before and after is immediate and impossible to miss. But it's one chapter in a much longer story. Brian and his sons have been finish carpenters since 1991, which means every room in your home is fair game.
If your space needs more than wainscoting, here's what else we build:
-
Kitchen and bathroom remodels — full custom cabinetry, tile work, and finish carpentry from demo to done
-
Custom entertainment walls and built-in bookshelves — designed by hand, built in the shop, installed to last
-
Coffered ceilings — grid beam systems that add architectural depth to any room, sized and proportioned to the space
-
Reclaimed wood accents — feature walls, fireplace surrounds, and detail work using salvaged material with real character
-
Beam wraps — hollow wood wraps that give exposed beams the look of solid timber without the structural engineering
-
Crown molding, baseboards, and trim carpentry — the details that make a house feel finished, from a single room to a whole home
-
Cased openings and interior door replacements — clean transitions between spaces that most contractors overlook
-
Board-and-batten, raised panel, and shiplap wall paneling — every application, every style
Wood, proportion, and rooms that feel right — that's what we do.<span class="underline">hsconstruct.com</span>
About the Author
Brian Holland is the owner and lead carpenter of Holland & Sons Construction, a family-run finish carpentry and general contracting company serving Riverside County and the Inland Empire since 1991. He entered the trade at 17, learned on the job, and has spent 35 years building the kind of work that makes rooms feel right — often before a homeowner can articulate why. Every project starts at his vintage drafting table, where he sketches the layout by hand with pencil and paper using a Vemco drafting machine before anything gets built. His sons now apprentice alongside him on every project. Holland & Sons is based in Perris, CA and licensed by the CSLB (#1123738).
Related project
This guide is part of our wainscoting & paneling series.
Learn more about Wainscoting & PanelingHave a project in mind? Let's start a conversation.
Tell us what you are thinking about and we will give you a straight answer about scope, timeline, and investment.
Start a Conversation