
The Best Paint and Finish System for Wainscoting: What Actually Holds Up in Southern California
Quick Answer
The best paint system for wainscoting is not a single product — it is a sequence. Shellac-based primer on all MDF edges and end grain. Oil-based or high-build primer on the full assembly. Bondo body filler at all joints, sanded flush. Paintable caulk at wall transitions only. Two coats of Sherwin-Williams Emerald Urethane Trim Enamel in satin sheen. That system, applied correctly in that order, produces a wainscoting finish that holds up in the low-humidity, high-temperature summer conditions of Menifee, Murrieta, and Temecula. Skip any step and the deficiency shows up under raking light within a year.
Key Takeaways
| Key Takeaways | Details |
| Recommended topcoat | Sherwin-Williams Emerald Urethane Trim Enamel — hardest water-based trim finish available |
| Recommended sheen | Satin — the Gypsy Canyon case study proves why semi-gloss fails in light-flooded entries |
| Joint filler | Bondo body filler — not latex caulk, not spackle |
| MDF edge sealing | Shellac-based primer — seals before any water-based product is applied |
| Caulk rule | Paintable caulk at wall transitions only — never in panel joints |
The Recommendation
Sherwin-Williams Emerald Urethane Trim Enamel is Brian's topcoat of choice for painted wainscoting in Southern California. It is a urethane-modified alkyd formula that cures significantly harder than standard latex trim paint. It levels like oil-based paint, cleans like tile, and holds up to the repeated contact that entry hallway wainscoting takes. For the Inland Empire climate — hot dry summers, relatively low indoor humidity during heating season — a hard cure film that does not soften under temperature is the right specification.
That recommendation does not exist in isolation. The topcoat is the last step in a system. A premium topcoat applied over inadequate prep shows every deficiency the prep left behind. Here is the full sequence.
Step 1: MDF Edge Sealing — The Step Most People Skip
MDF has a specific vulnerability: its edges and end grain are highly absorbent. Apply water-based primer directly to an unsealed MDF edge and the moisture raises the fiber, creating a rough, fuzzy surface that requires sanding and re-priming. Do that cycle multiple times and you have added cost and time without improving the result.
The solution is shellac-based primer — a product like Zinsser BIN — applied to all MDF edges and end grain before any water-based product touches the assembly. Shellac is solvent-based and seals the fiber against moisture absorption. One coat is sufficient. Once the edges are sealed and dry, water-based products can be applied over the top without raising the grain.
This step matters specifically for MDF. Pine rails and stiles do not require shellac sealing — standard oil-based or high-build primer is sufficient.
Step 2: Full-Assembly Primer
After MDF edges are sealed, the full assembly gets primed. The goal of primer in a wainscoting system is twofold: to seal the wood substrate and to create a uniform surface that reveals any remaining deficiencies before the first topcoat is applied.
Brian uses an oil-based primer or a high-build alkyd primer on the full assembly. Oil-based products penetrate wood fibers more effectively than latex, raising the grain slightly on pine so that grain texture can be sanded smooth before topcoat. High-build primers add film thickness that helps fill minor surface imperfections. Either approach requires a light sanding pass after the primer cures.
In the Inland Empire climate, primer cure time can be aggressive in summer. Oil-based primer on a hot day in Menifee will feel tack-free quickly — but full hardness takes 24 hours. Sanding or topcoating before full cure risks lifting the primer film. This is a patience requirement, not a technique requirement.
Step 3: Joint Filler — Bondo, Not Caulk
This is the step where most wainscoting installations fail at the finish level. Nail holes, rail-to-stile joints, and scarf joints on long runs all need to be filled to a flat, paint-ready surface before topcoat is applied.
Latex caulk is the wrong product for this application. Caulk stays flexible — it never fully hardens, which means it does not sand flat and it does not hold paint the same way as the surrounding wood surface. Under raking light with a semi-gloss sheen, a caulk-filled joint reads as a soft line across the panel face. It will for as long as the installation exists.
Bondo auto body filler — the same product used in automotive paint prep — is the right material. It cures rigid, sands flat, and takes primer the same way as the surrounding wood. Apply it with a flexible putty knife, overfill slightly, and sand flush with 120-grit when cured. A second application may be needed for deeper holes. After sanding, spot prime before topcoat.
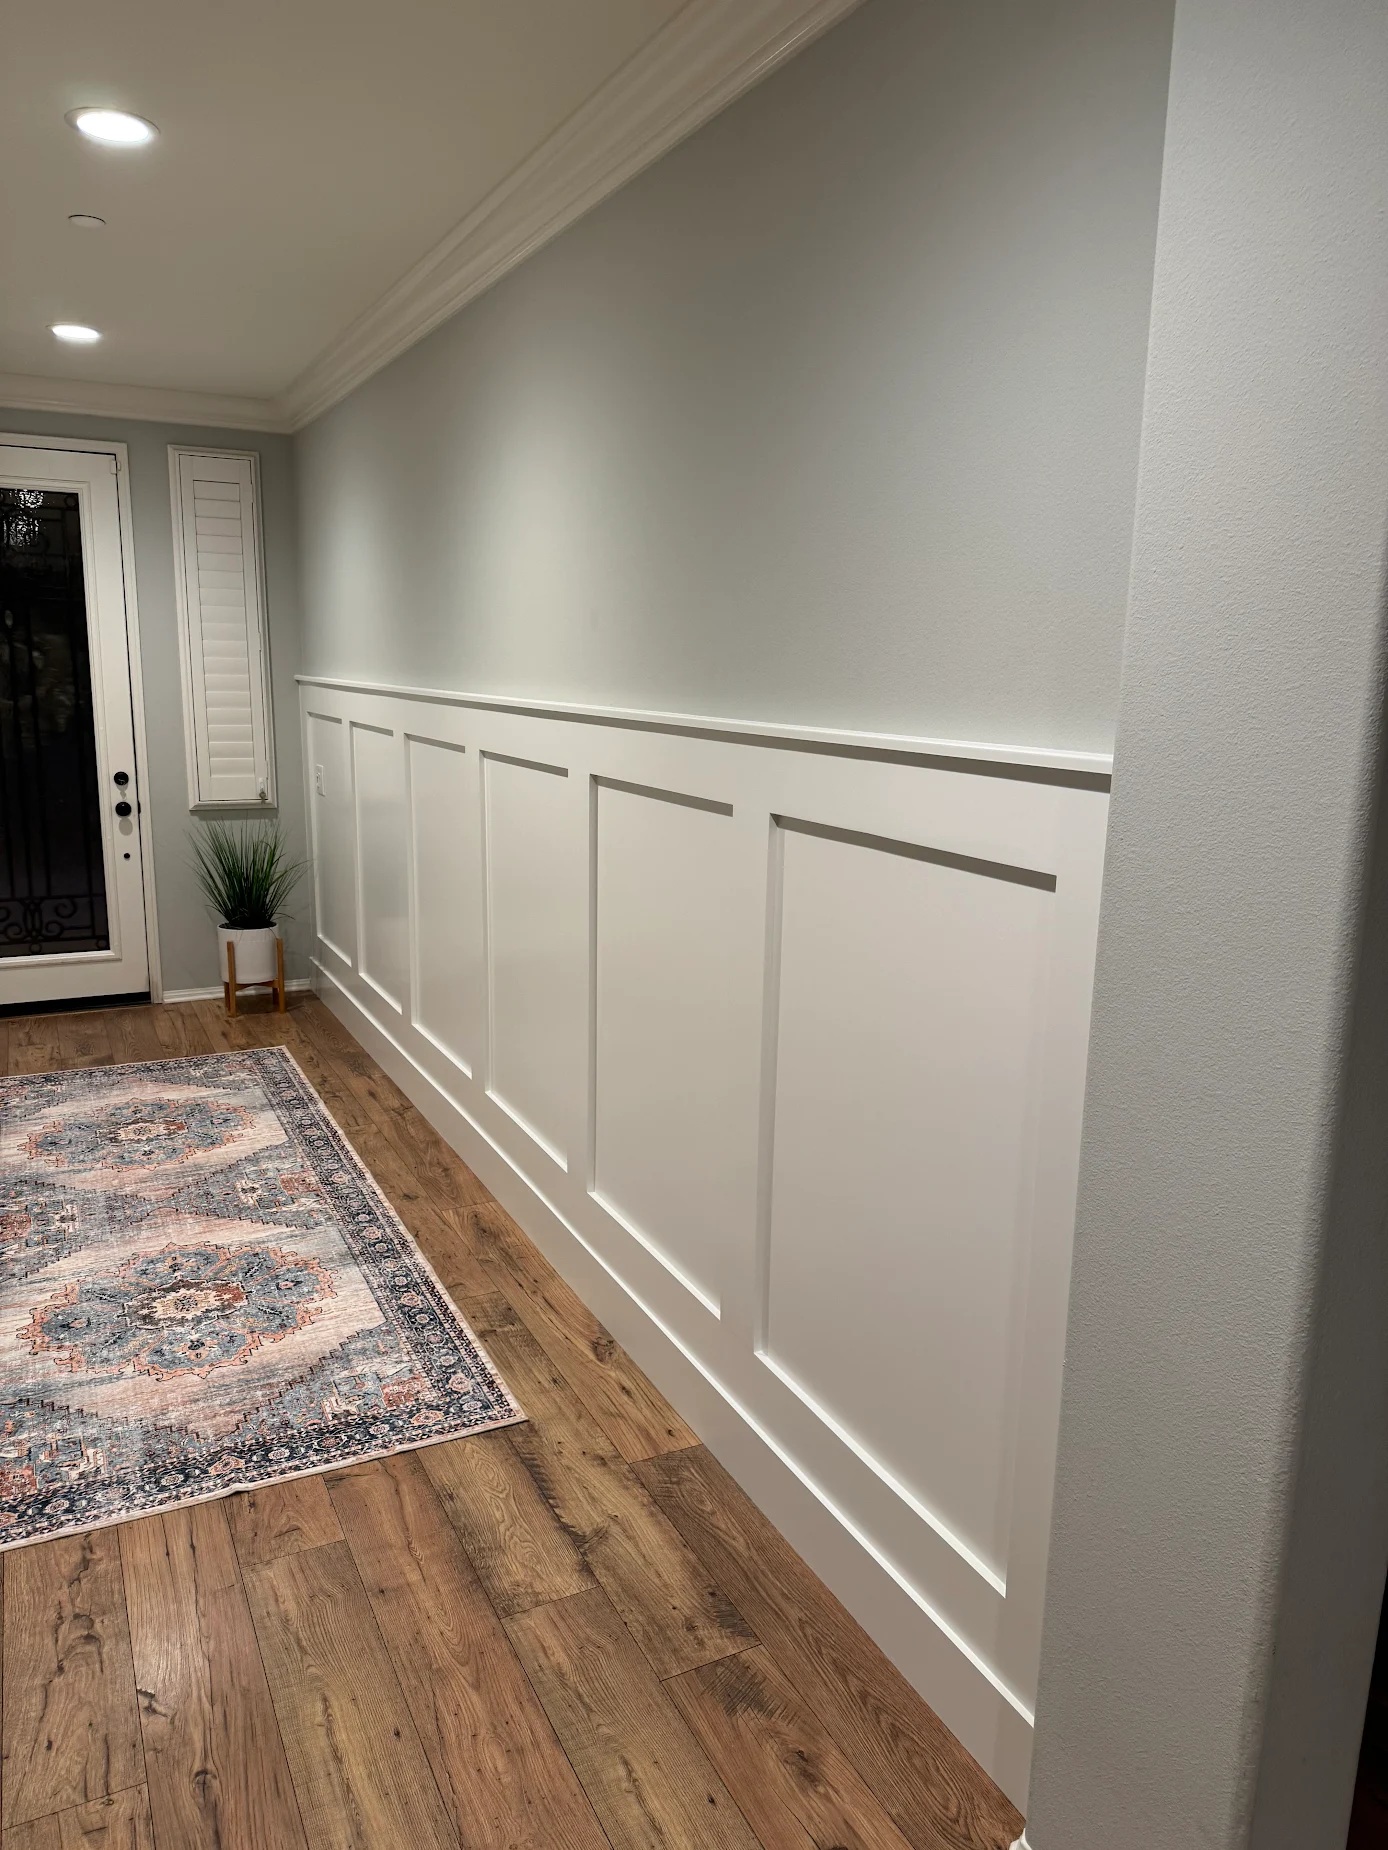
The Gypsy Canyon project required a second round of Bondo work after the first paint pass. The scarf joints — four of them on the long wall — were reading under semi-gloss light conditions despite being correctly filled the first time. Brian had the joints re-sanded, re-Bondo'd, re-primed, and repainted in satin. That is not a failure of the product. That is a failure of the original sheen specification under specific light conditions — and the right response to it.
Step 4: Caulk — Where It Belongs and Where It Does Not
Paintable caulk has one job in a wainscoting installation: sealing the transition where the cap rail meets the wall above. That gap, which exists because no wall is perfectly flat, needs to be sealed for paint to flow smoothly across the transition.
Caulk does not belong in panel joints. It does not belong filling nail holes. It does not belong at rail-to-stile connections. Every one of those applications produces a result that is inferior to Bondo — softer, less flat, more visible under paint.
Use DAP Alex Plus or equivalent paintable acrylic latex caulk at the cap-to-wall and baseboard-to-floor transitions. Apply with a caulk gun, tool with a damp finger, and allow to cure per manufacturer instructions before painting. In Inland Empire summer heat, water-based caulk can skin over quickly — work in manageable sections rather than running a full bead across a long wall and then tooling it.
Step 5: Topcoat and Sheen Selection
Sherwin-Williams Emerald Urethane Trim Enamel. Two coats. Applied with a quality foam roller for large flat surfaces and a 2.5-inch angled brush for detail work at joints and edges. Allow full cure between coats per label instructions — in the Inland Empire summer, this may be shorter than coastal applications because heat accelerates cure time.
Sheen selection deserves more attention than it gets on most projects.
Should Wainscoting Be Satin or Semi-Gloss?
Satin. The Gypsy Canyon project is a documented case study in why. The entry corridor had natural light coming from the front door and sidelights, hitting the wall at a low angle in the morning and at a cross-angle in the afternoon. Semi-gloss amplified every surface variation — the scarf joints across four horizontal members were visible despite being correctly made and filled. Switching to satin eliminated the problem without sacrificing durability.
Semi-gloss has one genuine advantage: marginally easier cleaning. In a high-traffic space where the wall surface is regularly wiped down, semi-gloss provides a slightly harder, more washable film. Satin is also washable — Emerald Urethane Trim Enamel in satin holds up to cleaning with mild household cleaners without dulling. For most entry and hallway applications in Inland Empire homes, satin is the right answer.
The one exception: a hallway with no natural light and purely artificial lighting directed away from the wall surface. In that environment, semi-gloss reads as rich rather than revealing. Assess the actual light conditions in the specific room before specifying sheen.
The Complete Finish System: Summary Table
| Step | Product / Approach | Why It Matters |
| MDF edge sealing | Shellac-based primer (Zinsser BIN) | Seals absorbent edges before water-based products contact MDF |
| Full assembly primer | Oil-based or high-build alkyd primer | Penetrates wood grain, reveals surface deficiencies, creates uniform base |
| Joint filler | Bondo auto body filler | Cures rigid, sands flat, holds paint without a profile |
| Transition caulk | Paintable acrylic latex caulk | Seals cap-to-wall and baseboard-to-floor gaps only |
| Topcoat — two coats | Sherwin-Williams Emerald Urethane Trim Enamel | Hardest water-based trim finish, levels well, holds up in heat |
| Sheen | Satin — in most Inland Empire applications | Conceals surface variation under raking light while maintaining durability |
Why the Inland Empire Climate Changes the Calculation
Southern California's inland communities run significantly hotter and drier than coastal markets. Menifee, Murrieta, and Temecula average summer highs above 95 degrees with low relative humidity during the heating season. That climate affects paint performance in two ways.
First, water-based products in high heat cure faster. Application windows are shorter. Brush marks can set before leveling is complete if ambient temperature is too high. Brian schedules paint work for early morning during summer months — lower ambient temperature, slower cure, better leveling.
Second, wood movement in low humidity is more aggressive than coastal markets. Pine rails and stiles will shrink slightly during the dry season. Joints that were tight at installation can show hairline movement in the heating season. A rigid, fully cured Bondo fill handles this better than latex caulk, which will compress and stretch with movement — visibly, over time.
Emerald Urethane Trim Enamel handles both of these conditions well. Its urethane-modified alkyd formula is more flexible than a standard alkyd while maintaining a harder cure than latex. For the Inland Empire specifically, it is the right product for the environment.
See This In Action — The Gypsy Canyon Project, Menifee, CA
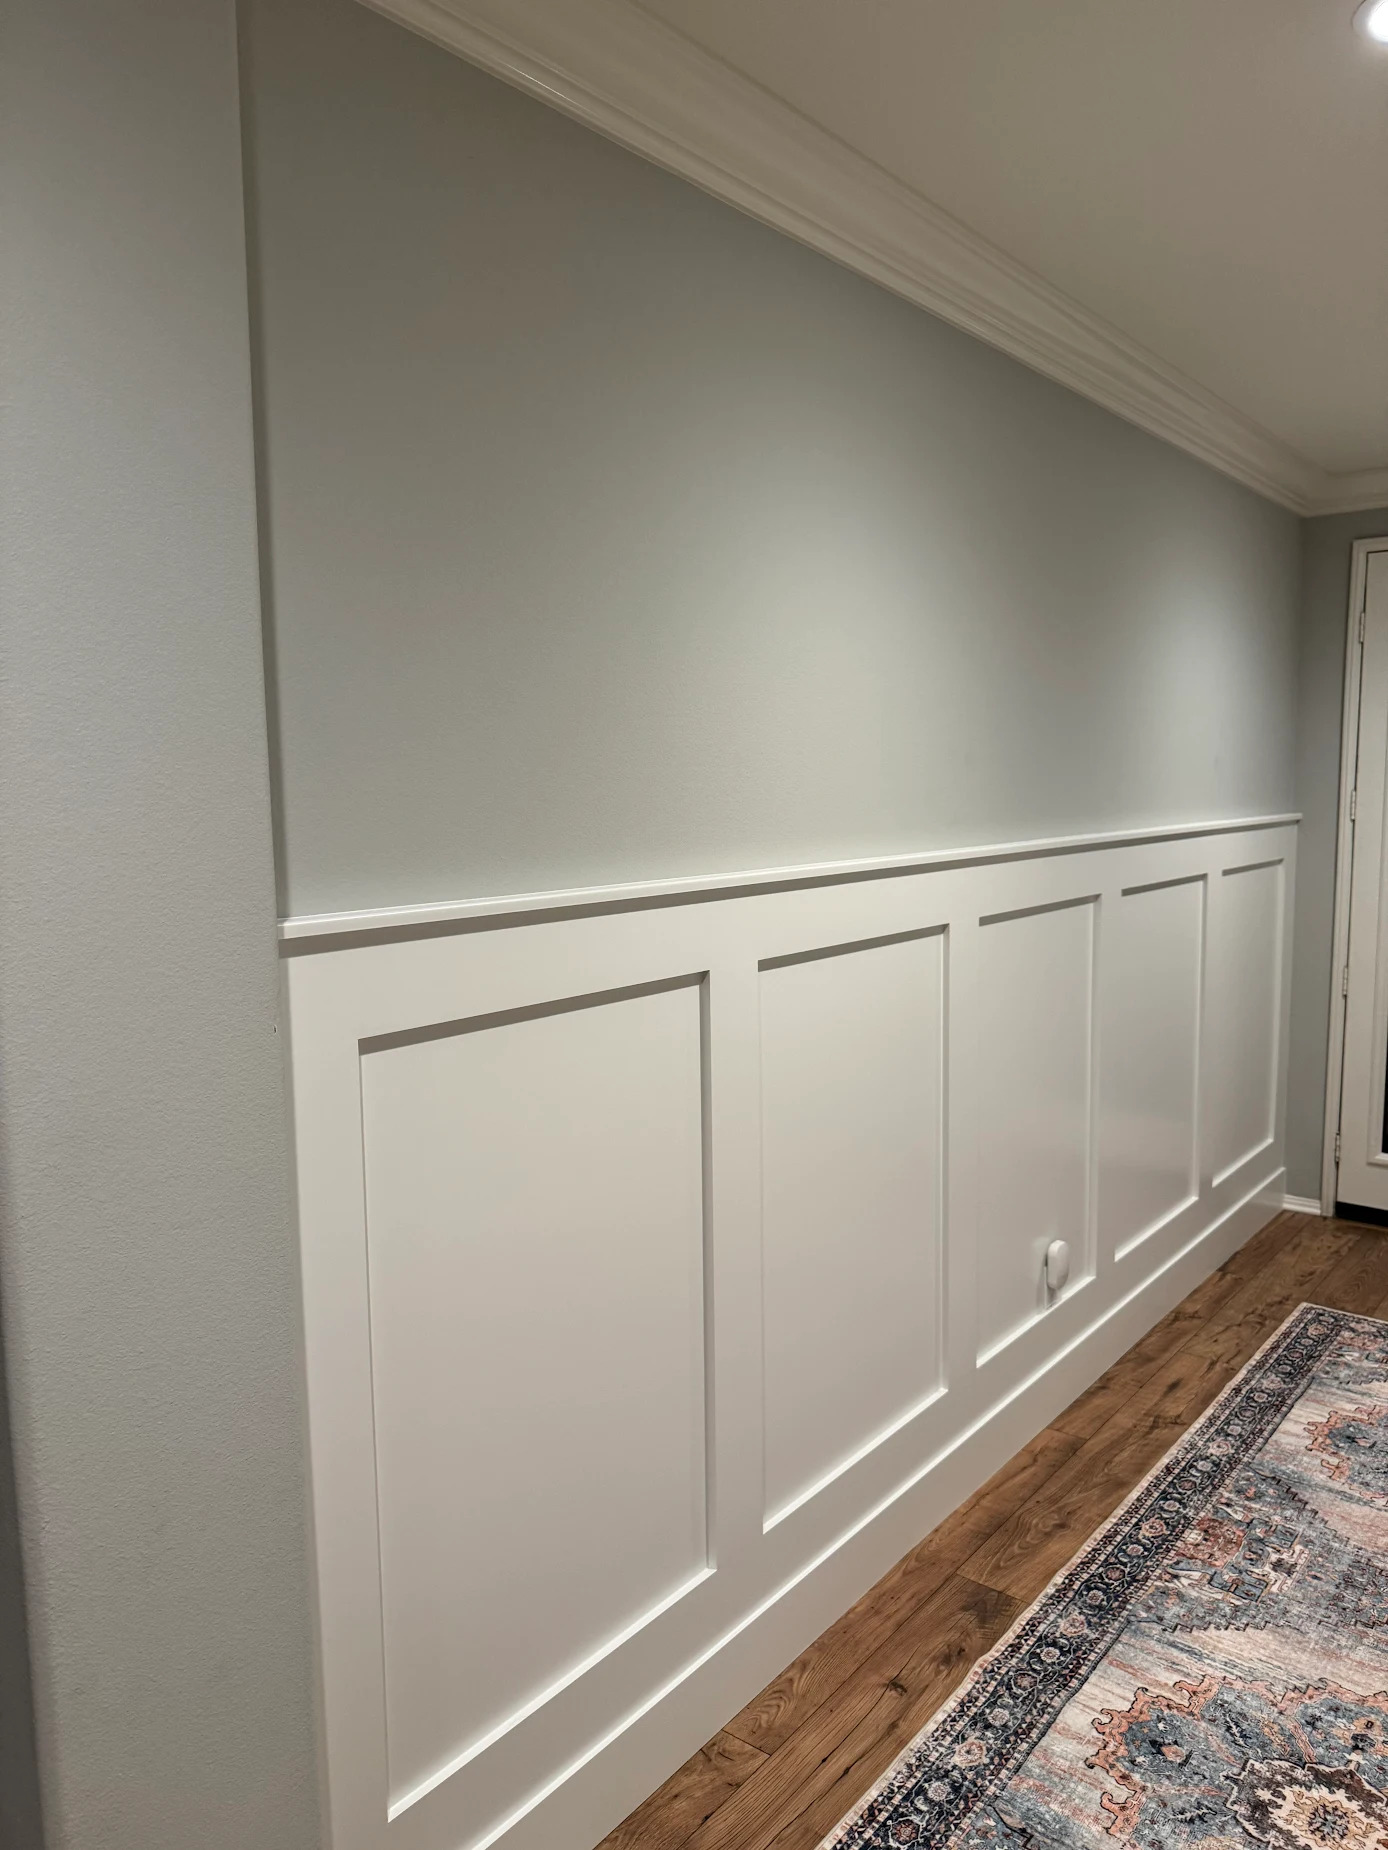
The Gypsy Canyon project is the clearest illustration of what happens when sheen is specified without assessing the room's light conditions — and what happens when a contractor catches it and fixes it proactively. Thirty-four linear feet of entry hallway, semi-gloss topcoat on the first pass, four scarf joints reading across the long wall under morning light from the sidelights. Brian made the call: re-prep, re-Bondo, repaint in satin. The second pass was invisible. That is the system working the way it should — not because nothing went wrong, but because the standard was held.
What the finish system on this project included:
-
Shellac primer on all MDF panel edges before shop assembly
-
Oil-based primer on full panel assembly after fabrication
-
Bondo body filler at all rail, stile, and scarf joint connections — two rounds on scarf joints
-
Paintable caulk at cap-to-wall transition only
-
Sherwin-Williams Emerald Urethane Trim Enamel, Pure White, Satin — final specified sheen
Read it here: Full project breakdown — photos, investment details, construction process, and the complete paint story
Maintenance: Keeping Wainscoting Looking Right
A properly finished wainscoting installation with Emerald Urethane requires minimal maintenance. The hard-cure film resists everyday contact in entry and hallway applications. Here is what to do when maintenance is needed:
-
Cleaning: damp cloth with mild household cleaner. Avoid abrasive scrubbers. The urethane-modified formula is specifically designed to resist cleaning without dulling.
-
Touch-up paint: keep a quart of the original product labeled with the project details. Touch-up with the same product, same sheen, applied with a quality brush. Feather the edges to blend with the surrounding film.
-
Joint hairline repair: if a joint develops a hairline crack over time — most common in the first heating season — clean the area, apply a thin pass of Bondo, sand flush, spot prime, and touch up with the topcoat. This is a 30-minute repair.
-
Do not repaint with a different product or sheen: mixing paint films on the same surface creates visible patches under raking light. If a repaint is needed beyond touch-up, use the same product throughout.
Holland & Sons Angle
The Gypsy Canyon project used approximately two quarts of Emerald Urethane Trim Enamel across 34 linear feet of entry corridor — two coats on pine, MDF, cap, and baseboard. The label says two-hour recoat time. In Menifee in July, the first coat was dry to the touch in 45 minutes. Brian waited the full two hours anyway because the label is written for 77 degrees and the shop was not 77 degrees that day. Patience in the paint phase produces a flat, clean film. Rushing it produces brush drag marks that are visible forever. His sons were on both paint days. That patience is not a tip — it is part of how the work gets done.
Frequently Asked Questions
What is the best paint for wainscoting?
Sherwin-Williams Emerald Urethane Trim Enamel is the best topcoat for painted wainscoting in the Inland Empire. It is a urethane-modified alkyd formula that cures harder than standard latex, levels without brush drag, and holds up to cleaning in high-traffic spaces. It is available in satin and semi-gloss sheens.
Should wainscoting be satin or semi-gloss?
Satin is the right answer for most Inland Empire entry and hallway applications. Semi-gloss amplifies surface variation under raking light — scarf joints, nail holes, and minor imperfections in the panel surface read more clearly under semi-gloss than satin. Satin provides the same durability and washability without broadcasting every surface detail. Assess the specific room's light conditions before specifying sheen.
What filler should I use for wainscoting joints?
Bondo auto body filler — not latex caulk, not spackle. Bondo cures rigid and sands flat to a surface that takes paint the same way as the surrounding wood. Latex caulk stays flexible, does not sand flat, and reads as a soft line under raking light. Use caulk only at the cap-to-wall and baseboard-to-floor transitions where flexibility is needed to accommodate minor movement.
Why do I need to prime MDF before painting?
MDF edges and end grain are highly absorbent. Water-based primer applied directly to unsealed MDF edges raises the fiber, creating a rough surface that requires repeated sanding and re-priming. The solution is shellac-based primer — Zinsser BIN is the most common product — applied to all MDF edges before any water-based product contacts the assembly. Shellac seals the fiber in one coat and allows water-based topcoats to be applied over it without absorption issues.
How many coats of paint does wainscoting need?
Two finish coats of topcoat over properly primed and filled surfaces. The primer coat reveals any remaining surface deficiencies — improperly filled joints, raised grain, inadequate edge sealing — and those are addressed before the first topcoat is applied. Rushing to topcoat without addressing what the primer reveals produces a finish that looks good on the first day and shows its problems within a year.
How do I fix paint issues on wainscoting?
For surface defects visible after painting — joint lines, raised grain, brush marks — sand the affected area with 220-grit, spot prime, and recoat with the topcoat. For sheen inconsistency, repaint the affected wall section with the original product in the original sheen rather than spot touching. For joint cracks that appear over time, clean the area, apply Bondo, sand flush, spot prime, and touch up.
Does paint choice affect wainscoting durability in hot climates?
Yes. In the Inland Empire, summer temperatures above 95 degrees with low humidity stress standard latex paint films more than coastal climates. Emerald Urethane Trim Enamel's urethane-modified alkyd formula maintains film integrity in heat better than standard latex. It also handles the seasonal humidity cycles — low in summer, slightly higher in winter — without the flexibility issues that can cause standard latex to peel or crack at joints over time.
Ready to Talk About Your Project?
Fill out the contact form at hsconstruct.com/contact, describe your project, and upload any inspiration photos. Brian will come out, assess the specific room conditions, and specify a paint system that is right for your walls.
Holland & Sons serves Menifee, Murrieta, Temecula, Perris, Riverside, and the greater Inland Empire.
Find us on Facebook and Instagram for project photos from recent Inland Empire installations.
951-338-8058 | brian@hsconstruct.com | hsconstruct.com | CSLB #1123738
More Than Just Wainscoting
Wainscoting is one of the most satisfying projects we do — the before and after is immediate and impossible to miss. But it is one chapter in a much longer story. Brian and his sons have been finish carpenters since 1991, which means every room in your home is fair game.
If your space needs more than wainscoting, here is what else we build:
-
Kitchen and bathroom remodels — full custom cabinetry, tile work, and finish carpentry from demo to done
-
Coffered ceilings — grid beam systems that add architectural depth to any room, sized and proportioned to the space
-
Wainscoting and wall paneling — classic raised panel, flat panel, board-and-batten, and shiplap applications
-
Reclaimed wood accents — feature walls, fireplace surrounds, and detail work using salvaged material with real character
-
Beam wraps — hollow wood wraps that give exposed beams the look of solid timber without the structural engineering
-
Crown molding, baseboards, and trim carpentry — the details that make a house feel finished, from a single room to a whole home
-
Cased openings and interior door replacements — clean transitions between spaces that most contractors overlook
-
Custom built-in entertainment walls and bookshelves — designed by hand, built in the shop, installed to last
Wood, proportion, and rooms that feel right — that is what we do.
About the Author
Brian Holland is the owner and lead carpenter of Holland & Sons Construction, a family-run finish carpentry and general contracting company serving Riverside County and the Inland Empire since 1991. He entered the trade at 17, learned on the job, and has spent 35 years building the kind of work that makes rooms feel right — often before a homeowner can articulate why. His sons now apprentice alongside him on every project. Holland & Sons is based in Perris, CA and licensed by the CSLB (#1123738).
Related project
This guide is part of our wainscoting & paneling series.
Learn more about Wainscoting & PanelingHave a project in mind? Let's start a conversation.
Tell us what you are thinking about and we will give you a straight answer about scope, timeline, and investment.
Start a Conversation