Board and Batten Over Textured Walls vs. Smooth Backing: Which Is Right for an Inland Empire Home?
By Brian Holland, Owner and Lead Carpenter, Holland & Sons Construction · Carpenter since 1991 · CSLB #1123738 · NARI Member · NAHB Member
Published
Quick Answer
Holland & Sons Construction builds board and batten and grid paneling both ways in the Inland Empire: straight over the existing textured wall, or over a smooth backer. Over texture suits tall walls seen from a distance and holds the investment down. Smooth backing suits walls seen up close or in strong side light, and on our Live Oak Project it would have added an estimated $1,200 to $2,000.
Key Takeaways
-
Both methods are sound; they produce two different looks
-
Texture left in the panels works on tall walls seen from across a room
-
Smooth backing is worth it on walls seen up close, in strong side light, or with a glossy finish
-
Decide before the job starts, because backing goes on first
-
Brian Holland has been a carpenter since 1991; every job carries a written workmanship warranty
-
See this in action: the Live Oak Project in Jurupa Valley, hsconstruct.com/blog/live-oak-stairwell-paneling-jurupa-valley
For most tall walls, go over the texture. For a wall you will sit next to, add smooth backing. That is the short version, and the rest of this post is how to tell which wall you have.
Nearly every home we work in from Jurupa Valley to Menifee has textured drywall. So the question comes up on almost every board and batten or grid wall: do the boards go straight on the wall, or does something smooth go behind them first?
Most of what you will read online says you have to smooth the wall. You do not. You have to choose, and you have to choose before the first board goes up.
Board and Batten Over Texture or Over Smooth Backing: The Direct Answer
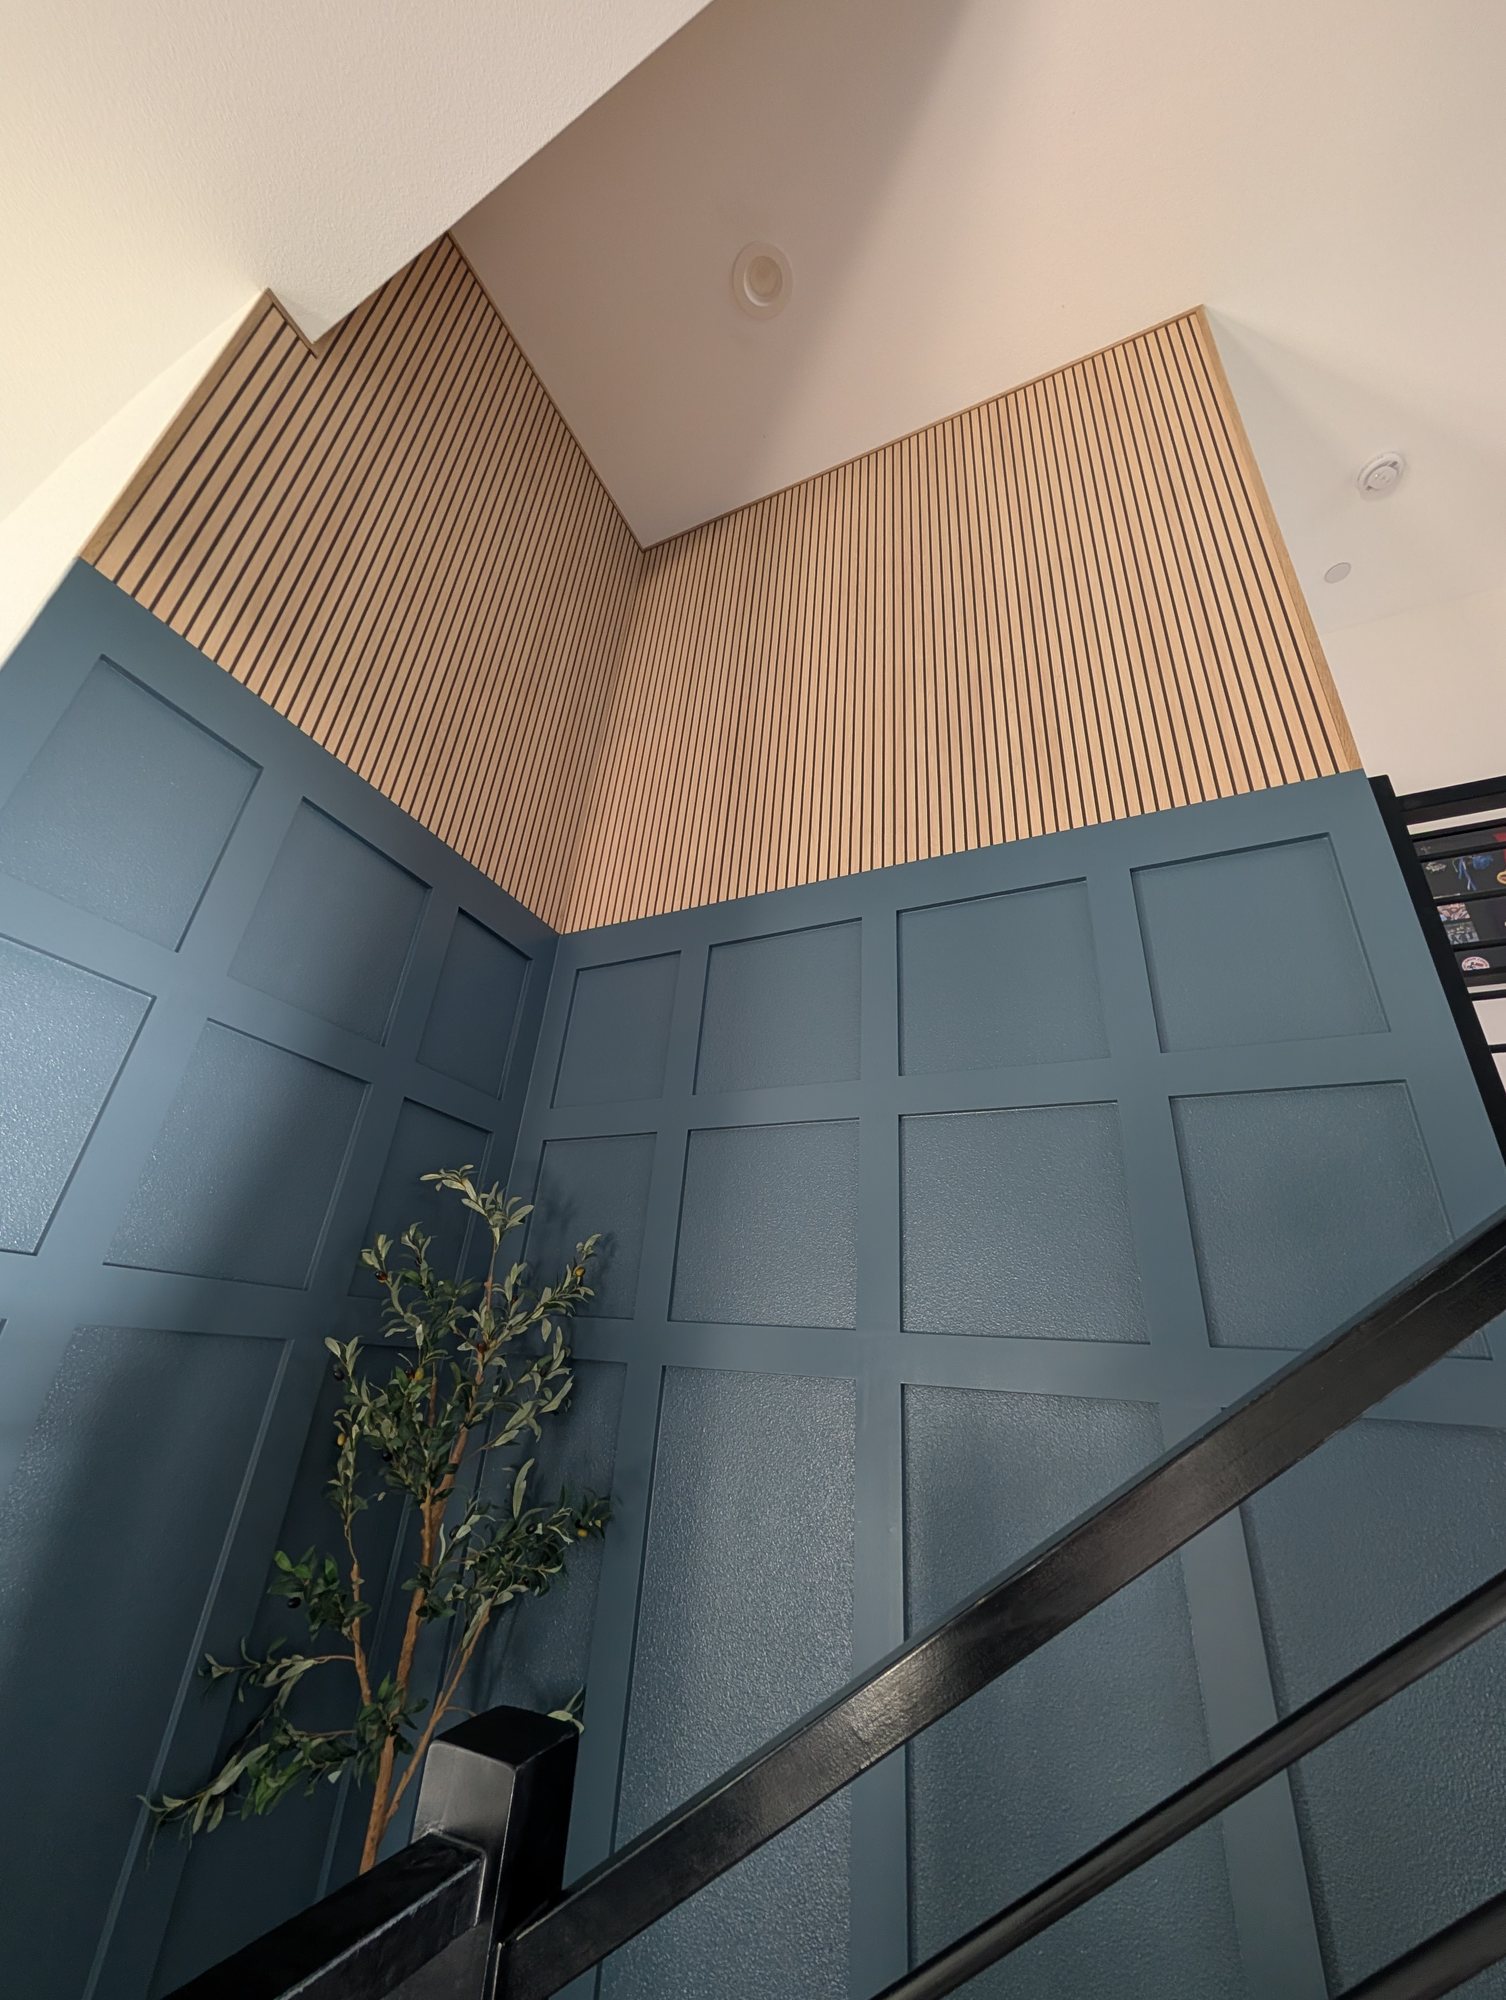
Go over the existing texture when the wall is tall, seen from a distance, and painted in a satin or lower sheen. A two-story stair wall is the best example. The grid does the work, the texture becomes background, and the investment stays down.
Add smooth backing when the wall is at eye level and arm's length, gets strong light from the side, has heavy texture, or is getting a glossy finish. Dining rooms, bedroom headboard walls, and hallways are the usual cases.
These are judgment calls, not fixed rules. Light, sheen, texture depth, and how crisp a finish you expect are what decide it, and the sections below show how to check each one on your own wall.
Side-by-Side Comparison
| Factor | Over Existing Texture | Over Smooth Backing |
|---|---|---|
| Investment range | Baseline | On Live Oak, an estimated $1,200–$2,000 more |
| Installation complexity | Boards glued and nailed to the wall; each board has to stay flat on its own | Sheets go up first; seams must land under boards; trim and outlets adjusted for thickness |
| Maintenance | Texture holds a little more dust; wipes down fine with a trim enamel | Flat panels wipe clean easily |
| Longevity | Depends on glue bond and caulk lines | Depends on the same, plus sheet seams staying hidden |
| Performance in dry inland climates | Fewer joints to move | More joints; seams need to be planned under boards |
| Best home style | Tall entries, stairwells, casual rooms | Formal rooms, traditional paneling, glossy finishes |
| Resale appeal | Reads as a finished accent wall | Reads as built-in millwork |
| Best for | Big walls seen from across the room | Walls seen up close or in raking light |
Why This Comparison Matters
This one decision changes three things at once: how the wall looks, what it takes to build, and what material the boards should be.
Without a backer, the boards are glued straight to a wall that is not perfectly flat. They have to stay flat on their own. That is why the grid on our Live Oak Project is primed pine, which is more rigid than MDF. With a backer, the sheet gives you a flat surface and the material question opens up. We keep the wood-selection details in one place, in MDF vs. pine trim, so this post stays on the surface behind the boards.
Generic advice tends to treat texture as a defect. In the Inland Empire it is just the wall. Orange peel and light knockdown are the standard finish in tract homes and custom homes alike, and a grid over that texture is a legitimate finished look when the carpentry and paint are clean.
What Changes the Look: Light, Sheen, and Distance
-
Light. Light that rakes across a wall from a window at one end throws a small shadow off every bump. Light that hits the wall straight on flattens it. Look at your wall at the time of day you use the room.
-
Sheen. The glossier the paint, the more the texture shows. Trim enamels such as Sherwin-Williams Emerald Urethane Trim Enamel come in satin, semi-gloss, and gloss. Over texture, satin is the forgiving one.
-
Distance. From twelve feet away, light texture disappears into the color. From two feet, you see it. A stair wall is mostly seen from far away. A banquette wall is not.
-
Texture weight. Light orange peel nearly vanishes under one color. Heavy knockdown or hand-troweled texture stays visible at any distance.
Other Ways to Get There
| Option | What It Solves | Best For |
|---|---|---|
| Skim coat the wall | Flattens texture with no added thickness | Walls where baseboard, casing, and outlets cannot move out |
| Shop-built assembled panels | Flat panels and frames made as one piece | Formal wainscoting; see picture frame molding vs. assembled panels |
| Slat panels over the wall | Covers the texture completely in that area | Upper walls and feature sections |
Skim coating is real work. A 2023 Westlake Royal how-to describes rolling on thinned joint compound, smoothing it, and repeating for two to three coats with at least eight hours of drying between each.
Your Questions, Answered
Does a backer change anything besides the look? Yes. It adds thickness. Baseboards, door casings, and outlet covers all have to account for it, and the seams between sheets have to be planned so every one lands under a board.
Can I add smooth backing later? Not without taking the grid off. This is a before-you-start decision, and it is on the list in what to decide before the first board goes up.
Does texture inside the panels look unfinished? Not when the joints are tight and the caulk lines are straight. It looks different from smooth panels. See it in person, or in close-up photos, before you decide.
How to Decide
-
Stand where people will usually stand. If that is more than about ten feet from the wall, texture is fine.
-
Check the light at the time of day you use the room. Strong side light points to smooth backing.
-
Pick the sheen. Semi-gloss or gloss points to smooth backing.
-
Run your hand over the wall. Heavy texture points to smooth backing.
-
Look at the trim around the wall. If baseboard and casings are thin, added thickness will need a plan.
If two or more of those point to smooth backing, budget for it. If none do, put that money somewhere you will see it. For how this choice sits inside a whole stairwell number, see what a paneled staircase wall runs.
See This In Action: The Live Oak Project
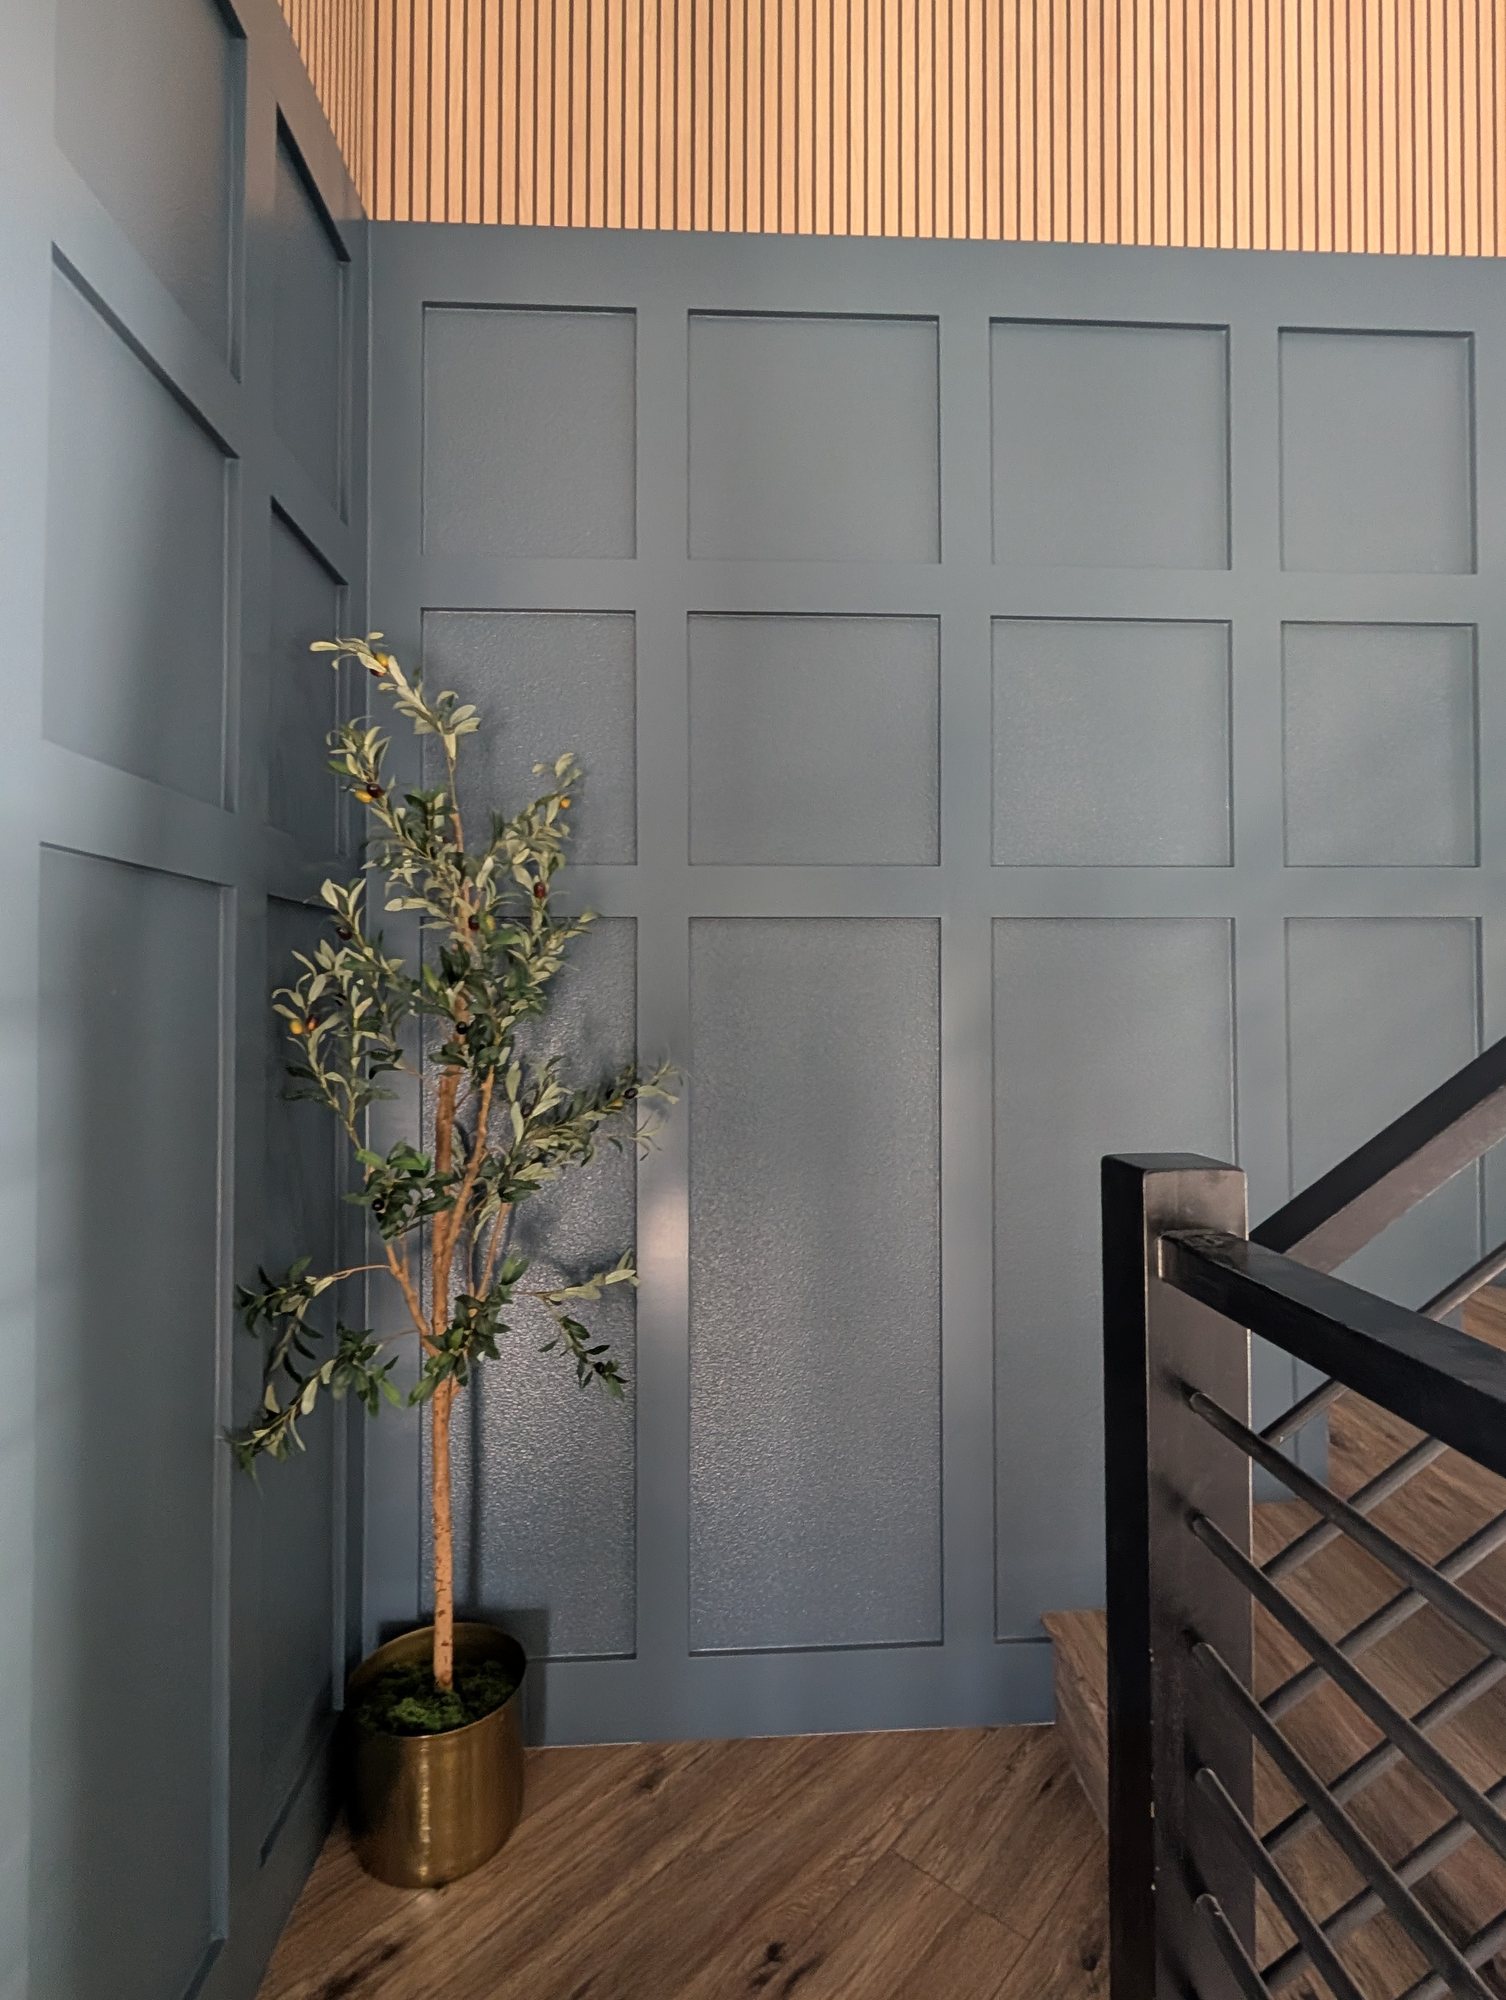
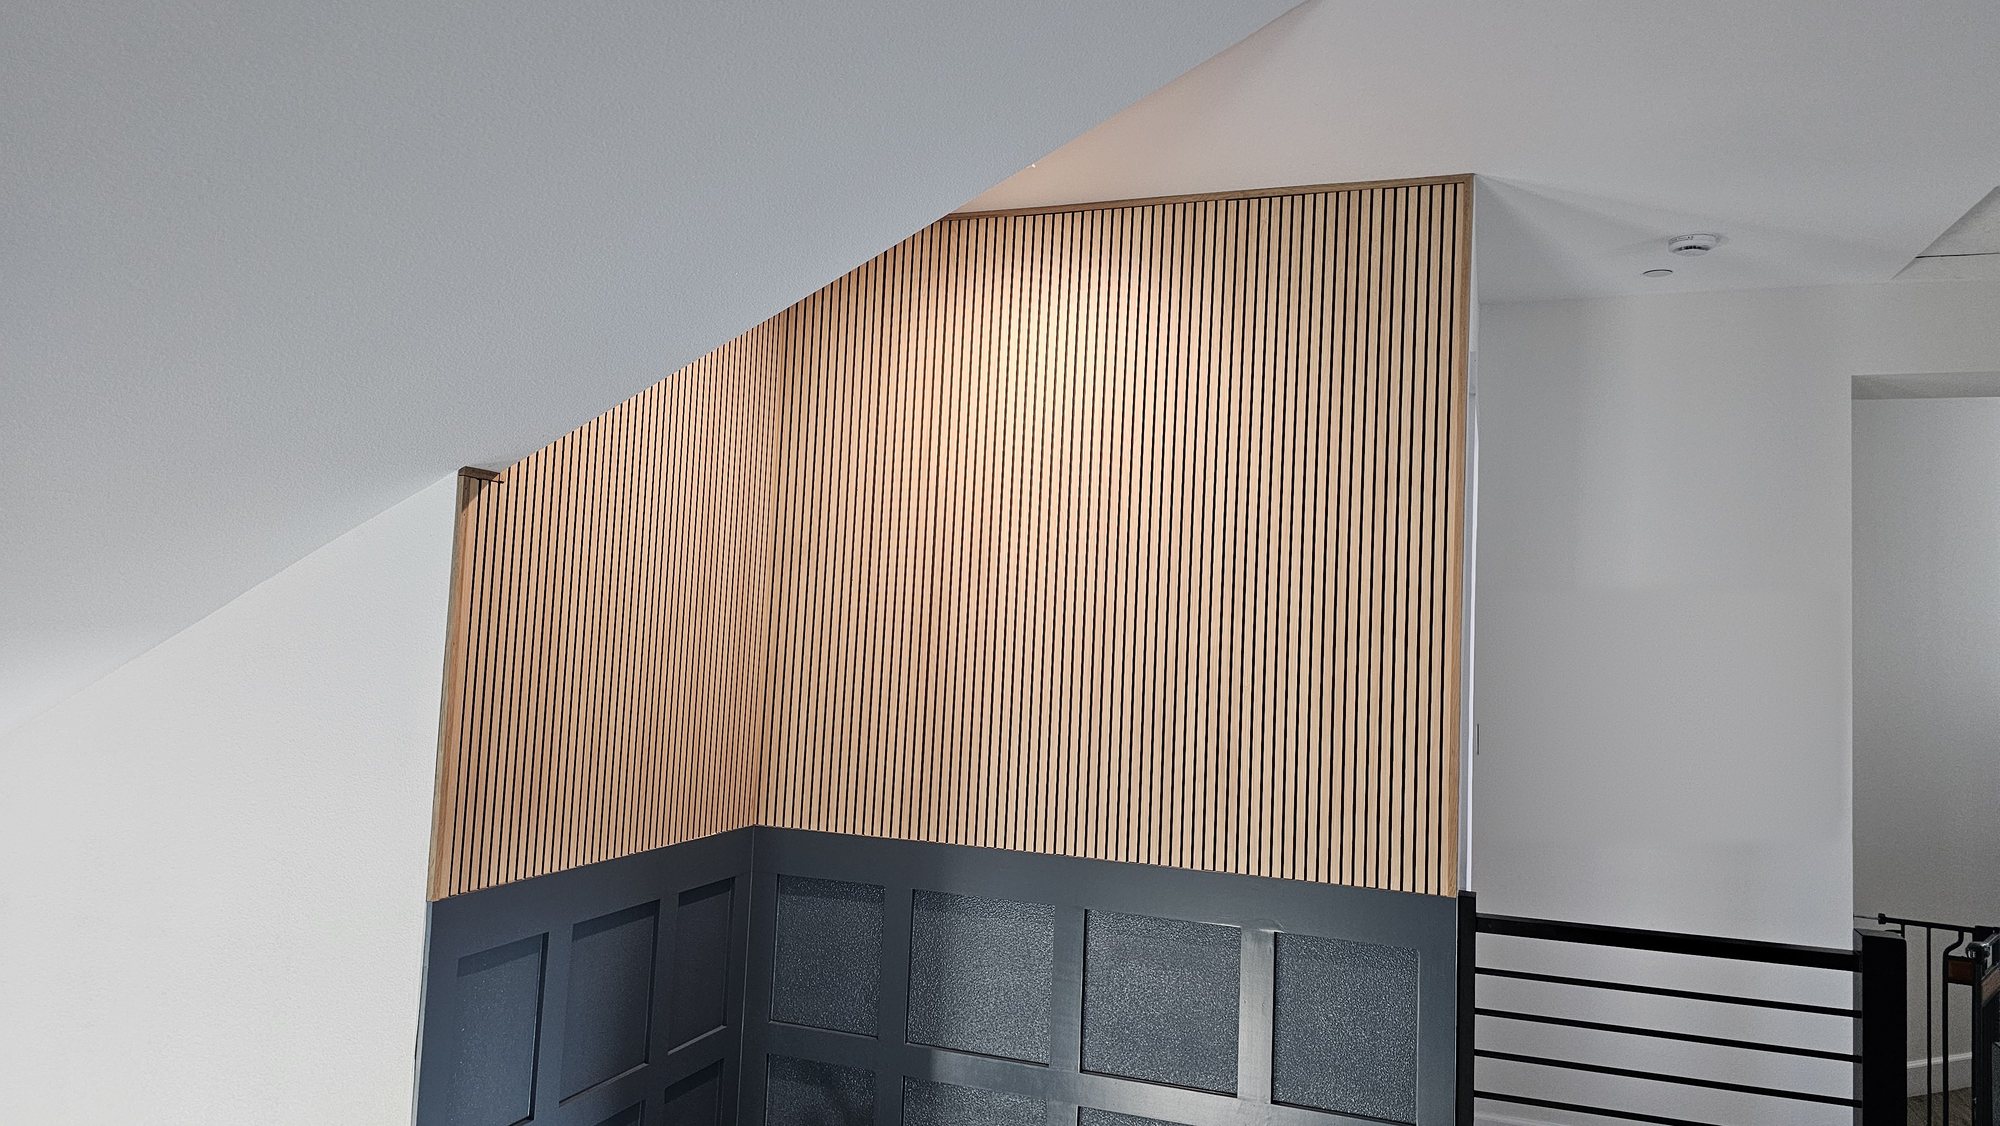
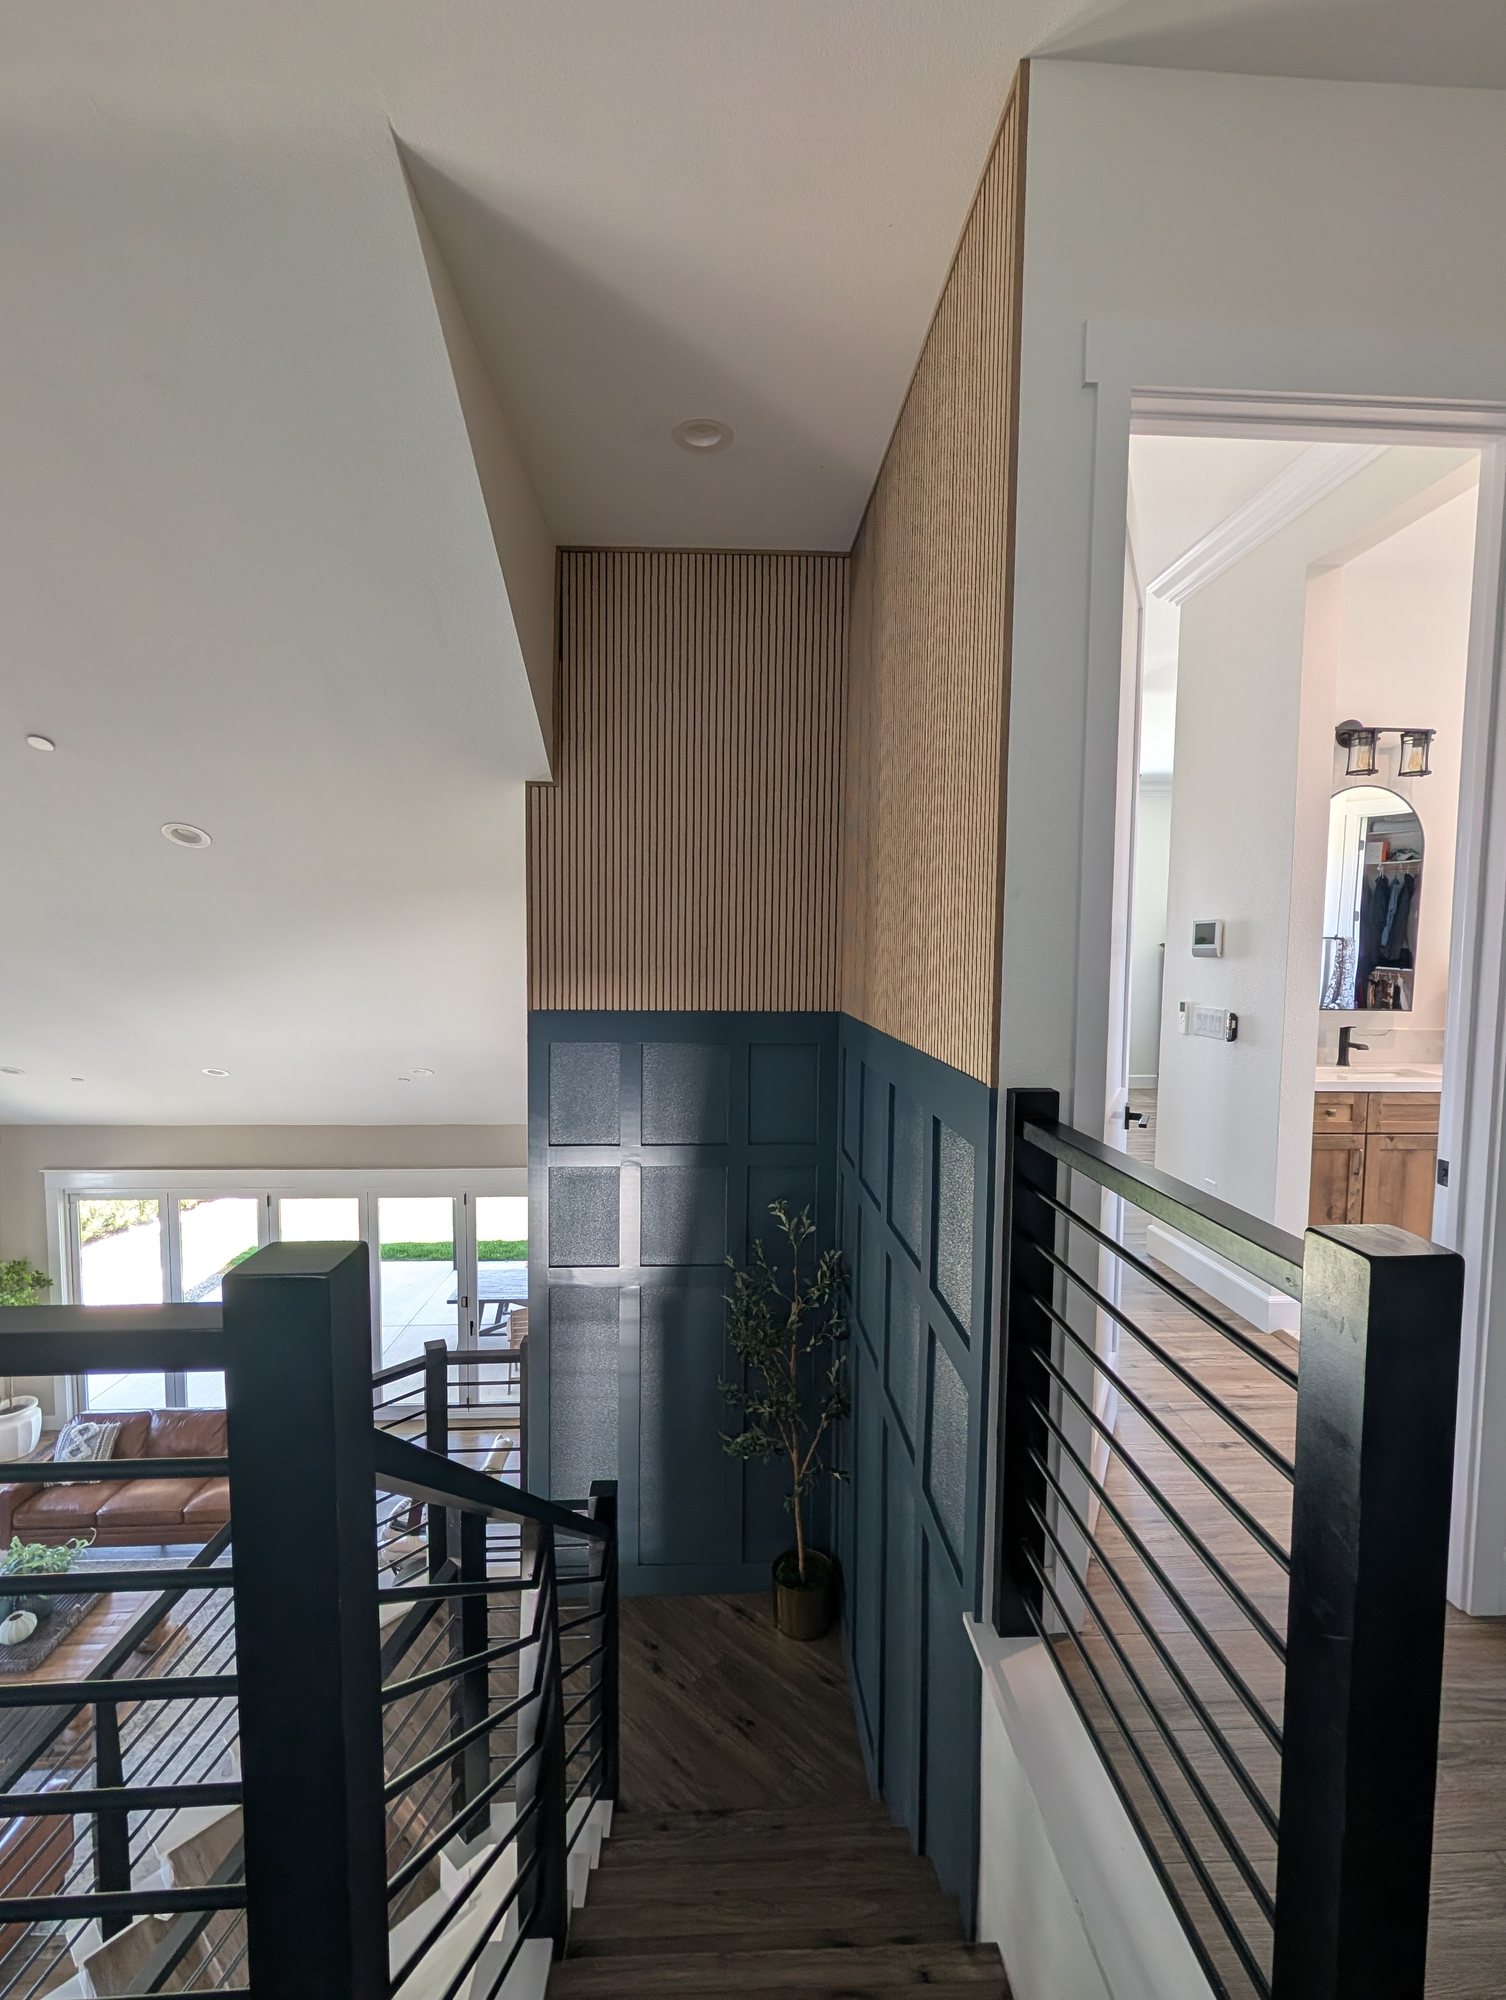
Every square in the Live Oak grid has the original wall behind it, and from the front door you would never think about it. The rails and stiles are primed pine, glued at every joint and glued to the wall, with nothing between the boards and the drywall.
What we used on this project:
-
Primed pine rails and stiles, chosen because they stay flat without a backer
-
The existing textured wall as the panel field, painted to match the grid
-
Sherwin-Williams Emerald Urethane Trim Enamel in a custom color
-
Glue at every joint and behind every board
The hub post has close-up photos before and after paint, the full investment breakdown, and the timeline: hsconstruct.com/blog/live-oak-stairwell-paneling-jurupa-valley
How Each Holds Up in the Inland Empire
Our summers are hot and dry, and houses move a little between a July afternoon and a January morning. Wherever two materials meet, that movement shows up first as a hairline in the caulk.
Over texture, the only joints are board to board and board to wall. Over a backer, there are sheet seams too, which is why they get hidden under boards. Either way, glue matters more than nails, and a flexible paintable caulk at every edge is what keeps the lines clean over time.
The Holland & Sons Angle
On Live Oak, the grid went straight on the wall. That was the right call for a two-story stairwell, and it kept an estimated $1,200 to $2,000 in the homeowners' pocket. But it put all the pressure on the boards. With no backer, any board that cups or lifts shows. So we used pine, glued every joint, and glued every board to the wall.
That is the part I care about with wainscoting and wall paneling. Neither method is the fancy one. Each asks for something different, and the job is knowing which.
It is also the question I want Wyatt and Waylon asking on every wall before they reach for material: where will people stand when they look at this?
Related Resources: Stairwell Wall Paneling Guide
This post is one part of a set built around one real stairwell in Jurupa Valley. Here is the rest of it.
-
Stairwell Wall Paneling in Jurupa Valley, CA: Shaker Grid Below, White Oak Slats Above (Live Oak Project), hsconstruct.com/blog/live-oak-stairwell-paneling-jurupa-valley: the full project, with photos, materials, timeline, and the complete investment breakdown
-
How Much Does It Cost to Panel a Staircase Wall in Jurupa Valley in 2026?: real ranges and what height and access do to them
-
Staircase Wall Paneling: What Goes Wrong and What to Decide Before the First Board Goes Up: the layout decisions to settle before anything gets cut
-
Do Acoustic Slat Wall Panels Really Reduce Echo?: what these panels do for sound and what they do not
-
How to Evaluate a Slat Wall Installation: a checklist for edges, seams, corners, and finish
Frequently Asked Questions
Can you do board and batten on textured walls?
Yes, you can install board and batten directly over textured walls, and plenty of finished projects are built that way. The boards get glued and nailed to the wall, the edges get caulked, and the texture stays visible inside each panel once everything is painted one color. Whether that suits your house depends on how heavy the texture is and how close people will stand to the wall. On a tall stair wall seen from across the entry, it works well. On a wall beside a dining table, many homeowners choose smooth backing.
Do you need a backer board for board and batten on orange peel walls?
You do not need a backer board for board and batten on orange peel walls, but you may want one. Orange peel is a light texture, and under a single paint color it reads as a soft surface more than a pattern. A thin smooth sheet behind the boards gives you flat panels that look like one built piece. The trade is added material, added labor, and a little added thickness at the baseboard, door casings, and outlets.
Does the wall texture showing inside the panels look unfinished?
Wall texture inside the panels does not look unfinished when the rest of the work is clean, but it does look different from smooth panels, and you should see it before you choose. Tight joints, straight caulk lines, and one consistent sheen make a textured panel field read as intentional. What draws the eye is contrast: a glossy finish, strong light across the wall, or heavy knockdown texture. If any of those describe your wall, smooth backing is the safer choice.
What can I put over my textured walls?
Over textured walls you can put paneling with the texture left as the panel field, paneling over a thin smooth backer, slat panels, or a skim coat of joint compound that flattens the wall before anything else goes on. Each one covers a different amount of the texture. A backer or slat panel hides it completely in that area. A grid alone hides only what sits under the boards.
How do you modernize textured walls without retexturing the whole house?
You modernize textured walls without retexturing the house by changing how one wall reads. A grid, a paneled section, or a slat wall gives the eye lines and shadow to follow, and the texture between them becomes background. That is why a single paneled wall in an entry or stairwell can change a home where every other wall is still orange peel.
Is orange peel wall texture outdated?
Orange peel wall texture is a matter of taste, and it is still the standard finish in most Inland Empire homes, including new ones. Some homeowners want smooth walls and some never think about it. If it bothers you, you do not have to redo the house. Decide wall by wall, starting with the ones you look at most.
Is it better to skim coat or use a backer board behind paneling?
A backer board is usually the more predictable way to get smooth panels behind a grid, and a skim coat is the choice when you want no added thickness. Skim coating means troweling thinned joint compound over the texture in layers. A 2023 Westlake Royal how-to says to expect two to three coats with at least eight hours of drying between each. A backer goes up in a day, but its seams have to land under a board.
Not Sure Which Wall You Have?
Send us a few photos and we can usually tell you. Go to hsconstruct.com/contact, fill out the form, describe the wall, and upload photos taken in daylight, including one close-up of the texture and any inspiration photos. We will set a time to see it in person and give you a number for both ways if you want to compare.
Want to see this advice applied to a real project? Here's the full breakdown: hsconstruct.com/blog/live-oak-stairwell-paneling-jurupa-valley
We work in Jurupa Valley, Eastvale, Norco, Corona, Riverside, Chino, Chino Hills, Ontario, Fontana, Rancho Cucamonga, and all across Riverside County, San Bernardino County, and the Inland Empire.
See more of our work on Facebook, Instagram, YouTube, and TikTok.
951-338-8058 | brian@hsconstruct.com | hsconstruct.com | CSLB #1123738
More Than Just Board and Batten
What goes behind the boards is a small decision that changes the whole wall. Board and Batten is one piece of what we do at Holland & Sons, and it's one chapter in a much longer story. Brian has been a finish carpenter since 1991, and his sons now build alongside him, which means every room in your home is fair game. If your space needs more than a grid on one wall, here's what else we build:
-
Kitchen and bathroom remodels: full custom cabinetry, tile work, and finish carpentry from demo to done
-
Custom and built-in cabinetry: designed for the room, built in the shop, installed to last
-
Media walls and entertainment walls: built-in TV walls with storage, lighting, and clean cable management
-
Fireplace walls: mantels, surrounds, and full-height paneling that make the fireplace the center of the room
-
Accent walls: paneling, slat walls, and feature walls that give one wall a job to do
-
Mudrooms: lockers, bench seating, cubbies, and hooks, built for the way your family comes through the door
-
Coffered ceilings: grid beam systems that add architectural depth to any room, sized and proportioned to the space
-
Wainscoting and wall paneling: classic raised panel, flat panel, board-and-batten, and shiplap applications
-
Reclaimed wood accents: feature walls, fireplace surrounds, and detail work using salvaged material with real character
-
Beam wraps: hollow wood wraps that give exposed beams the look of solid timber without the structural engineering
-
Crown molding, baseboards, and trim carpentry: the details that make a house feel finished, from a single room to a whole home
-
Cased openings and interior door replacements: clean transitions between spaces that most contractors overlook
Wood, proportion, and rooms that feel right. That's what we do. hsconstruct.com
This guide is part of our wainscoting & paneling series.
Learn more about Wainscoting & PanelingHave a project in mind? Let's start a conversation.
Tell us what you are thinking about and we will give you a straight answer about scope, timeline, and investment.
Start a Conversation