
What Goes Wrong With Mudroom Built-Ins in the Inland Empire (and How to Avoid It)
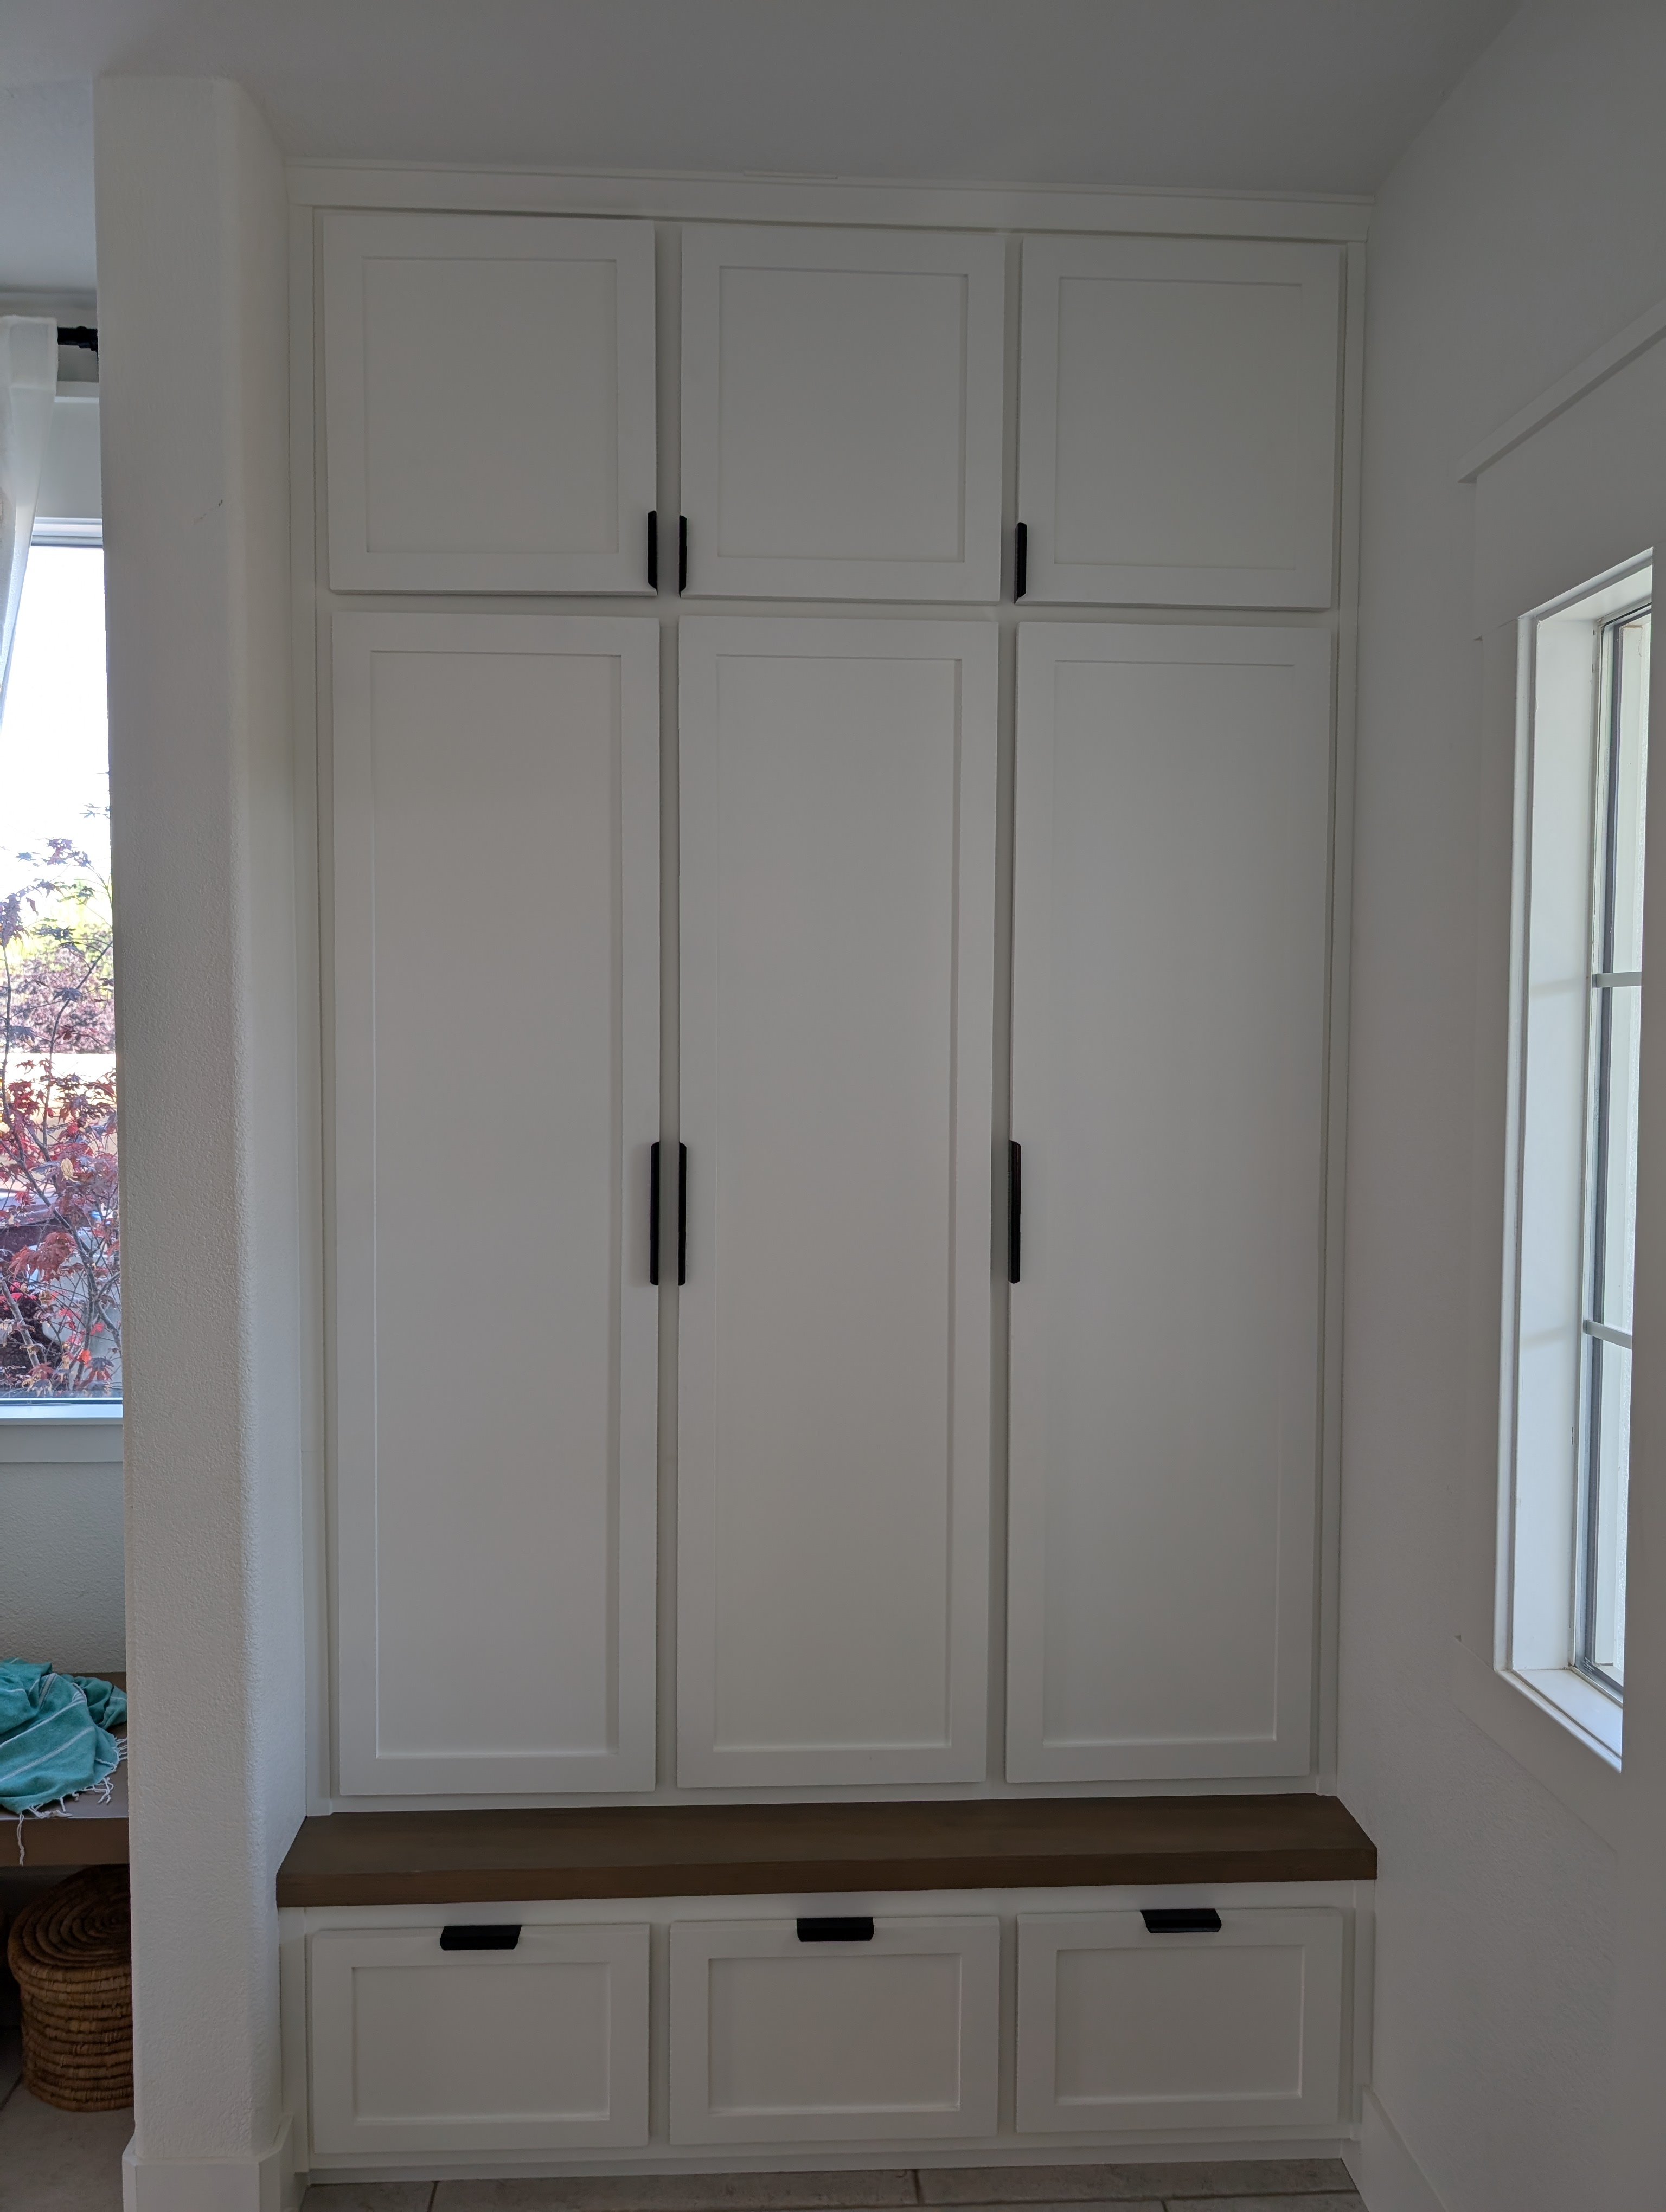
| Quick Answer: The three problems that sink a mudroom built-in in Menifee and the wider Inland Empire are burying wall access you’ll need later (like a plumbing cleanout), underbuilding the boxes for real household load, and stick-building the cabinet in place instead of in a shop. All three are invisible on day one and costly years later — and all three are planning decisions, which means they’re completely preventable before any wood is cut. |
Key Takeaways
• The biggest mudroom built-in mistakes are hidden-access burial, underbuilt boxes, and stick-building in place — all preventable in design.
• Mapping anything hidden in the walls (plumbing, electrical, panels) before fabrication is the single most important early decision.
• A mudroom built-in is usually non-structural finish carpentry and rarely needs a permit in Riverside County — confirm by scope.
• Void-free plywood boxes are what keep a unit from sagging under a busy household’s daily abuse.
• Holland & Sons has handled these exact problems in the field across Riverside County since 1991, including designing around a live plumbing cleanout.
Most homeowners planning a mudroom built-in aren’t worried about the part you can see. They’re worried about the part they can’t — will it block something in the wall, will it hold up, will it look bolted on, will it pass inspection. Those are the right things to worry about, and the honest answer is that every one of them is preventable. Not with luck. With planning.
After 35 years of finish carpentry across the Inland Empire, three problems come up again and again on built-ins like this. None of them show up on day one. All of them show up later — the first time a plumber needs access, the first time a loaded drawer racks the box, the first time the light catches a gap in a seam. The difference between a built-in that gives you grief and one that doesn’t is decided before a single board is cut.
This post walks through what actually goes wrong, what to decide early, and the specific mistakes we design out before the contract is signed. No fear-mongering. Just the field knowledge that removes the uncertainty.
The Most Common Problem, Stated Plainly
The single most common and most expensive mudroom mistake is building over wall access you’ll need later. Walls hide drain stacks, cleanouts, shutoffs, and junction boxes. Build a cabinet flush over one of those and you’ve created a problem that only surfaces the day a tradesperson needs in — and by then the fix means tearing apart a finished, paid-for unit.
It’s common because it’s invisible. A contractor focused only on the visible design never thinks to ask what’s behind the drywall. The prevention is simple and entirely upfront: identify every access point during design, then engineer the unit so you can still reach it. That’s a conversation, not a construction technique.
What You’re Actually Worried About — Addressed
Let’s name the real fears and take them one at a time.
"It’ll bury something in the wall I need later." Valid — and the reason we ask about hidden access before designing anything. Cleanouts, shutoffs, and panels get designed around, not over. On Rhapsody Ct., the cleanout in the divider wall shaped the entire drawer-box layout from the first sketch.
"It won’t hold up to my kids." Also valid, and entirely a materials-and-build question. Void-free plywood boxes, glued and screwed and dadoed, carry load and hold fasteners for decades. The Rhapsody Ct. unit weighs an estimated 500 to 600 pounds itself and still takes whatever the family piles on.
"I’ll need a permit and it’ll be a headache." Usually not. Non-structural finish carpentry typically doesn’t require a permit in Riverside County. The exception is when you move walls, relocate plumbing, or add circuits — which is exactly why designing around existing systems keeps a project simple.
"It’ll look like it doesn’t belong." A real risk if a contractor chases a trend instead of matching the home. Material, tone, and proportion are chosen to tie into the rest of the house — more on how material selection prevents these problems in our materials guide.
What Has to Be Decided Before Fabrication
A built-in is fabricated in a shop, so certain decisions have to be locked before boxes are cut. Change them after, and you’re paying to redo work. Here’s the sequence.
| Decision | Must Be Locked In Before Fabrication? |
| Hidden wall access (plumbing, electrical, panels) | Yes — it dictates the entire box layout, like the Rhapsody Ct. drawer design |
| Overall layout and dimensions | Yes — boxes are cut to these; changes mean re-cutting |
| Material and finish (paint vs. stain grade) | Yes — substrate and finishing method depend on it |
| Hardware (slides, hinges, pulls) | Yes — box and drawer dimensions are built around the hardware |
| Final paint touch-ups | No — handled on site after install |
| Baskets, bins, and styling | No — chosen anytime, even after completion |
The Questions Behind the Questions
Will a built-in really block my plumbing?
Only if no one plans for it. The risk is real — the divider wall between a bench and lockers is a classic spot for a drain stack and cleanout — but the solution is routine. You size the cabinetry so access stays reachable. On Rhapsody Ct., pulling the lower drawers lets a person fit head and shoulders into the cavity and reach the cleanout in the side wall. Hidden every day, open when it counts. That’s the whole trick: not avoiding the wall, but designing the unit to live with it.
How do I know the boxes are built strong enough?
Ask what the boxes are made of, by name. The answer should be a void-free plywood — Baltic birch is the gold standard — not "wood" or "MDF." Void-free means no hidden gaps in the core, so panels stay flat under load and every screw bites solid material. In a high-traffic family entry, that’s the difference between a unit that’s solid in ten years and one that’s sagging in three.
Do I need a permit?
For a standard built-in, almost certainly not — it’s non-structural finish carpentry. The moment the scope touches structure, plumbing, or electrical, that can change. The cleanest path is the one we took on Rhapsody Ct.: design around existing systems instead of altering them, which keeps the project as straightforward as it should be. Always confirm for your jurisdiction and scope.
The Mistakes We Design Out
-
Burying wall access. What it is: building flush over a cleanout, shutoff, or panel. Why it happens: nobody asks what’s behind the drywall. How we prevent it: we identify every access point during design and size the unit to keep it reachable — exactly how the Rhapsody Ct. drawer box was engineered around the cleanout.
-
Underbuilding the boxes. What it is: thin or void-filled plywood, or MDF, used for structural boxes. Why it happens: it’s cheaper and faster. How we prevent it: void-free plywood, glued, screwed, and dadoed, so the unit carries its own 500–600 lbs and the family’s load on top.
-
Stick-building in place. What it is: framing the cabinet board by board in the room. Why it happens: it skips shop time. How we prevent it: we shop-build boxes, doors, and bench where tolerances hold, then install finished components — a single day on site for Rhapsody Ct.
-
Ignoring an out-of-square house. What it is: pushing a perfectly square box against a wall that isn’t. Why it happens: skipping the scribe. How we prevent it: we scribe each unit tight to the actual walls so there are no gaps and it looks original to the house.
-
Designing for a photo, not a family. What it is: chasing a trendy look that ignores how the space gets used. Why it happens: aesthetics over routine. How we prevent it: we plan zones around the household first — the subject of our layout planning guide.
Mistake → Consequence → Prevention
| Mistake | Consequence | Prevention |
| Building over a cleanout or shutoff | A five-figure problem the day a plumber needs access | Map hidden access first; size cabinetry to keep it reachable |
| Thin / void-filled boxes | Sagging shelves and stripped screws within a few years | Void-free plywood, glued, screwed, and dadoed |
| Stick-building in the room | Visible gaps and racked boxes; slow, messy install | Shop fabrication, then a clean single-day install |
| Square box on an out-of-square wall | Gaps at the top and baseboard; "applied," not built-in look | Scribe each unit tight to the actual walls |
| Trend-first design | A unit that looks bolted on and doesn’t fit daily use | Plan storage zones around the household, match the home |
A Simple Framework for Avoiding All of It
You don’t need to be a carpenter to dodge these. You need to ask four questions before anyone cuts wood.
-
What’s behind this wall? Get hidden plumbing, electrical, and panels identified and designed around.
-
What are the boxes made of? Insist on a void-free plywood named specifically — not "wood," not MDF for structure.
-
Where is it built? Shop-built and installed beats stick-built in place, every time.
-
How does it meet the wall? Confirm the unit will be scribed to your actual walls, not pushed against them.
Get straight answers to those four and you’ve eliminated the problems this entire post is about. A contractor who can’t answer them is the bigger red flag — see how to evaluate a contractor before you hire.
See This In Action — Rhapsody Ct. Mudroom
The wall between the bench and the lockers on Rhapsody Ct. houses the main drain stack for the upstairs plumbing, including a cleanout. A contractor who buried it would have handed the family a five-figure problem the first time that line needed service. Instead, we sized the lower drawer box so the drawers pull out and a person can fit head and shoulders into the cavity to reach the cleanout — invisible in everyday use, fully accessible when it matters. That one decision shaped the entire base of the unit.
What we used on this project:
-
Baltic birch boxes — glued, screwed, and dadoed for load
-
A lower drawer box engineered for cleanout access behind it
-
A two-part stacked carcass so a 9-ft, quarter-ton unit could install plumb in one day
-
No permit required — existing plumbing designed around, not altered
At the link: photos from rough lumber to finished install, the full investment, and the build timeline.
Can You DIY This? An Honest Assessment
We respect a capable DIYer, so here’s the straight version rather than "don’t try it." The simple pieces are genuinely doable: hooks, open cubbies, a basic bench. The built-in itself is where most homeowners hit the wall — literally.
Here’s where it goes wrong. Houses are practically never square, so a perfectly built box pushed against your entry wall leaves a half-inch gap at the top and a baseboard jutting out at the bottom. The skill that fixes that is scribing — tracing the wall’s actual contour onto the cabinet and cutting to that line. Next is structural load: a bench span wider than about 36 inches without center support will bow under an adult. And finally, access planning around hidden plumbing and electrical, which is unforgiving to get wrong.
So the honest line is this: if scribing, load math, and access planning are familiar to you, a DIY built-in is realistic. If they’re new terms, that’s exactly the point where most homeowners hand it off — and there’s no shame in it. It’s the part of the trade that takes years to learn, not a weekend.
The Holland & Sons Angle
The detail we’re proudest of on Rhapsody Ct. is one the family will mostly never think about — until the one day they’re grateful for it. The divider wall held the upstairs drain stack and its cleanout. Most builds would have sealed it behind a pretty front. We sized the lower drawer box so pulling the drawers opens a path straight to the cleanout, then designed the whole base around that constraint. Hidden every day, reachable when a plumber shows up. That’s the invisible part of the trade. On this job, one of Brian’s sons learned to read a wall before designing a box — to ask what’s behind the drywall first, and let the answer shape the cabinet. You can’t see that decision in a finished photo. It’s the whole craft getting handed down.
Related Resources — Mudroom Built-In Guide
This problems guide is one piece of a full Holland & Sons mudroom cluster. Here’s where to go next.
-
How Much Does a Custom Mudroom Built-In Cost? — real ranges and a line-item breakdown from a $12,912 project.
-
Custom Built-In vs. IKEA/Prefab Lockers — when prefab is fine and when it isn’t.
-
The Best Materials for a Mudroom Built-In — which woods and finishes prevent these failures.
-
How to Vet a Cabinet Maker — the questions that catch problems before they start.
-
How to Plan a Mudroom Layout Around Your Routine — zoning storage for how your family actually moves.
Frequently Asked Questions
What are the most common mistakes when building a mudroom built-in?
The most common mistakes are burying a wall access point you’ll need later, underbuilding the boxes for real household load, and stick-building the cabinet in place instead of in a shop. Each one is invisible on day one and expensive years later — a buried plumbing cleanout becomes a five-figure problem, thin boxes sag and strip screws, and a stick-built unit shows every gap in an out-of-square house. The good news: all three are planning decisions, which means they’re entirely preventable before a single board is cut.
Do I need a permit for a mudroom built-in in Riverside County?
Typically no. A mudroom built-in is non-structural finish carpentry, so it usually doesn’t require a permit in Riverside County. The exception is when the work touches structure, plumbing, or electrical — moving a wall, relocating a drain, or adding circuits can trigger permit requirements. On the Rhapsody Ct. project in Menifee, no permit was needed because we designed around the existing plumbing cleanout rather than altering it. Requirements vary by scope and jurisdiction, so confirm for your specific situation before work begins.
What decisions need to be locked in before a mudroom built-in is fabricated?
Before fabrication starts, you need to finalize the layout and dimensions, the material and finish, any hidden wall access (plumbing, electrical, panels), and the hardware. These can’t change once boxes are cut without re-doing work. Decisions you can defer include final paint touch-ups, basket and bin selection, and styling. The single most important early item is mapping anything hidden in the walls — on Rhapsody Ct., knowing a cleanout sat in the divider wall shaped the entire drawer-box design from the start.
Can a built-in cabinet block plumbing or electrical access?
Yes, and it’s one of the most expensive mistakes in built-in work. Walls hide drain stacks, cleanouts, shutoffs, and junction boxes, and a cabinet built flush over one buries access the day a plumber or electrician needs it. The fix is planning: identify every access point before design, then engineer the unit so you can still reach it. On Rhapsody Ct. we sized the lower drawer box so the drawers pull out and a person can reach the cleanout in the side wall — hidden in daily use, fully accessible when it matters.
Why do cheap mudroom built-ins sag or fall apart?
They fail because the boxes are built from thin or void-filled plywood, or from MDF that can’t carry load or hold a screw over time. A mudroom in a full house takes punishment — doors slammed, drawers loaded, kids climbing — and lightweight boxes rack, sag, and strip their fasteners within a few years. A properly built unit uses void-free plywood so every screw bites solid wood and panels stay flat under load. That’s how a unit can carry 500 to 600 pounds of its own weight and still take whatever a family adds.
Should a mudroom built-in be built in place or in a shop?
A shop-built unit is almost always better. Stick-building a cabinet board by board in the room means fighting gravity, dust, and an uneven house all at once, and it shows in the seams. Shop fabrication happens in a controlled environment where real tolerances hold, then finished components install cleanly — the Rhapsody Ct. unit went in plumb in a single day. The one caveat: a 9-foot, quarter-ton cabinet has to be engineered as multiple sections to be installable, which is itself a planning decision.
Can I DIY a mudroom built-in, or should I hire a pro?
You can DIY the simpler pieces — hooks, open cubbies, a basic bench — but the built-in itself is where most homeowners should hand it off. The hard parts aren’t the visible ones: scribing the unit tight to walls that are never square, building boxes that carry real load, and routing around hidden plumbing or electrical. Houses are practically never square, so a perfectly built box pushed against a wall leaves gaps. If you’re comfortable with scribing, structural loading, and access planning, DIY is realistic. If those are new terms, that’s the handoff point.
How do I make sure a mudroom matches the rest of my house?
Match material, tone, and proportion to what’s already in the home rather than chasing a trend. A common mistake is building a mudroom that looks far more modern — or more generic — than the rooms around it, so it reads as bolted on. On Rhapsody Ct., we chose vertical-grain fir specifically to match interior doors installed for the same family on a prior project, and blended the stain on site against their dining table. Continuity is what makes a built-in feel original to the house instead of dropped into it.
Build It Right the First Time
The best time to solve every problem in this post is before anyone cuts wood. If you’ve got a niche or a builder-grade closet you want turned into a built-in that actually lasts, start at hsconstruct.com/contact. Fill out the form, describe your space, and upload any inspiration photos. We’ll walk through the design — including what’s behind your walls and the details most contractors never mention — before any work begins.
Holland & Sons serves Menifee, Murrieta, Temecula, Perris, Riverside, and the greater Inland Empire. Follow our work on social media to watch builds come together.
951-338-8058 | brian@hsconstruct.com | hsconstruct.com | CSLB #1123738
More Than Just a Drop Zone
Custom mudroom and entry built-ins are a signature project at Holland & Sons — but they’re one chapter in a much longer story. Brian and his sons have been finish carpenters since 1991, which means every room in your home is fair game.
If your space needs more than storage, here’s what else we build:
-
Kitchen and bathroom remodels — full custom cabinetry, tile work, and finish carpentry from demo to done
-
Coffered ceilings — grid beam systems that add architectural depth to any room, sized and proportioned to the space
-
Wainscoting and wall paneling — classic raised panel, flat panel, board-and-batten, and shiplap applications
-
Reclaimed wood accents — feature walls, fireplace surrounds, and detail work using salvaged material with real character
-
Beam wraps — hollow wood wraps that give exposed beams the look of solid timber without the structural engineering
-
Crown molding, baseboards, and trim carpentry — the details that make a house feel finished, from a single room to a whole home
-
Cased openings and interior door replacements — clean transitions between spaces that most contractors overlook
-
Custom built-in entertainment walls and bookshelves — designed by hand, built in the shop, installed to last
Wood, proportion, and rooms that feel right — that’s what we do.
hsconstruct.com
About the Author
Brian Holland is the owner and lead carpenter of Holland & Sons Construction, a family-run finish carpentry and general contracting company serving Riverside County and the Inland Empire since 1991. He entered the trade at 17, learned on the job, and has spent 35 years building the kind of work that makes rooms feel right — often before a homeowner can articulate why. His sons now apprentice alongside him on every project. Holland & Sons is based in Perris, CA and licensed by the CSLB (#1123738).
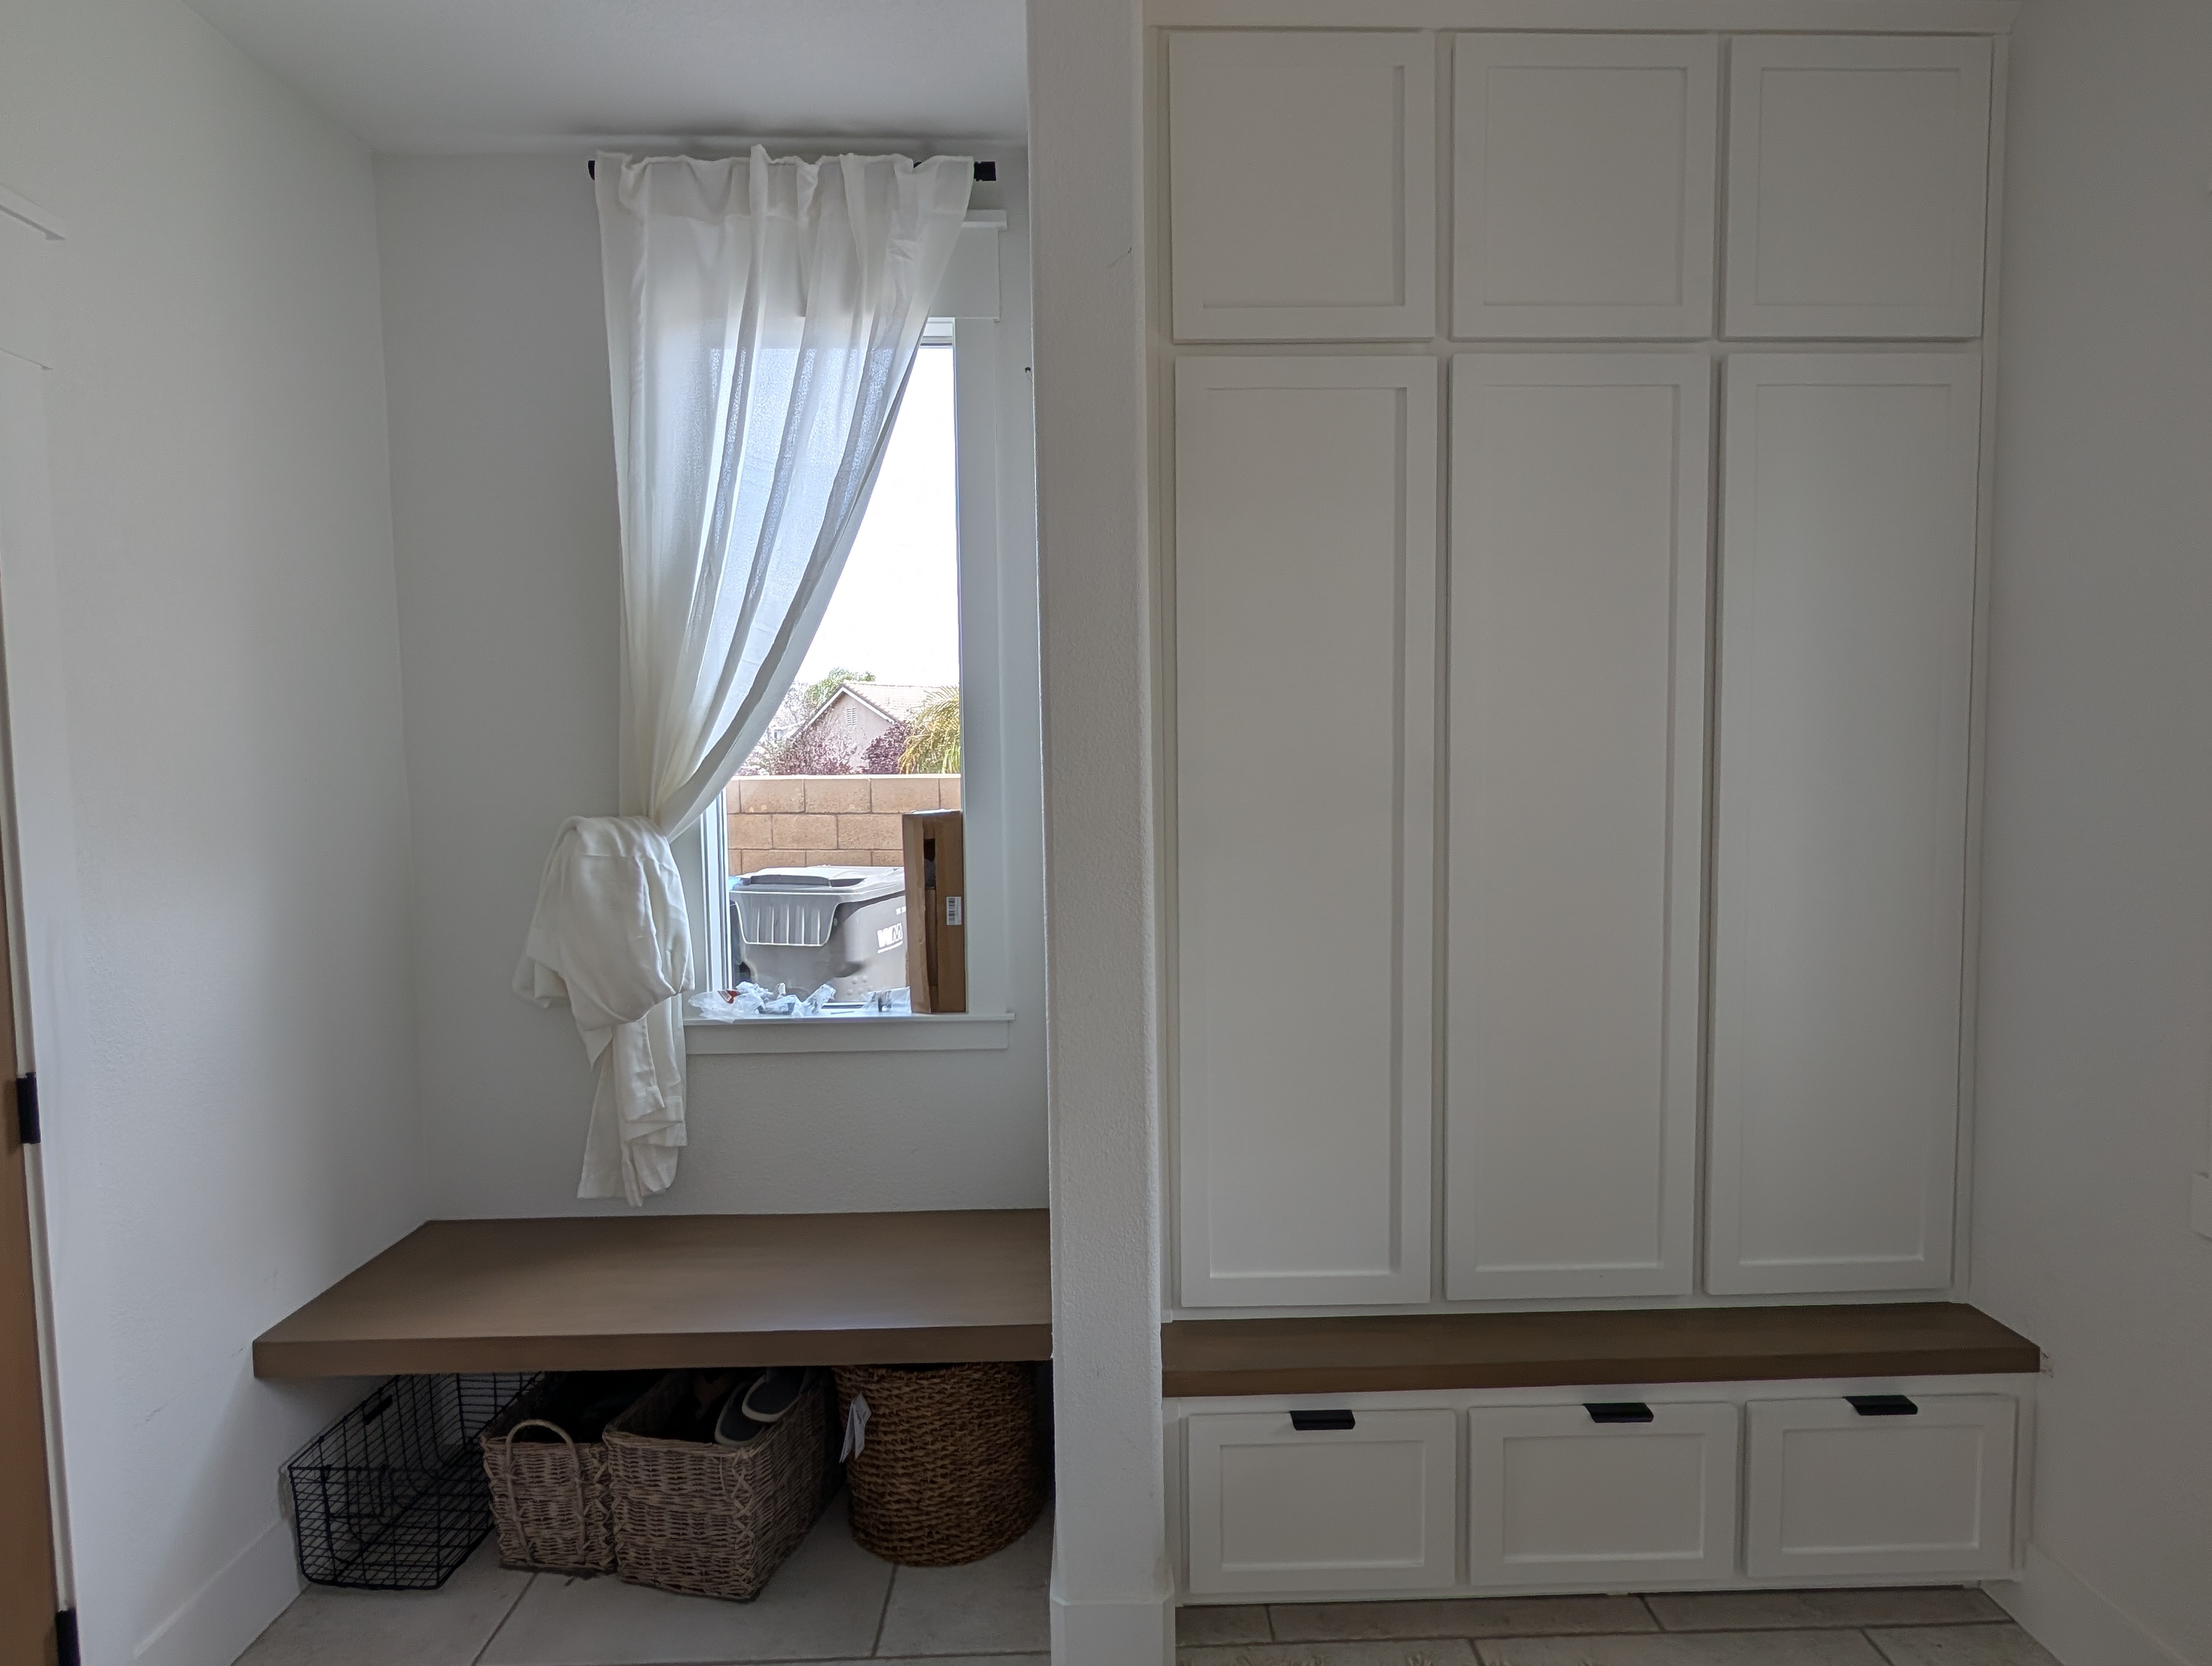
Related project
This guide is part of our mudrooms & storage series.
Learn more about Mudrooms & StorageHave a project in mind? Let's start a conversation.
Tell us what you are thinking about and we will give you a straight answer about scope, timeline, and investment.
Start a Conversation