
Reclaimed Barn Wood Walls: What Goes Wrong and What to Know Before You Start in the Inland Empire
By Brian Holland, Owner and Lead Carpenter, Holland & Sons Construction · Carpenter since 1991 · CSLB #1123738 · NARI Member · NAHB Member
Published
| Quick Answer: The biggest problems with reclaimed barn wood walls in the Inland Empire are drifting courses, gaps that open between irregular boards, untreated wood carrying insects, and wood that shifts because it wasn't allowed to acclimate. Nearly all of them trace back to skipping the planning — a balanced layout, a laser level, treated material, and a few days of acclimation prevent the failures that ruin these walls. A permit usually isn't required for non-structural decorative work, but your Riverside County building department makes the final call. |
Key Takeaways
-
The most common failure is skipping a planned, balanced layout — it leaves drifting courses and a sliver of board at the top or bottom.
-
Untreated salvaged wood can carry insects; reputable suppliers fumigate or kiln-dry before it enters your home.
-
Authentic reclaimed wood is very stable, but it still needs 3–7 days to acclimate to your indoor humidity before install.
-
Brian Holland has installed reclaimed wood across Riverside County since 1991 and solves these problems before the first board goes up.
The thing homeowners are really worried about with a reclaimed wood wall is simple: that they'll spend real money and end up with something that looks crooked, develops gaps, or — worst case — brings bugs into the house. Those fears are reasonable, and the honest answer is that all of them are preventable. Every one traces back to planning that happens before a single board goes up.
Reclaimed wood is forgiving in some ways and unforgiving in others. The irregularity that gives it character is the same irregularity that makes a careless install look sloppy. Old stock that survived a century outdoors is incredibly stable — but only if it's been treated and acclimated properly. None of this is mysterious. It's just work that a lot of installers skip.
This guide walks through exactly what goes wrong, what to lock in before you start, and how an experienced finish carpenter removes each risk. Brian Holland has been doing this across Norco, Menifee, Temecula, and the wider Inland Empire since 1991, and the problems below are the ones he plans around on every job.
The Direct Answer: The Most Common Problem
The single most common problem with reclaimed wood walls is courses that drift, because the install started without a planned, balanced layout and a true level line. Everything else — gaps, blotchy color, that vague sense the wall is 'off' — tends to follow from the same root cause: starting to nail before the math is done. Get the layout right and most of the failures never happen.
The Fears, Named and Addressed
Let's take the worries one at a time, directly:
-
"It'll look crooked." It will, if the installer skips a laser level. With a true line and patient handling, every course stays dead-level across the whole wall — even across cabinets and shelves. This is a solved problem for anyone who plans.
-
"Gaps will open up." Small seasonal movement is normal in any wood. Big, ugly gaps come from skipping acclimation and from no layout plan. Acclimate the wood and lay it out balanced, and gaps stay minor and intentional-looking.
-
"It'll bring bugs into my house." Only if it's untreated. Fumigated or kiln-dried stock from a real supplier carries no infestation risk. Confirm the treatment before install — always.
-
"It'll warp or fall apart." Authentic old-growth reclaimed wood is more stable than new lumber, not less. Decades of slow drying already did its moving. Proper acclimation handles the rest.
-
"I'll need a permit and a bunch of inspections." Usually not — non-structural decorative work typically falls below the threshold. New electrical or structural changes are the exception. Your building department confirms.
Wood Movement, Acclimation, and Moisture Content
This is the section most reclaimed wood guides skip, and it's the one that prevents season-one callbacks. Wood is a living material even after it's milled — it gains and loses moisture with the air around it, and as it does, it moves. Understanding that is the difference between a wall that stays tight and one that opens gaps in its first dry summer.
Why authentic reclaimed wood moves less
Here's the good news: authentic century-old reclaimed wood is among the most dimensionally stable material you can put on a wall. It has already cycled through decades of seasons — expanding in humid months, contracting in dry ones — so most of its movement is behind it. Old-growth stock is also denser than fast-grown modern lumber, which further limits how much it shifts. This stability is a genuine, practical advantage of choosing authentic stock over new 'aged' lumber, which hasn't done that cycling yet.
Why acclimation still matters in the Inland Empire
Stable doesn't mean inert. Our climate — dry air most of the year, with real temperature swings between day and night and season to season — still asks the wood to move a little. The risk isn't catastrophic warping; it's small gaps opening or closing seasonally between boards. The way you prevent that is acclimation: stacking the boards loosely in the actual room for three to seven days before install, with air moving around them, so they reach equilibrium with your home's indoor humidity before they're fastened in place. Wood installed straight off a truck that just crossed the desert hasn't equalized yet, and it will move after it's on the wall.
| Moisture & Movement Factor | What It Means for Your Wall |
| Authentic old-growth stock | Already cycled for decades — very stable |
| Inland Empire dry climate | Minor seasonal movement; acclimation handles it |
| Skipping acclimation | Gaps open after install as wood equalizes |
| 3–7 day in-room acclimation | Wood reaches equilibrium before fastening — stays tight |
Material choice also shapes how much you'll deal with movement at all — and how material selection prevents these problems is part of why the authentic-versus-aged decision matters so much. We cover that fork fully in our guide to authentic vs. aged and faux reclaimed wood.
Decision Sequencing: What to Lock In and When
Reclaimed wood projects go sideways when decisions get made out of order. Here's what has to be settled before the next phase can start — genuinely useful structure no generic home-improvement site bothers to produce:
| Decision | Must Be Locked In Before Install Begins? |
| Wood grade (authentic / aged / DIY) | Yes — drives sourcing, lead time, and budget |
| Treatment confirmed (fumigated / kiln-dried) | Yes — must happen before wood enters the home |
| Coverage and surfaces (wall? ceiling? both?) | Yes — determines material quantity and layout |
| Acclimation period scheduled | Yes — 3–7 days before fastening, not after |
| Balanced layout calculated | Yes — before the first board goes up |
| Backing and substrate plan | Yes — but it's its own subject (see Hidden Layer guide) |
| Final board placement / color distribution | No — fine-tuned during dry-fit on site |
Common Mistakes — and How We Prevent Them
-
Starting without a balanced layout. The lazy way starts with a full board at the bottom and ends with whatever sliver lands at the top. We do the math up front so the top and bottom courses land within an inch of each other — the wall reads intentional. This is the most important invisible decision on the whole job.
-
Skipping the laser level. Irregular boards drift fast without a true reference. We set a laser line and keep every course dead-level across the entire wall, including across cabinets and openings where the courses have to align across separate zones.
-
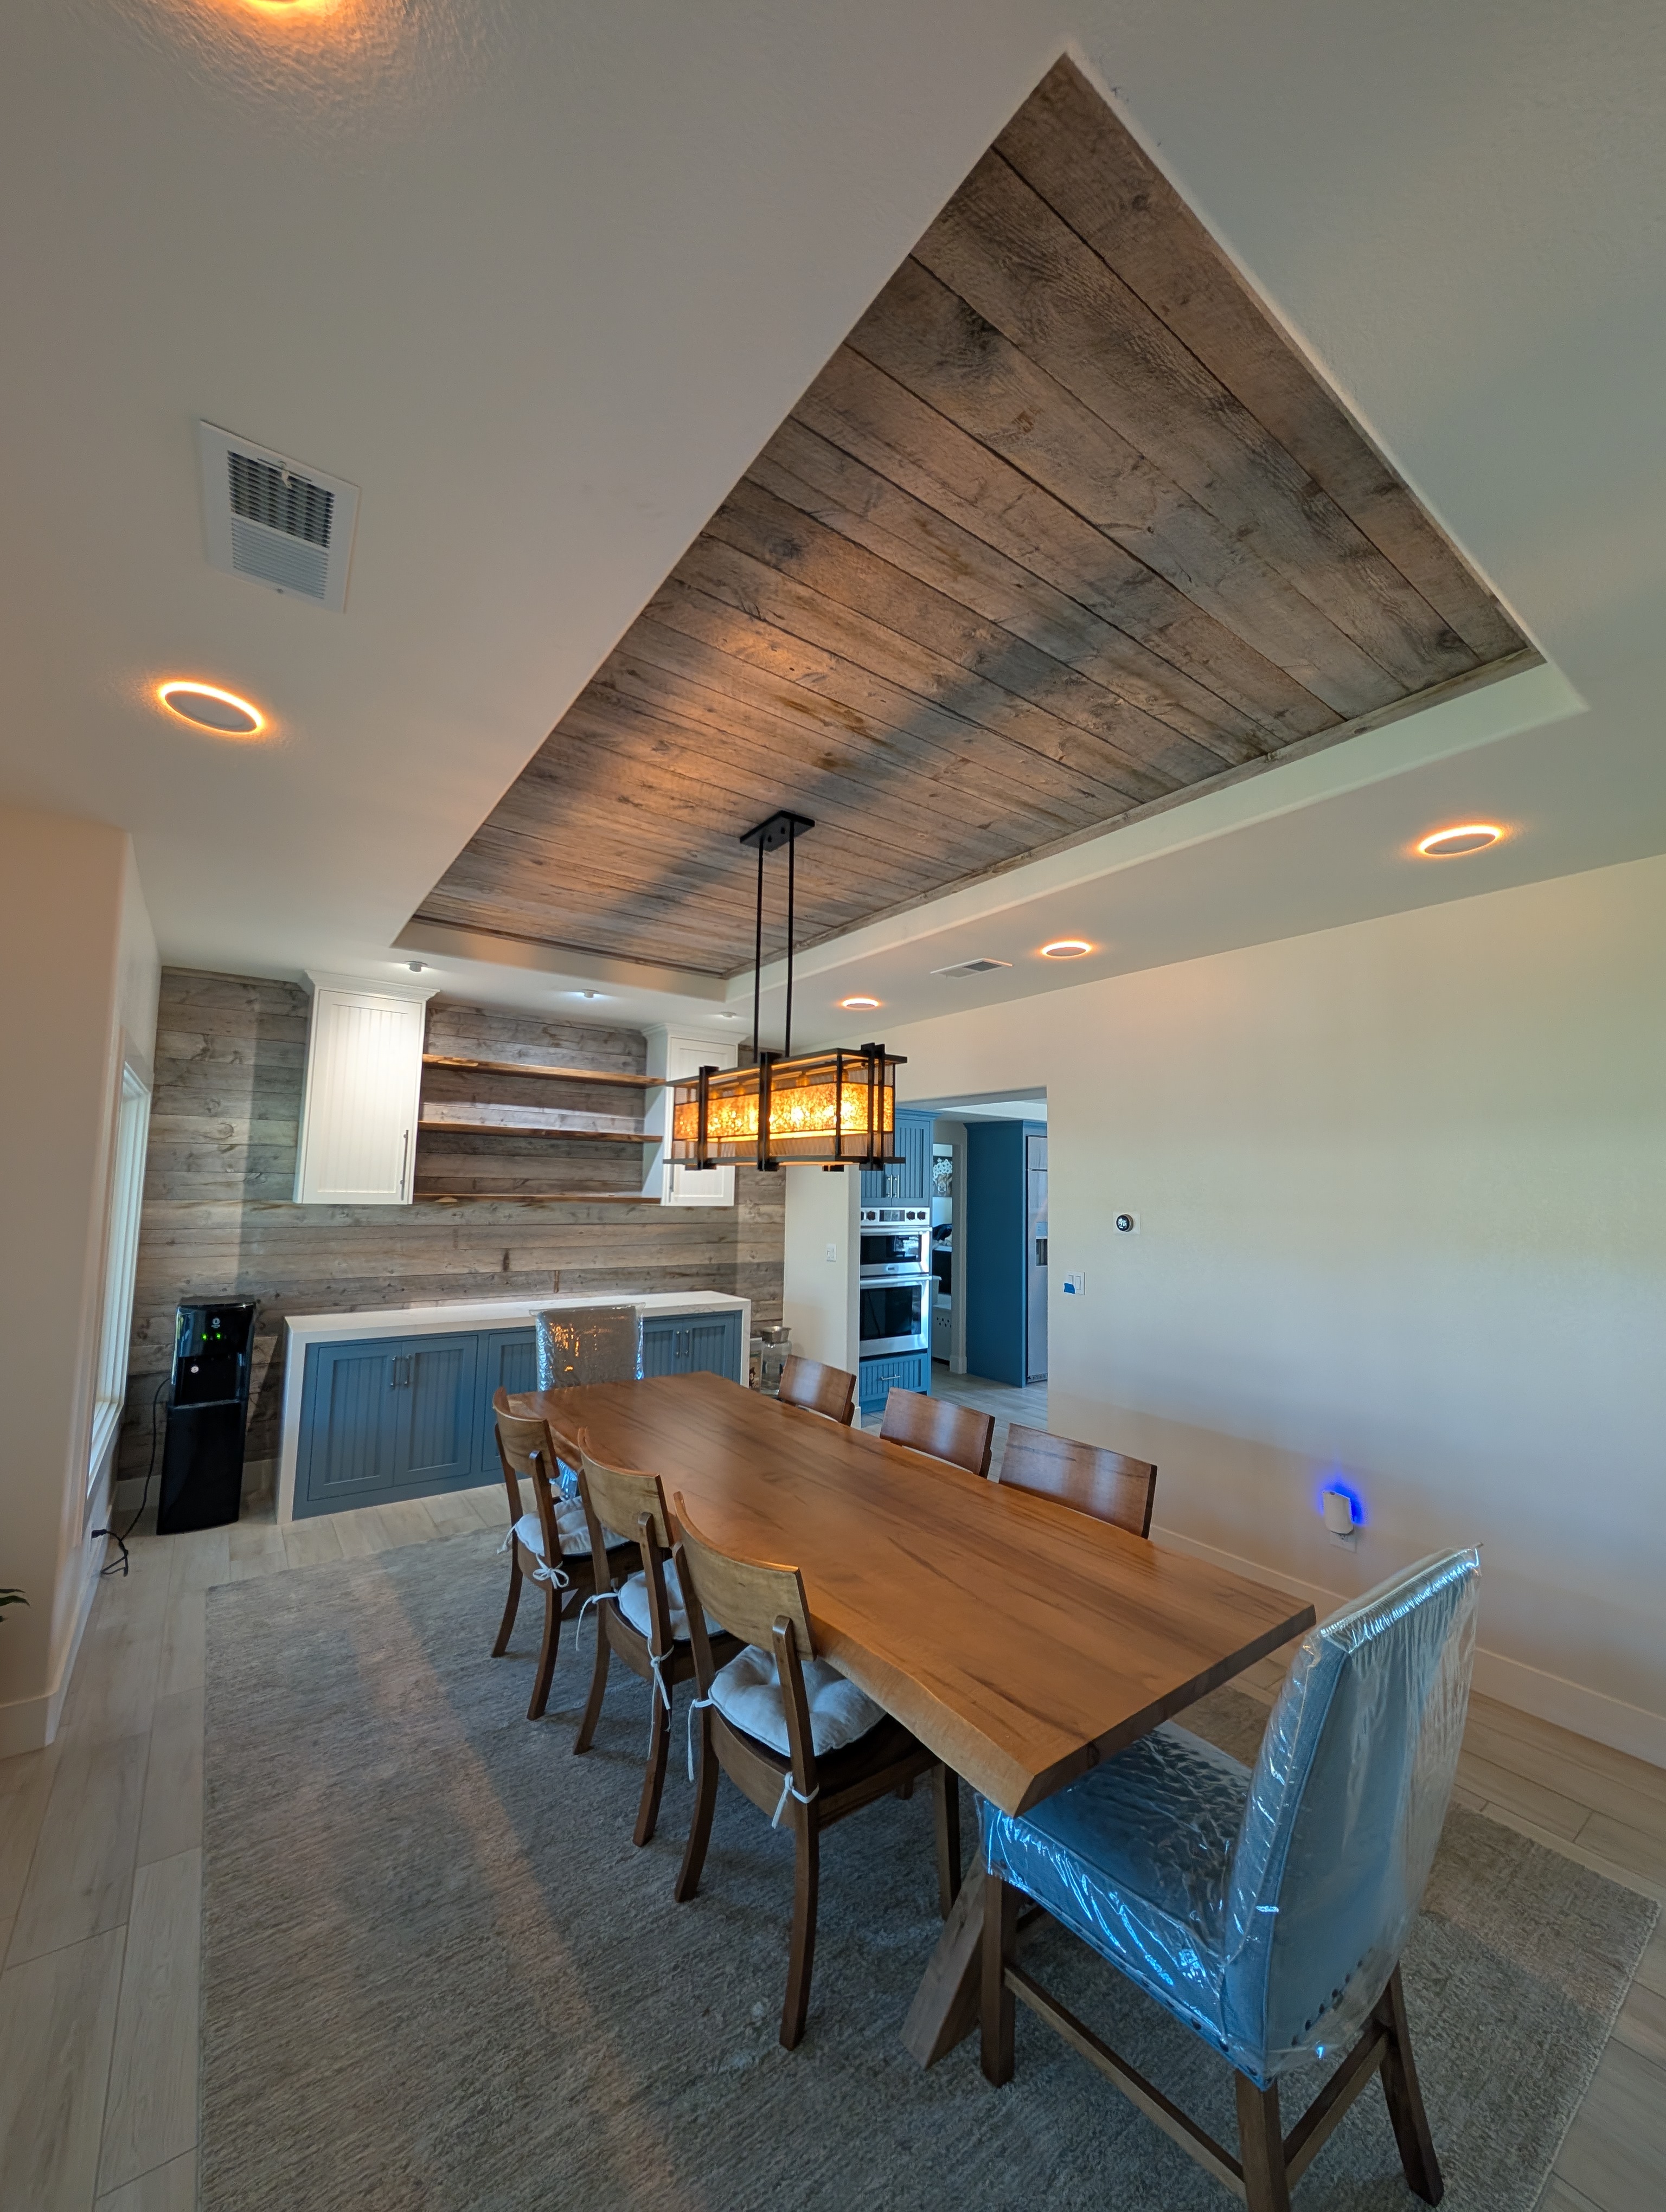
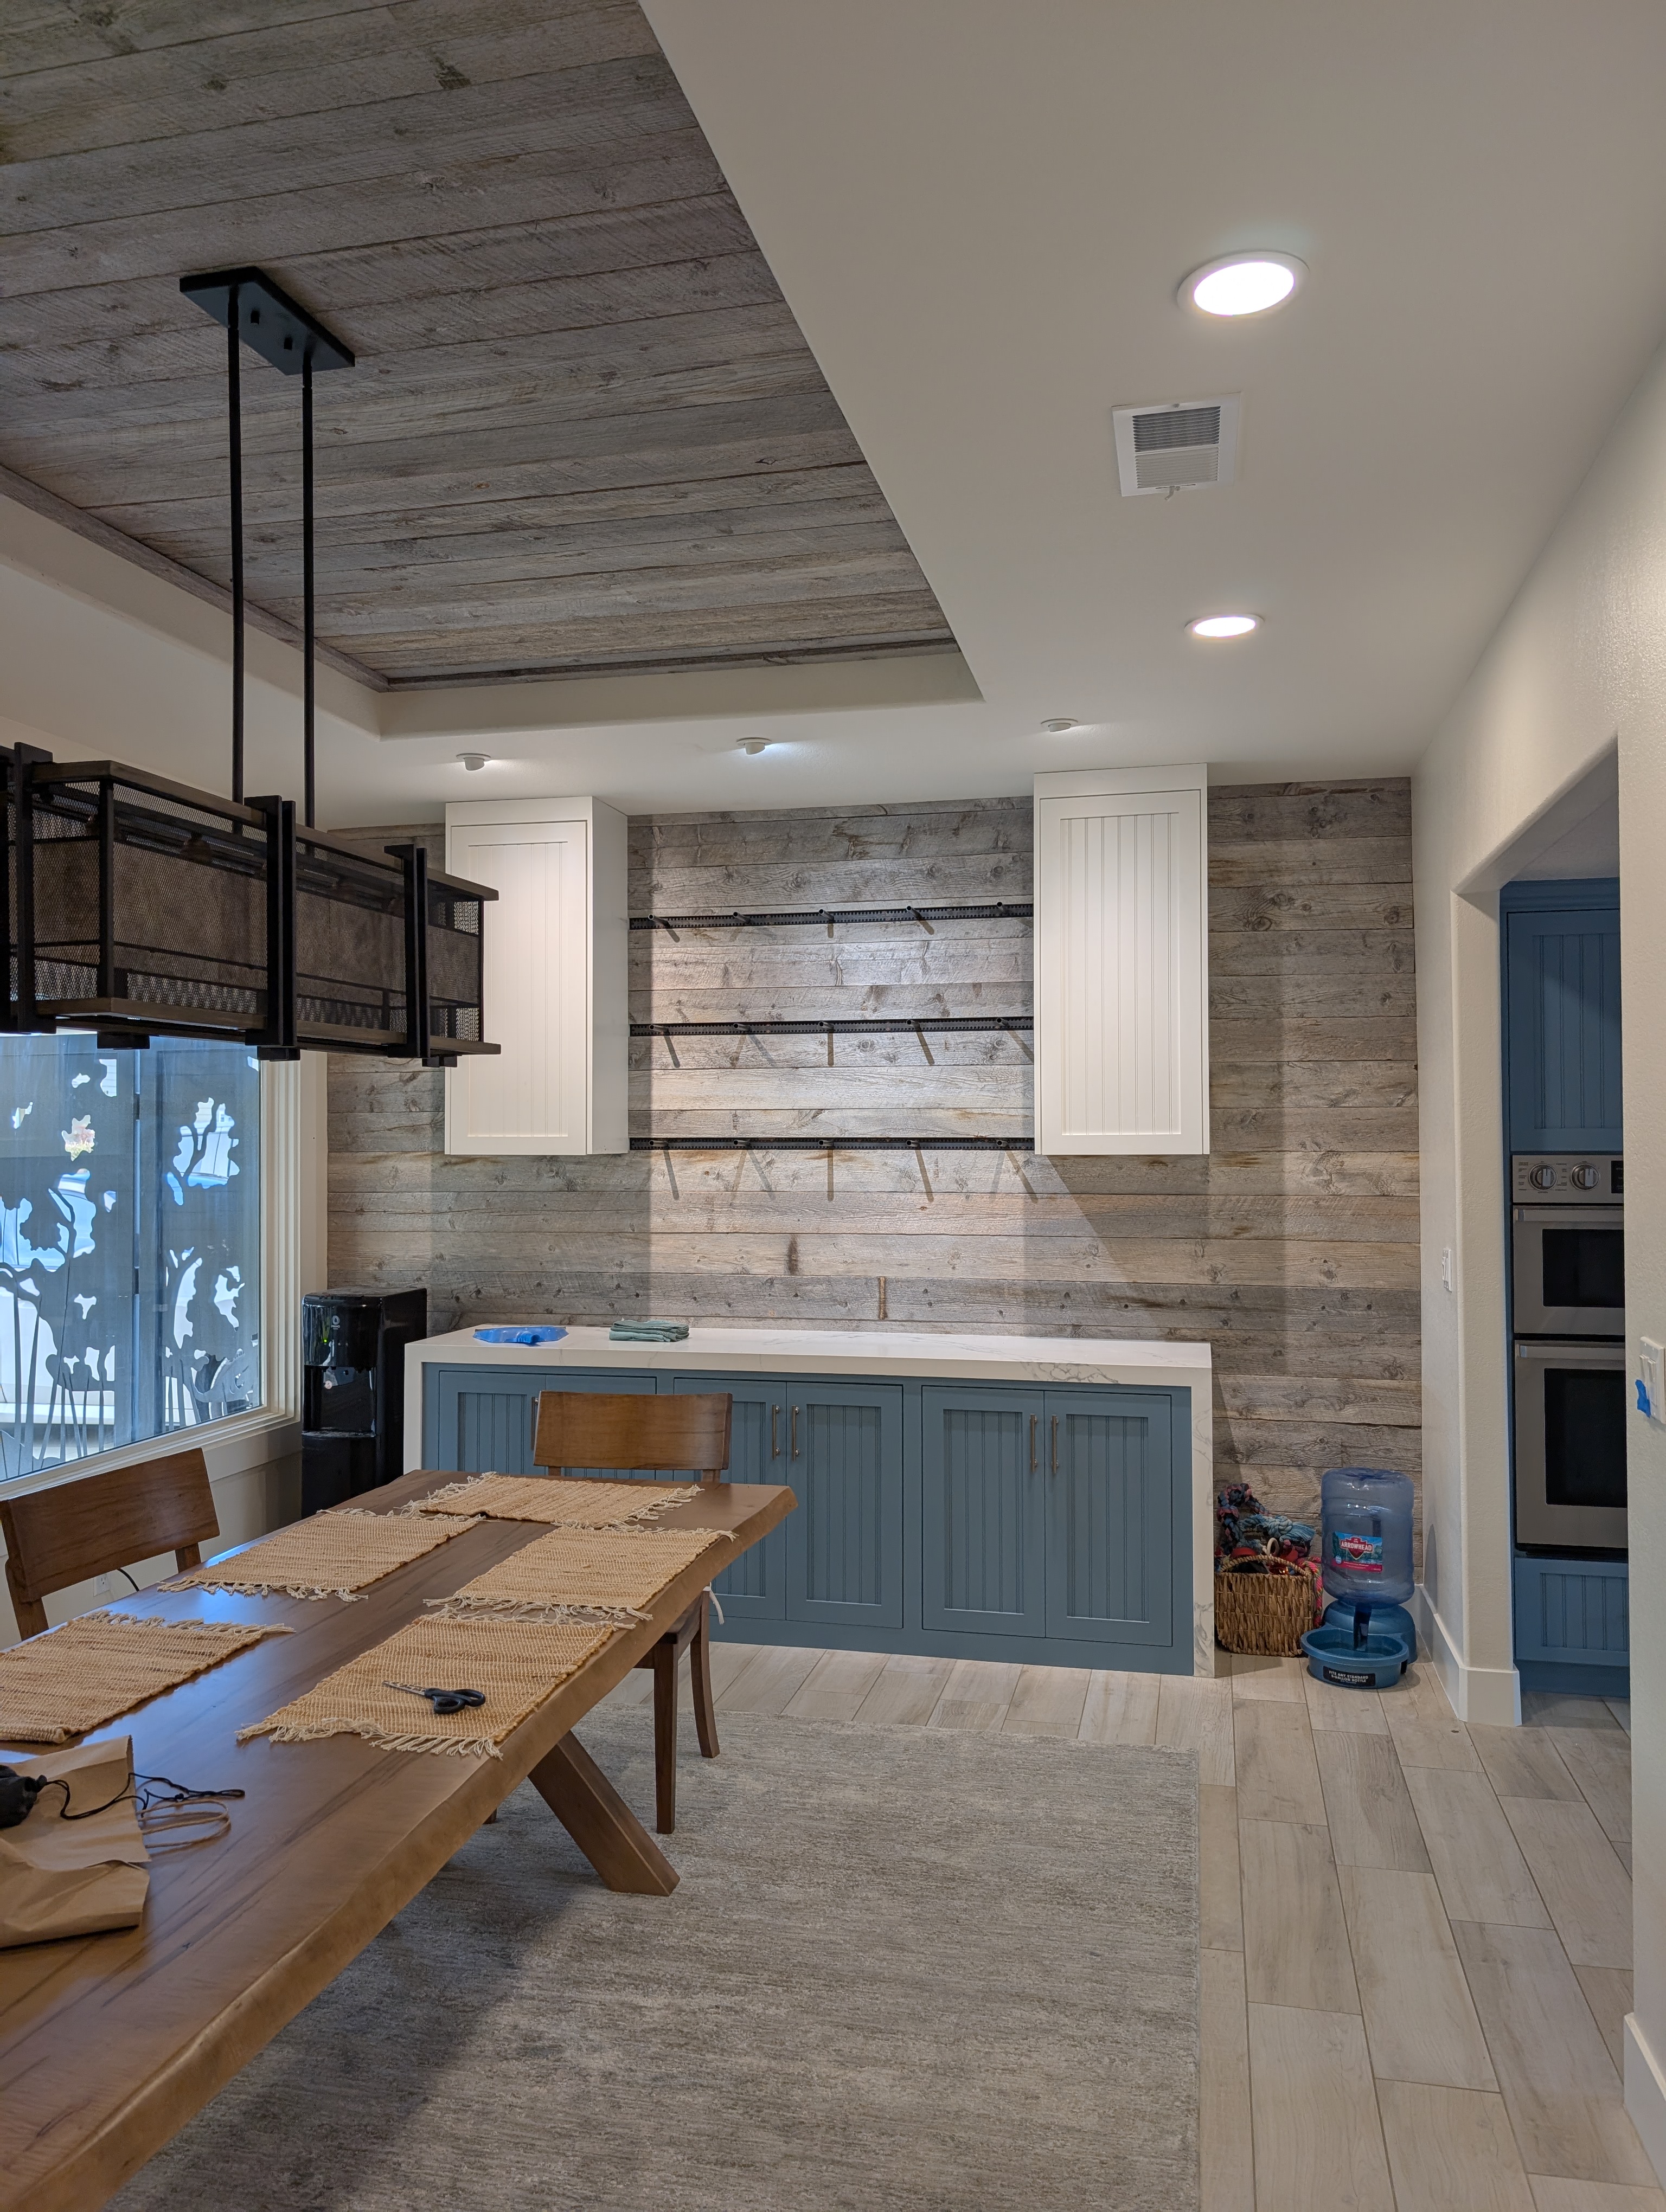
Covering bad cuts with trim. When boards meet cabinets or shelves, the shortcut is a rough cut hidden under a strip of molding. We template and scribe each board to fit clean — no cover trim. On the Broken Twig wall, only three or four boards were full width; every other one was custom-cut to land perfectly.
-
Installing untreated wood. Salvaged wood from an unknown source can carry beetles or borers. We only install fumigated or kiln-dried stock and tell you exactly how it was treated.
-
Rushing past acclimation. Wood installed before it equalizes with your home will move. We build the acclimation period into the schedule every time.
The Decision Framework: Avoiding These Problems
Boil it all down and the framework is short:
-
Demand treated material. Ask how the wood was fumigated or kiln-dried, and don't accept 'it's fine' as an answer.
-
Insist on a layout plan. If a contractor can't describe how they'll balance the courses, they haven't planned the job.
-
Build in acclimation. A few days of waiting prevents a season of gaps.
-
Confirm permits up front. Let the contractor check with the building department before work starts.
See This In Action — The Broken Twig Project, Norco
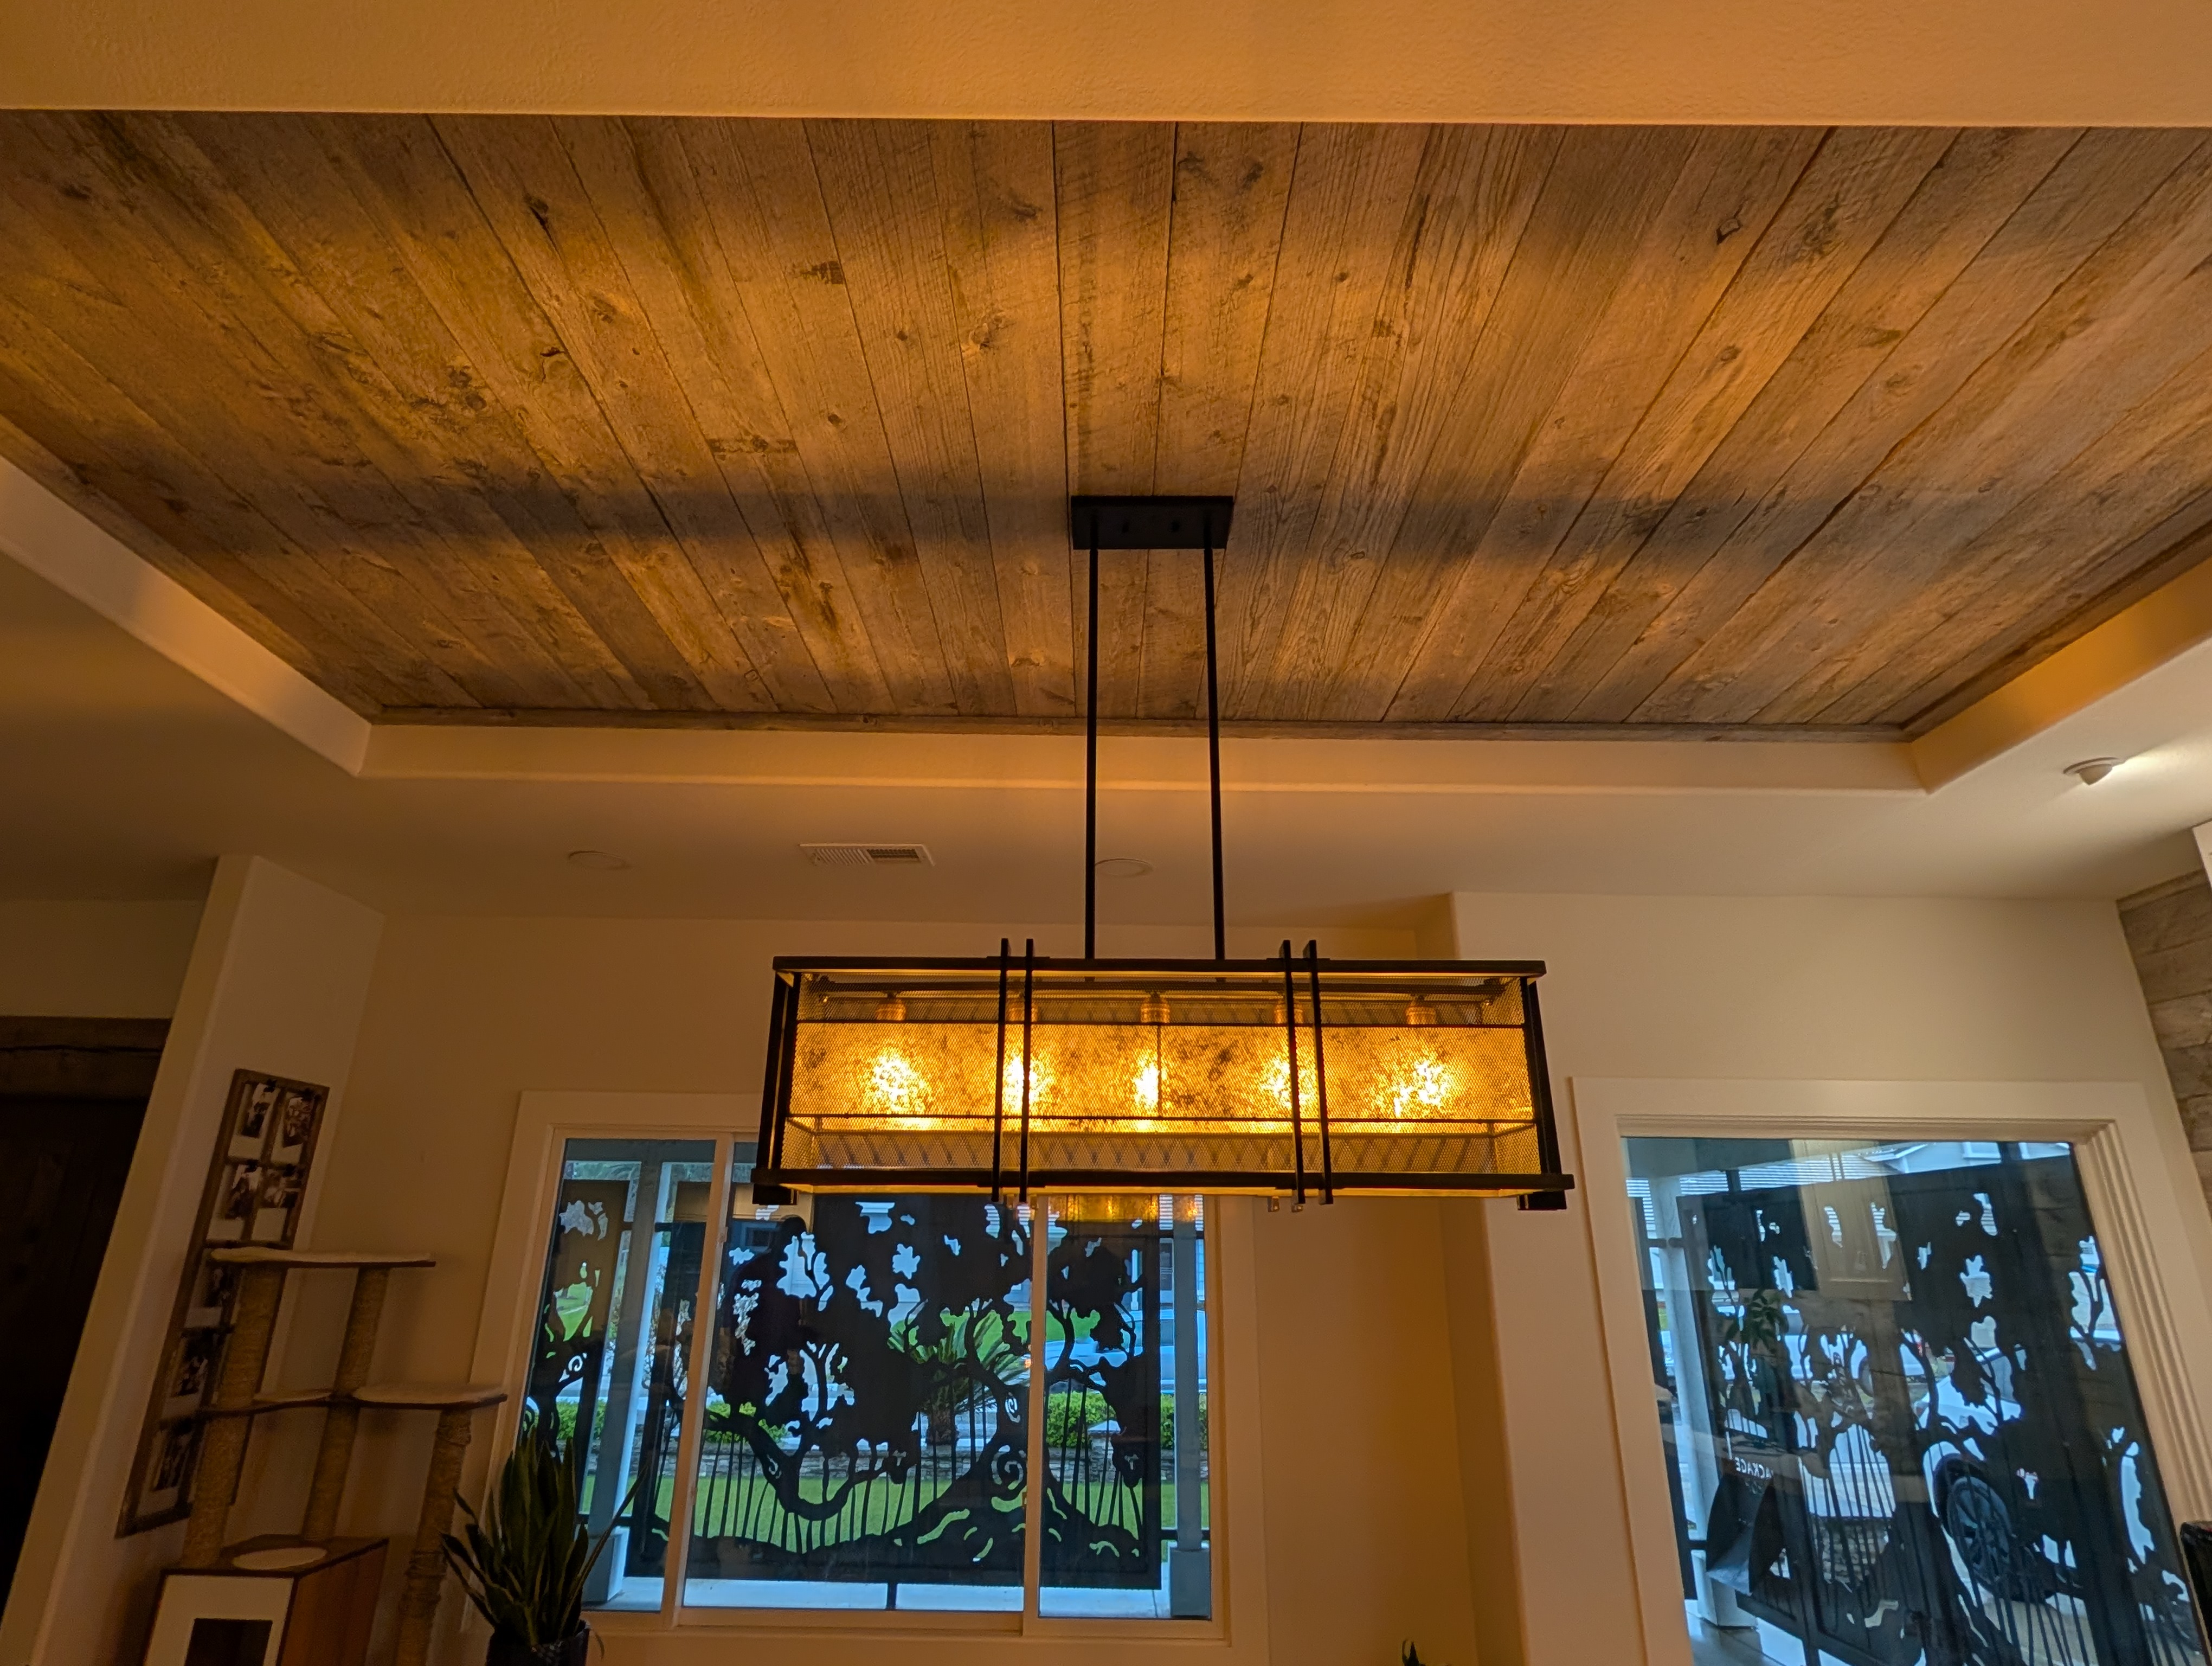
On the Broken Twig dining room, only three or four boards on the entire accent wall were full width. Every other board was custom-cut around the cabinets and shelves using templates — laid out, dry-fit, marked, and cut so each piece landed perfectly with no side trim and no scribe molding hiding a sloppy gap. That's the difference between a wall where the wood meets the cabinet clean and one where a strip of molding is doing the apologizing.
What we used on this project:
-
Authentic 100+ year-old Kentucky reclaimed barn wood, fumigated against insects before install.
-
Templates and scribe gauges for every cut around cabinets and shelves — no cover trim.
-
A laser level keeping every course true across three separate wall zones.
-
Wood installed aged-side-out, blind-nailed so fasteners stay hidden.
Thinking of Doing It Yourself? An Honest Assessment
A reclaimed wood accent wall is one of the more approachable DIY projects — plenty of homeowners install thin peel-and-stick panels successfully. So let's be straight about where it gets hard rather than just telling you not to try.
The easy version is a single, simple wall with no cabinets, no shelves, no outlets to work around, using uniform thin panels. A motivated DIYer with a level, a saw, and patience can do that well. Where it goes sideways is the moment the wall has interruptions — outlets, a window, cabinets, anything that requires cutting boards to fit around an obstacle. That's where the templating and scribe work starts, and that's the skill most people don't have yet.
The honest handoff point: if your wall is a clean rectangle and you're using consistent material, you can likely do it. If you're working with authentic irregular stock, wrapping a ceiling, or fitting around built-ins — and especially if the material is expensive enough that one bad cut hurts — that's where most homeowners hand it off. There's no shame in that line; knowing where it is is its own kind of expertise.
The Holland & Sons Angle
Watch how Brian handles a board that has to meet a cabinet, and you'll understand the whole philosophy. The shortcut — the one that saves an hour — is to make a rough cut and hide the gap under a strip of trim. Brian won't do it. Instead he'll spend the time making a template, dry-fitting, marking, and cutting to the line so the wood meets the cabinet clean. The reason isn't pride; it's that cover trim is a tell. It announces that someone took the easy way, and once you see it you can't unsee it. The harder, invisible cut is what makes the wall feel right.
This is the lesson Brian's sons are learning one cut at a time. On a recent job, instead of reaching for cover trim the way a hurried installer would, one of them stopped, made a template, and cut the board to fit around an obstacle clean — choosing the half-hour of careful work over the five-minute shortcut. That instinct, to cut to the line rather than cover the gap, can't be taught from a manual. It gets passed down on the job, board by board, until it becomes the only way that feels acceptable.
Related Resources — Reclaimed Wood Feature Guide
This problems guide is part of a full series on planning a reclaimed wood feature in the Inland Empire. The companion guides cover the rest of the decision:
-
How Much a Reclaimed Wood Accent Wall Costs — real numbers, cost drivers, and investment tiers.
-
Authentic vs. Aged & Faux Reclaimed Wood — the material fork, and how it affects stability and movement.
-
Best Wood for Floating Shelves & Feature Walls — species picks for shelves and walls.
-
How to Hire a Finish Carpenter — how to evaluate a contractor before you hire, so these problems never happen.
-
The Hidden Layer Behind a Reclaimed Wood Wall — backing, substrate, and mounting (the 'what goes behind it' questions answered in full).
Frequently Asked Questions
What are the most common mistakes when installing a reclaimed wood wall?
The most common mistake is starting without a planned, balanced layout, which leaves courses drifting and a random sliver of board at the top or bottom. Close behind are skipping a laser level so the horizontal lines wander, miscalculating square footage and running short on irregular stock, and covering sloppy cuts with filler trim instead of templating each board to fit. Less obvious but just as damaging: not letting the wood acclimate to your home's humidity, and not accounting for color distribution so one section looks blotchy. Each of these is preventable with planning. On the Broken Twig project in Norco, the layout math was done before the first board went up specifically so the wall would read balanced — that planning is what separates a clean install from one that feels 'off.'
Does reclaimed barn wood have bugs or termites?
Reclaimed barn wood can harbor insects if it isn't properly treated, which is exactly why reputable suppliers and contractors fumigate or kiln-dry the material before it ever comes into your home. Old barn stock has spent decades outdoors, so beetles and wood-boring insects are a real risk with untreated wood. The solution is straightforward: source through a specialist who treats the wood, and confirm it has been fumigated or kiln-dried before installation. On the Broken Twig project, the Kentucky barn wood was fumigated against insects after resawing and before it went on the wall. Never install untreated salvaged wood from an unknown source — that's how an infestation gets into a home. A trustworthy contractor will tell you exactly how the wood was treated.
Do you need to seal or treat reclaimed barn wood on a wall?
Most authentic reclaimed barn wood on an interior accent wall can be left raw, because the patina is the entire point and the wall isn't exposed to moisture or heavy handling. Sealing can darken the wood or add a sheen that fights the weathered, matte character people want. The exceptions are surfaces you'll touch often, areas near moisture, or wood that's shedding fine particles. On the Broken Twig project, the barn wood was left raw and needs little more than occasional dusting, while the live-edge walnut shelves — which get handled — carry a multi-layer clear coat. The general rule: leave the rustic wall raw, and protect the surfaces that get used. When in doubt, ask your contractor to test a finish on a scrap board first.
Will reclaimed wood warp, or expand and contract on the wall?
Authentic reclaimed wood is actually more dimensionally stable than new lumber, because decades of slow drying and seasonal cycling have already done most of its moving. That stability is one of the real advantages of old-growth stock. It is not, however, completely inert — all wood responds to changes in humidity, and the dry Inland Empire climate with its big temperature swings can still cause minor movement. The risk isn't dramatic warping; it's small gaps opening or closing seasonally. The fix is to let the wood acclimate in your home for several days before installation so it reaches equilibrium with your indoor humidity, and to install with that movement in mind. Properly acclimated and installed, reclaimed wood stays remarkably stable for decades.
How long should reclaimed wood acclimate before installation?
Reclaimed wood should acclimate in the room where it will be installed for at least three to seven days before going up, so it reaches equilibrium with your home's indoor humidity. This step is easy to skip and expensive to ignore. Wood that's installed straight off the truck — especially after sitting in a hot or humid warehouse, or in a vehicle crossing the desert into the Inland Empire — can shift after it's on the wall, opening small gaps between boards. Stacking the boards loosely in the actual room, with air able to move around them, lets them settle. A finish carpenter who knows reclaimed stock will build this waiting period into the schedule rather than rushing the install. It costs a few days and prevents a season-one callback.
Can you install reclaimed wood directly over drywall?
Reclaimed wood can be installed over drywall, but how it's attached and what goes behind it matters more than most homeowners realize — and getting that wrong is a separate category of problem from the material issues covered here. The wood needs to fasten into something solid, and the backing affects how the finished wall reads. Because the substrate, backing, and attachment method are their own detailed subject, we cover them fully in a dedicated guide rather than glossing over them here. The short version: don't assume boards can simply be glued to a wall and left to hold. Plan the backing first.
Do I need a permit for a reclaimed wood accent wall or ceiling?
Most reclaimed wood accent walls and decorative ceilings do not require a permit, because they're non-structural finish carpentry installed over existing conditions. The Broken Twig project in Norco did not require one — it was finish work and cabinetry over existing walls, with the electrical and recessed lighting already in place. The picture changes if your project involves new electrical, structural modifications, or anything that alters the building's framing or systems. Permit thresholds also vary by jurisdiction across Riverside County, so the final call always rests with your local building department. A reputable contractor confirms permit requirements before starting, rather than assuming — and folds that check into the planning phase.
Why do my accent wall boards look crooked or uneven?
Boards look crooked because the installation skipped a level reference line and the courses drifted as they went up. With irregular reclaimed stock, this happens fast: one board sits slightly off, the next compensates, and within a few rows the horizontal lines wander noticeably. The eye catches it immediately even when it can't name the cause. The fix is a laser level setting a true line, and patient material handling so each course stays dead-level across the whole wall — including across any interruptions like cabinets or shelves, where every course has to line up across separate zones. This is precisely where an experienced finish carpenter earns the fee. Once the lines wander, the only real remedy is to take it down and start over.
Let's Talk About Your Project
Worried about getting a reclaimed wood wall wrong? That's the right instinct — and it's exactly the conversation we like to have before anything starts. Head to our contact page, fill out the form, describe your room and what you're picturing, and upload any inspiration photos. We'll walk you through how we plan around every problem in this guide, before a single board is committed.
We serve Norco, Corona, Eastvale, Riverside, Temecula, Murrieta, Menifee, Perris, and the wider Inland Empire. Follow our latest work on social media, and reach out whenever you're ready.
951-338-8058 | brian@hsconstruct.com | hsconstruct.com | CSLB #1123738
More Than Just Reclaimed Wood Walls
Getting a reclaimed wood wall right is one piece of making a whole room feel finished. Brian has been a finish carpenter since 1991, and his sons now build alongside him, which means every room in your home is fair game.
If your space needs more than that, here's what else we build:
-
Kitchen and bathroom remodels — full custom cabinetry, tile work, and finish carpentry from demo to done
-
Coffered ceilings — grid beam systems that add architectural depth to any room, sized and proportioned to the space
-
Wainscoting and wall paneling — classic raised panel, flat panel, board-and-batten, and shiplap applications
-
Reclaimed wood accents — feature walls, fireplace surrounds, and detail work using salvaged material with real character
-
Beam wraps — hollow wood wraps that give exposed beams the look of solid timber without the structural engineering
-
Crown molding, baseboards, and trim carpentry — the details that make a house feel finished, from a single room to a whole home
-
Cased openings and interior door replacements — clean transitions between spaces that most contractors overlook
-
Custom built-in entertainment walls and bookshelves — designed by hand, built in the shop, installed to last
Wood, proportion, and rooms that feel right — that's what we do.
hsconstruct.com
This guide is part of our accent walls series.
Learn more about Accent WallsHave a project in mind? Let's start a conversation.
Tell us what you are thinking about and we will give you a straight answer about scope, timeline, and investment.
Start a Conversation