
The Making of a Vertical-Grain Fir Glue-Up: How a Custom Solid-Wood Panel Gets Built in Menifee, CA
Quick Answer: Holland & Sons Construction built a set of solid wood panels for a custom bench, shelving, and accents on a project in Menifee, CA, by joining rough-sawn vertical-grain Douglas fir boards edge to edge. The glue-up took a full day in the shop, a long two-person day, followed by a night in the clamps. It's a peek behind the curtain of what custom actually means: sourcing the right wood, dimensioning it properly, gluing it up under cauls, and building something one-of-one for a specific spot.
Three ways this could have gone
-
Plywood. A bench or shelf cut from a sheet. The right call for a lot of cabinet boxes and shelves: stable, efficient, and available with good hardwood veneers.
-
The standard version. A particleboard or MDF core with a thin wood veneer on the faces and edge banding on the edges. It's what most store-bought shelving and benches are made of, it looks like wood, and for most spots in most homes it does the job.
-
This one. Solid vertical-grain fir, milled in our shop, edge-glued into a panel, with the show edges miter-folded so the face grain runs down over the edge. No veneer, no applied edge banding, just fitted glue joints.
Just to be right up front, the standard version is a fine choice and most homeowners make it. Most never think about it again. We went solid here because the design wanted the thickness, the edge, and the look of real lumber. This post is for the homeowner who walks up to a bench, runs a hand across the edge, and wants to know why it feels different.
How we made it
-
Source the stock. We bought rough-sawn 2x6 vertical-grain Douglas fir from Reel Lumber Service in Riverside. It comes in random lengths, anywhere from 8 to 14 feet, and it's an expensive wood. We bring a moisture meter to the yard and check the stock before picking the boards we want. Vertical grain means the growth rings stand nearly straight up through the board instead of lying across it. That's what gives the face those tight, straight lines, and it's why the board stays flatter across its width than flat-sawn stock. It's still solid wood. It moves a little with the seasons.
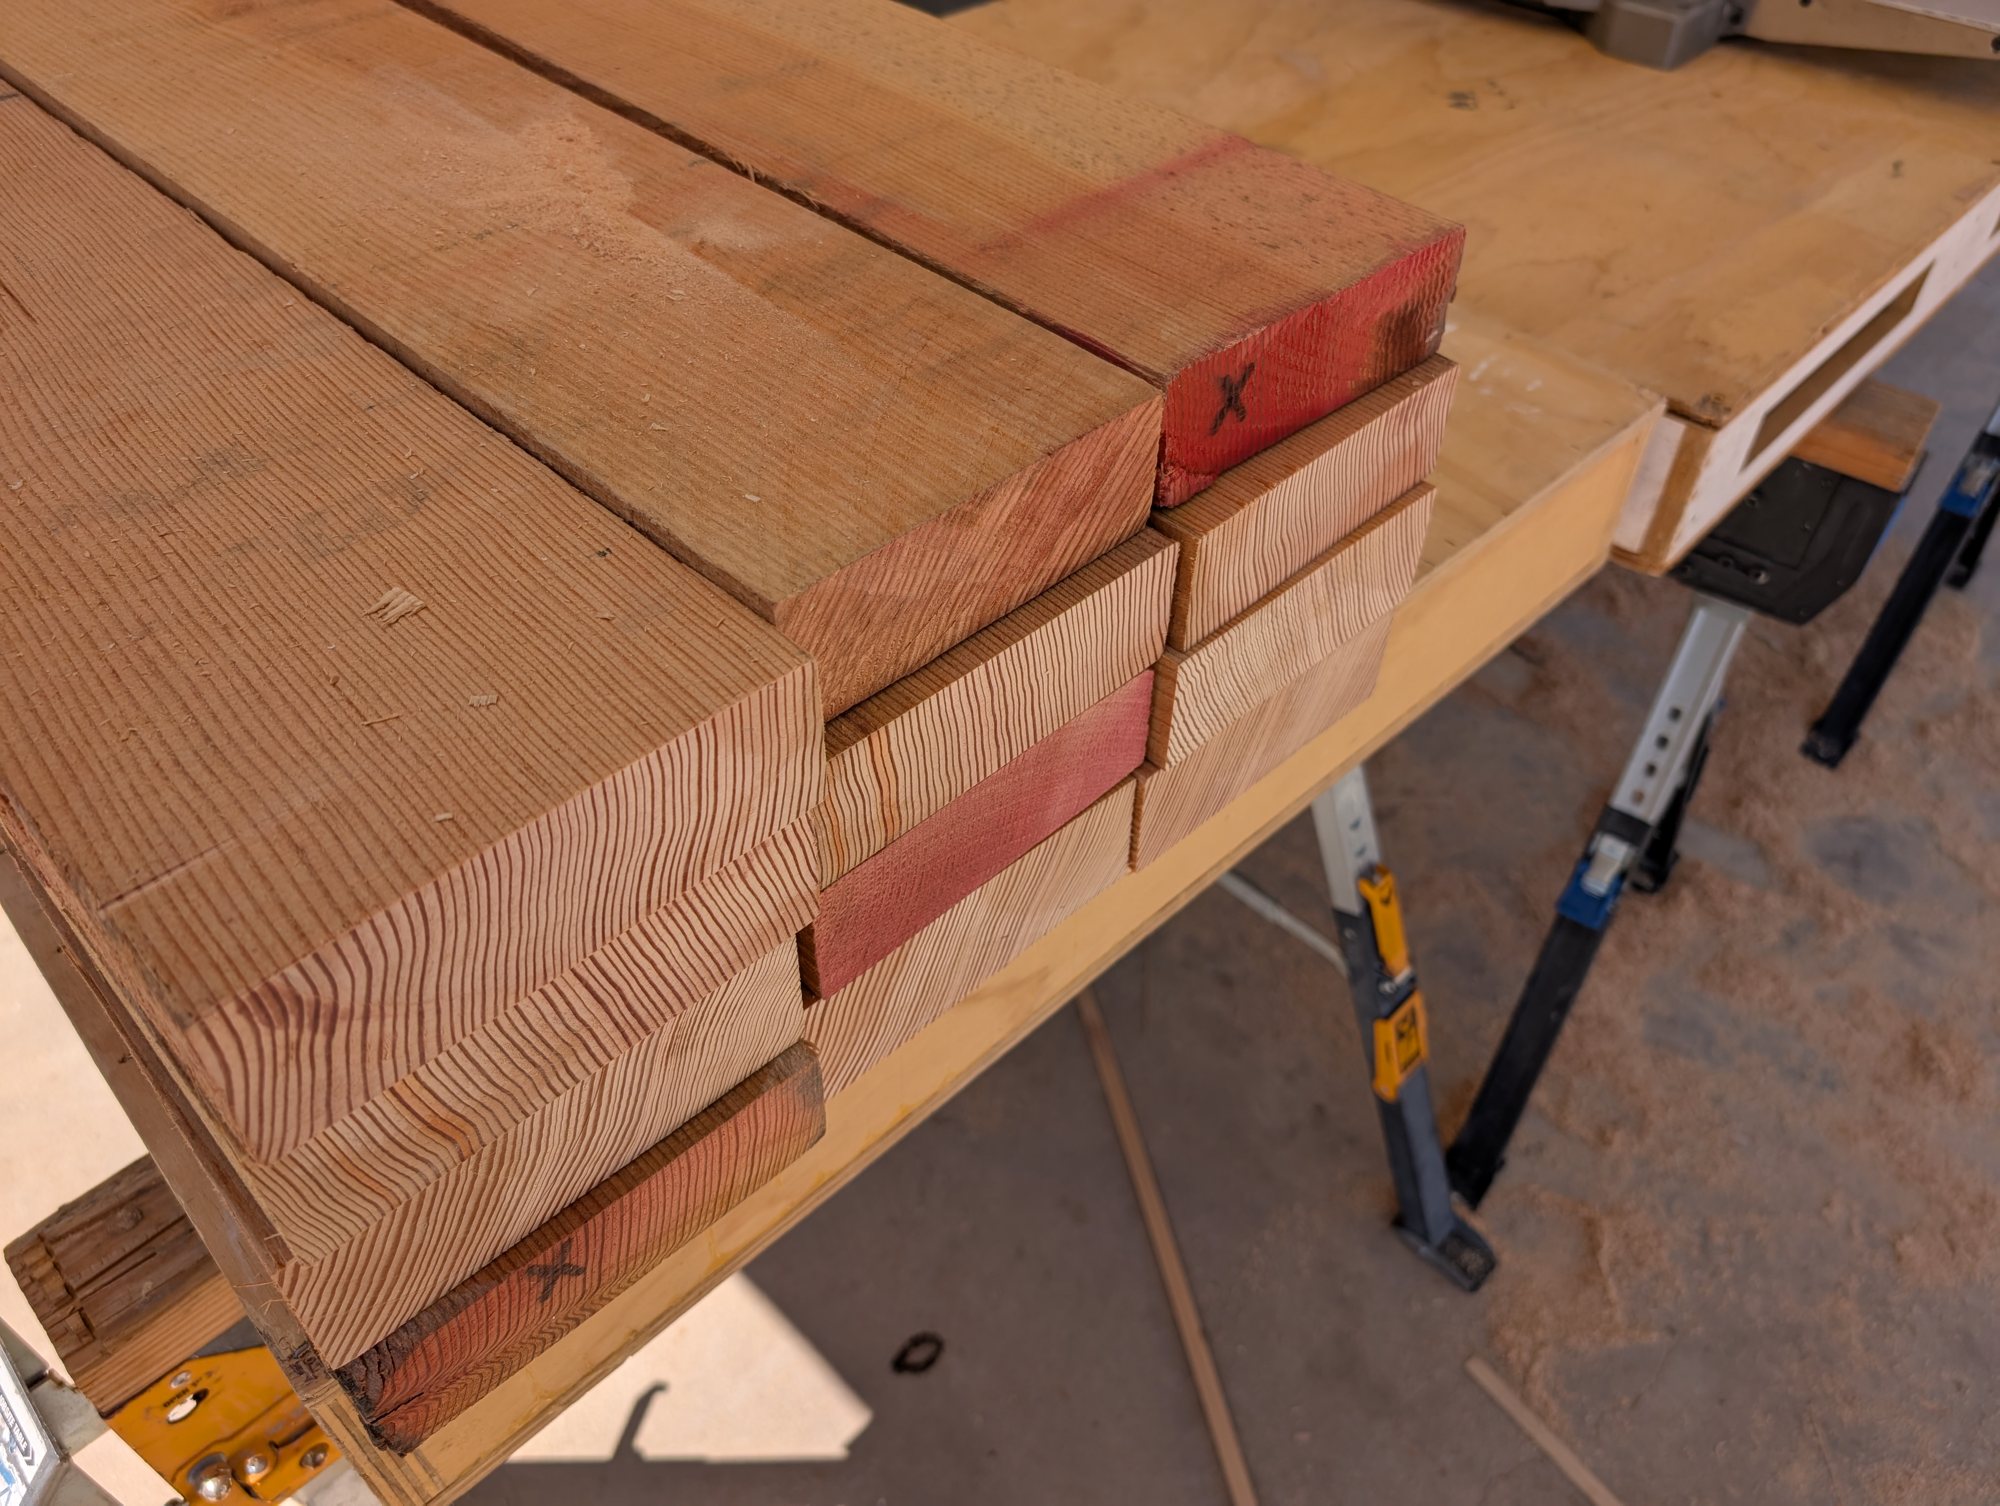
End grain on the rough stock. The rings run straight up and down, which is what vertical grain means.
-
Rough cut. Back at the shop, we cut the long stock down to the rough dimensions for each panel. Random lengths get sorted so the best faces land where they'll be seen.
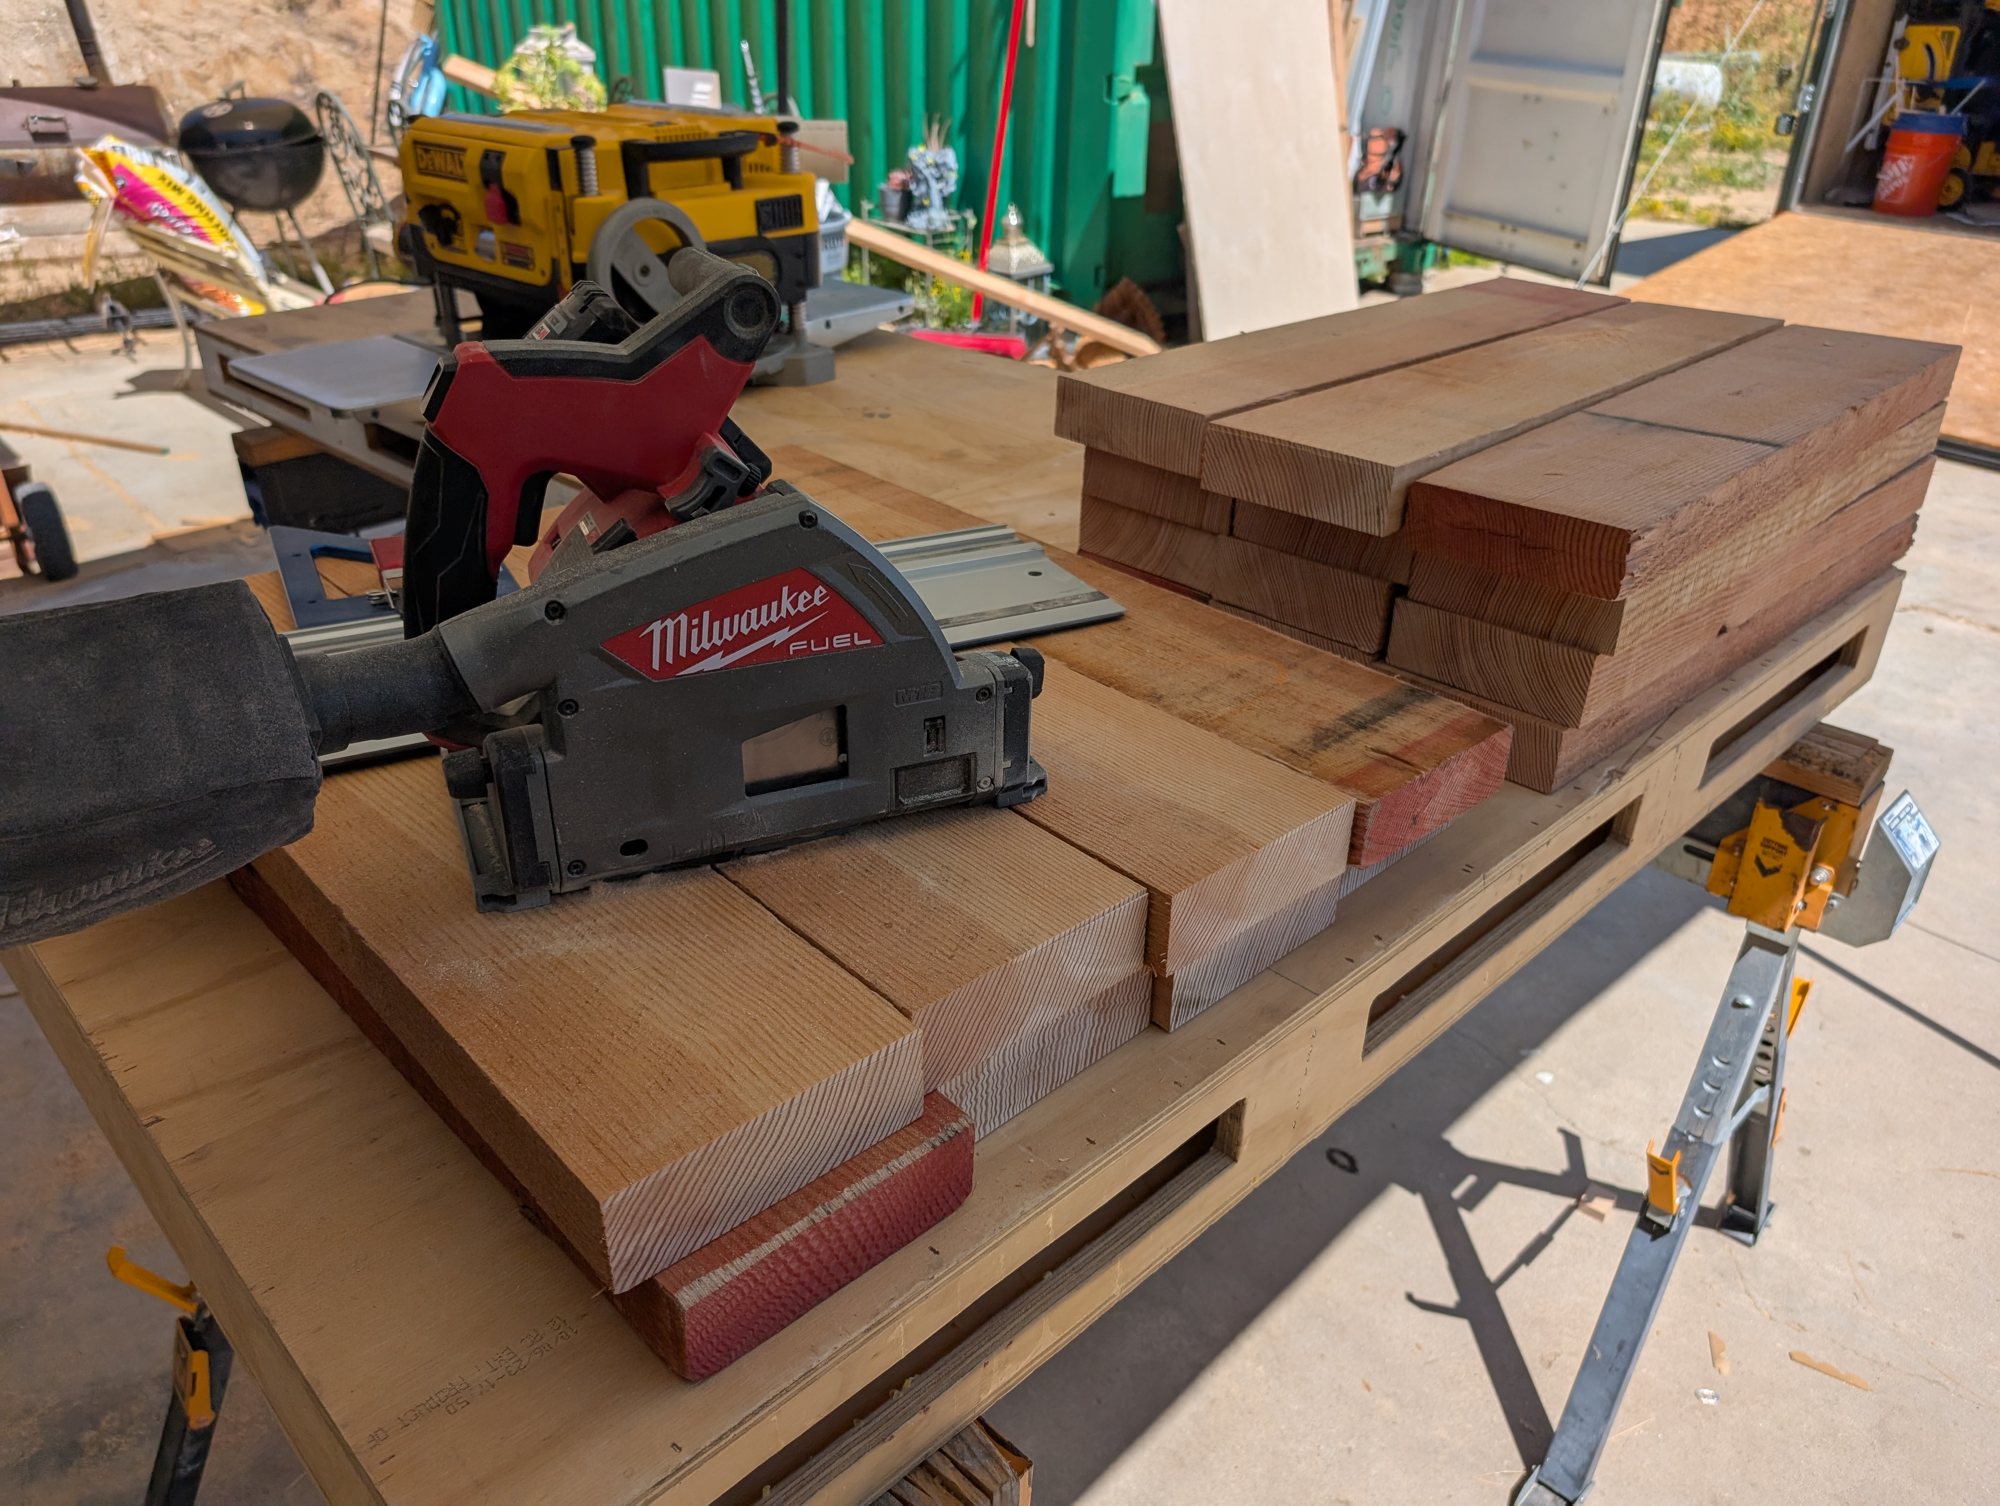
Rough-cutting the long stock down with the Milwaukee track saw.
-
Plane to thickness. The stock comes rough-sawn but close enough to go straight to the DeWalt DW735 thickness planer. Every board goes through until it's a uniform 1.75 inches with both faces parallel. Boards that come off a rack are close. Close doesn't glue up flat.
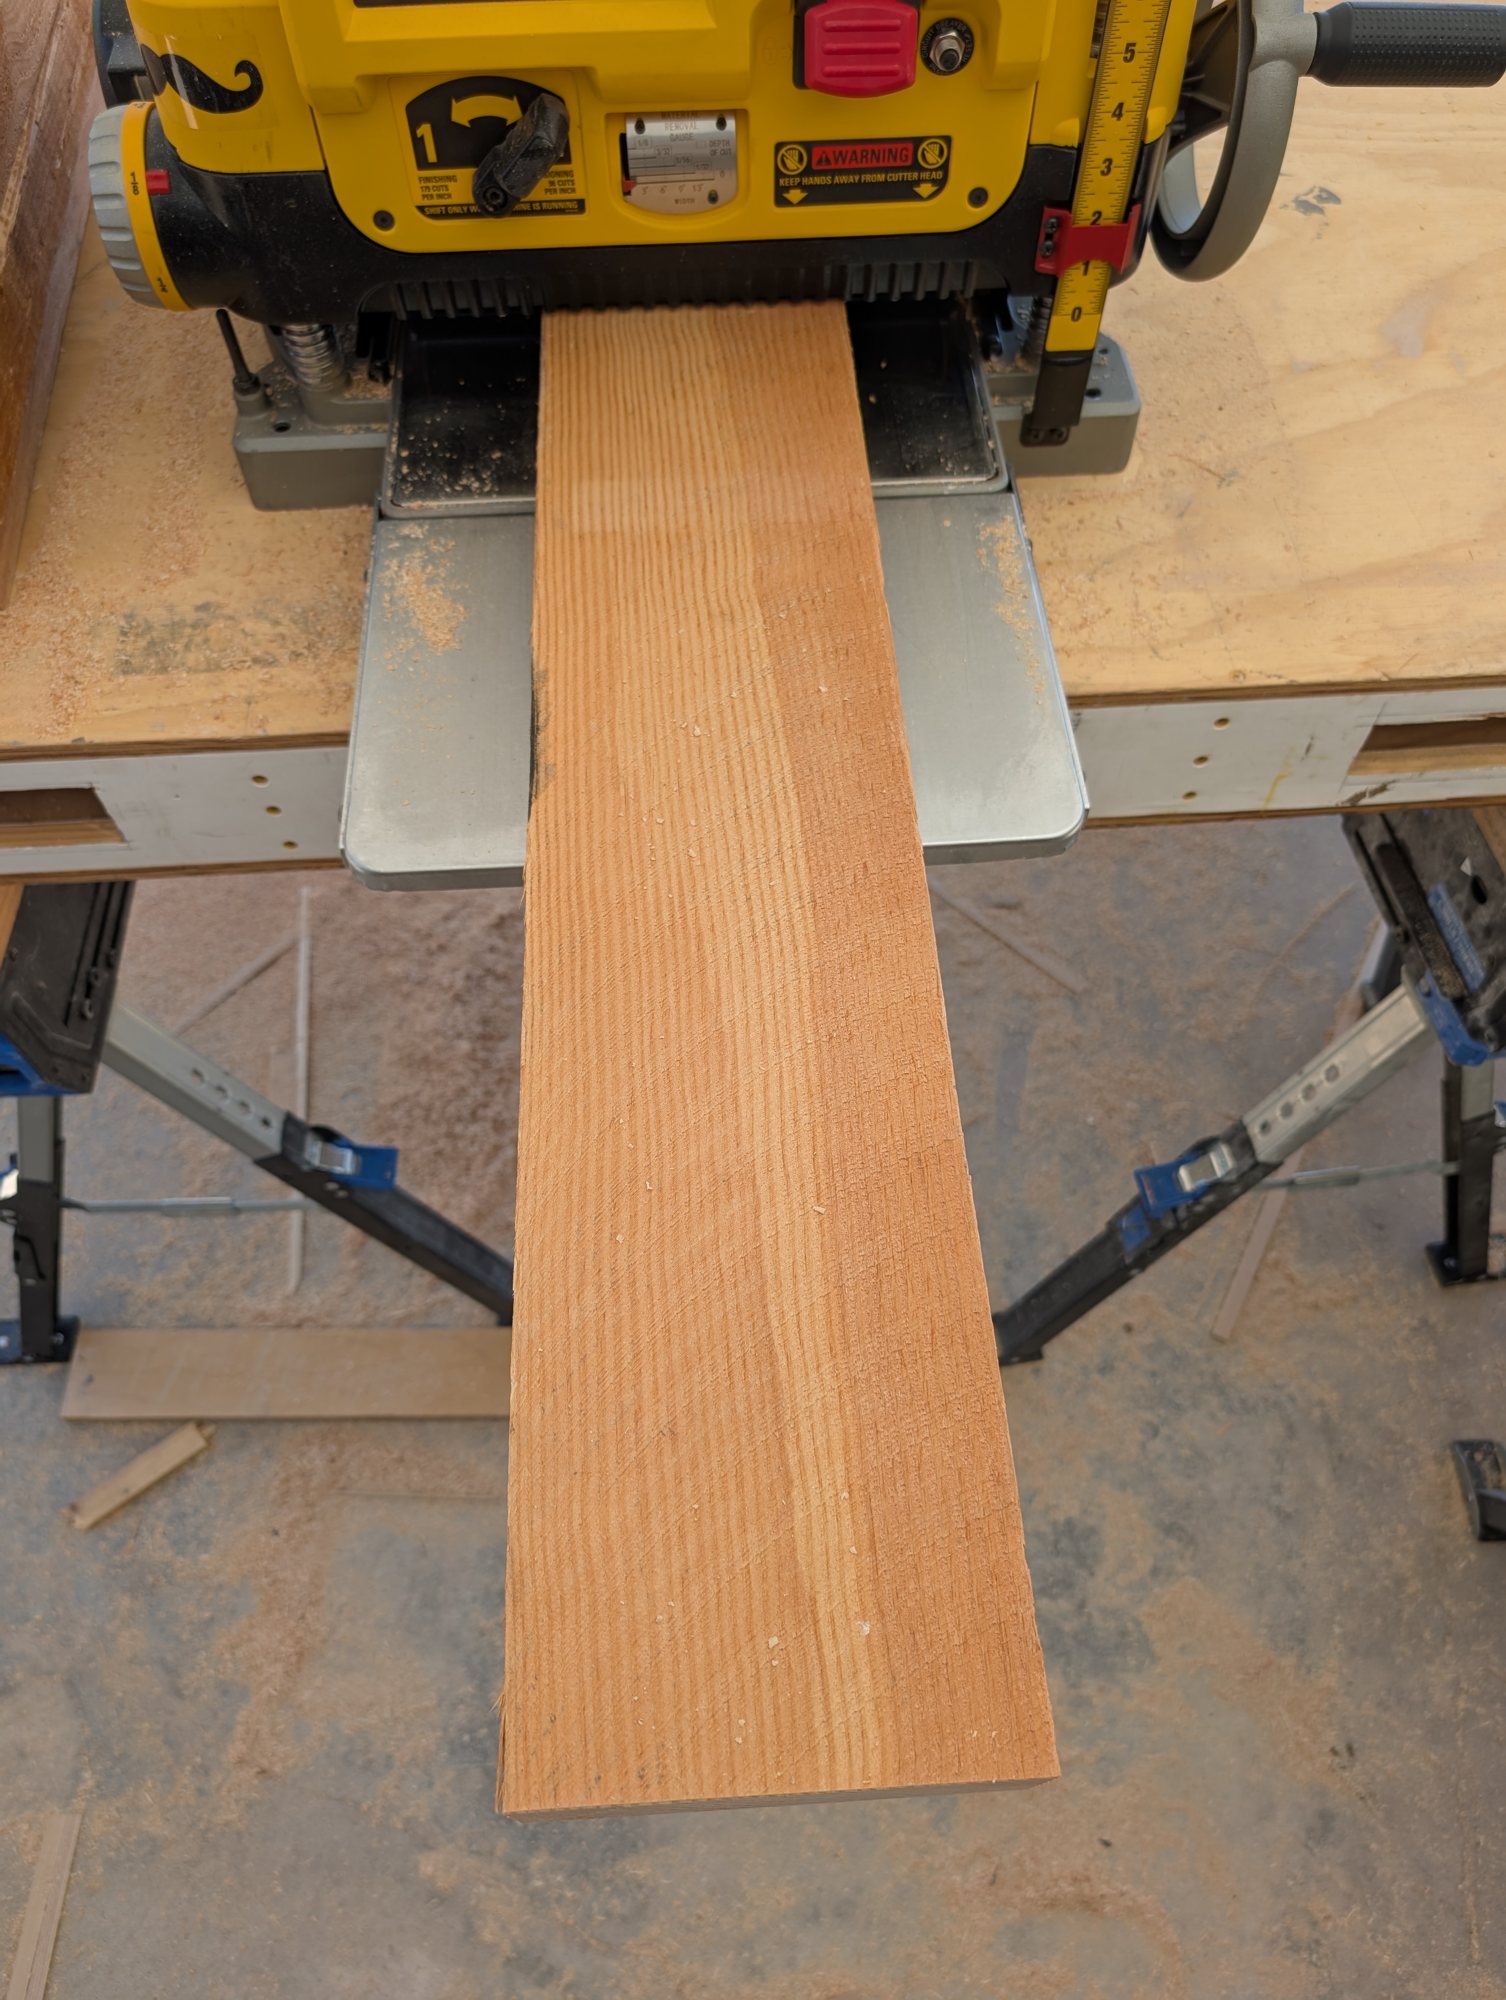
A board coming out of the planer at a uniform 1.75 inches.
-
True the glue edges. This is the one we do our own way. Our Milwaukee M18 FUEL track saw is dialed in tight enough that we trust it for glue edges. First cut: the track saw takes one edge and makes it the reference edge. Second cut: that reference edge goes against the table saw fence and we straighten the other edge. Third cut: flip the board, put the new edge against the fence, and cut the reference edge again. Two dead-parallel edges, both off the same fence, ready for glue. The engineer's square on the edge is how we know the saw is still cutting square.
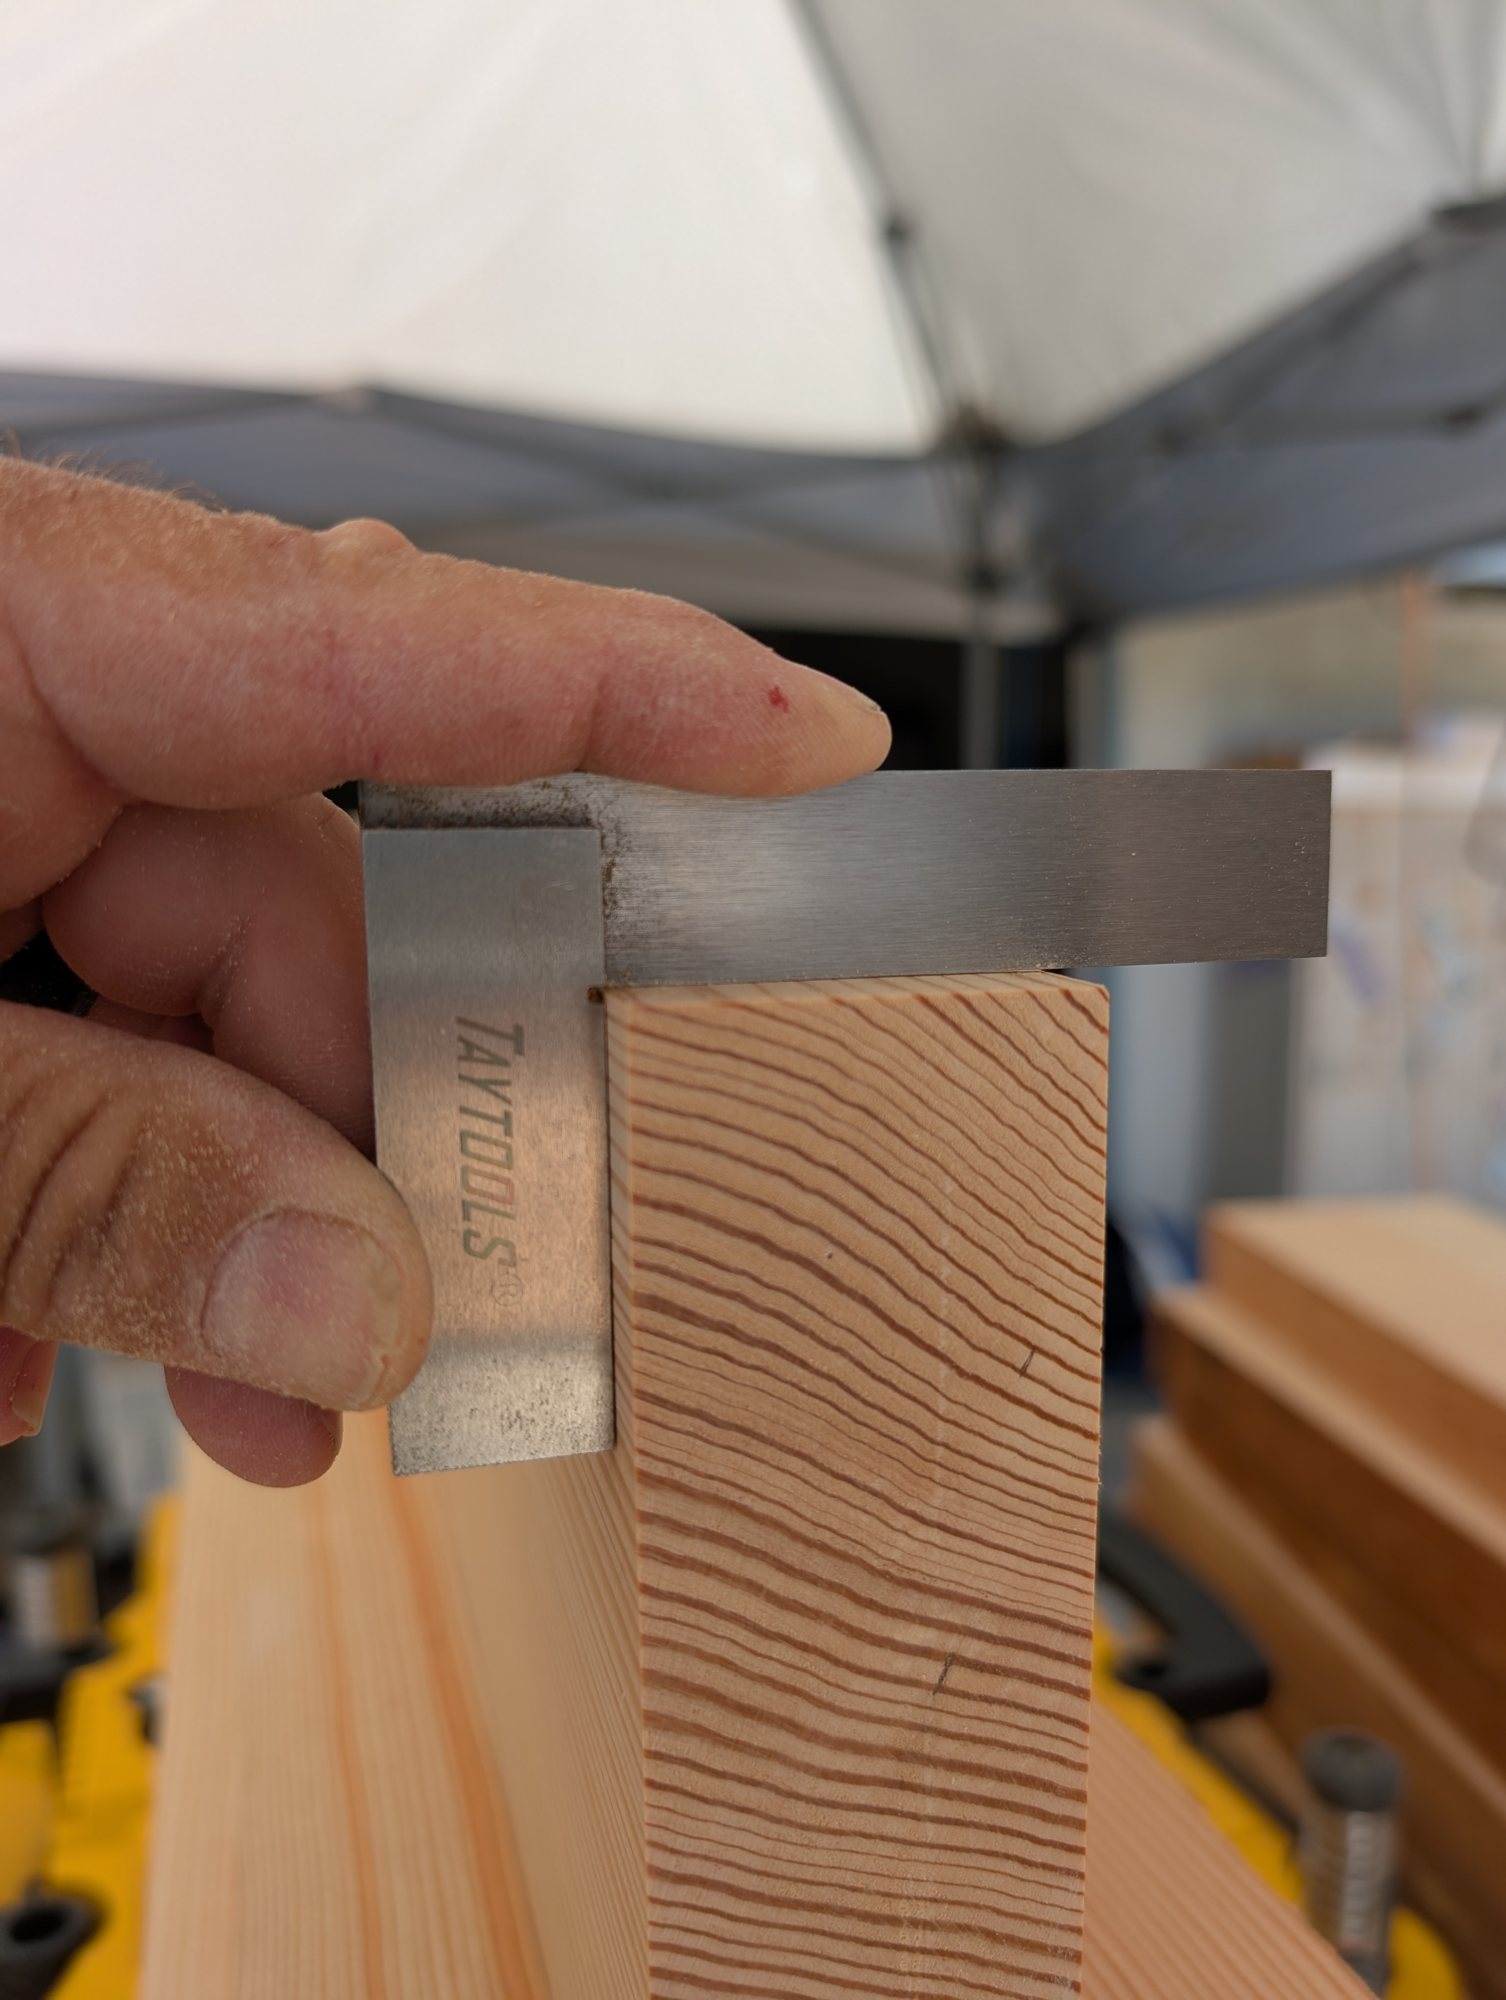
Checking a glue edge with an engineer's square. If this isn't dead square, the panel won't be flat.
-
Quick sand. A pass with 150 over the faces, just enough to smooth the planer marks before the boards go together.
-
Lay out, glue, and clamp. The boards go on the Jorgensen Cabinet Master parallel clamps dry first so we can shuffle them for grain and color. Then wood glue on the edges, clamps snug, and cauls across the top. A caul is a straight block clamped over the seams so every board stays flush with its neighbor while the edge clamps pull the joint closed. Without cauls, neighboring boards shift up or down a hair and leave ridges at every seam. Those ridges have to be sanded flat later, which costs time and takes thickness off a panel we just milled. The glue joint does the holding. The cauls keep the panel flat.
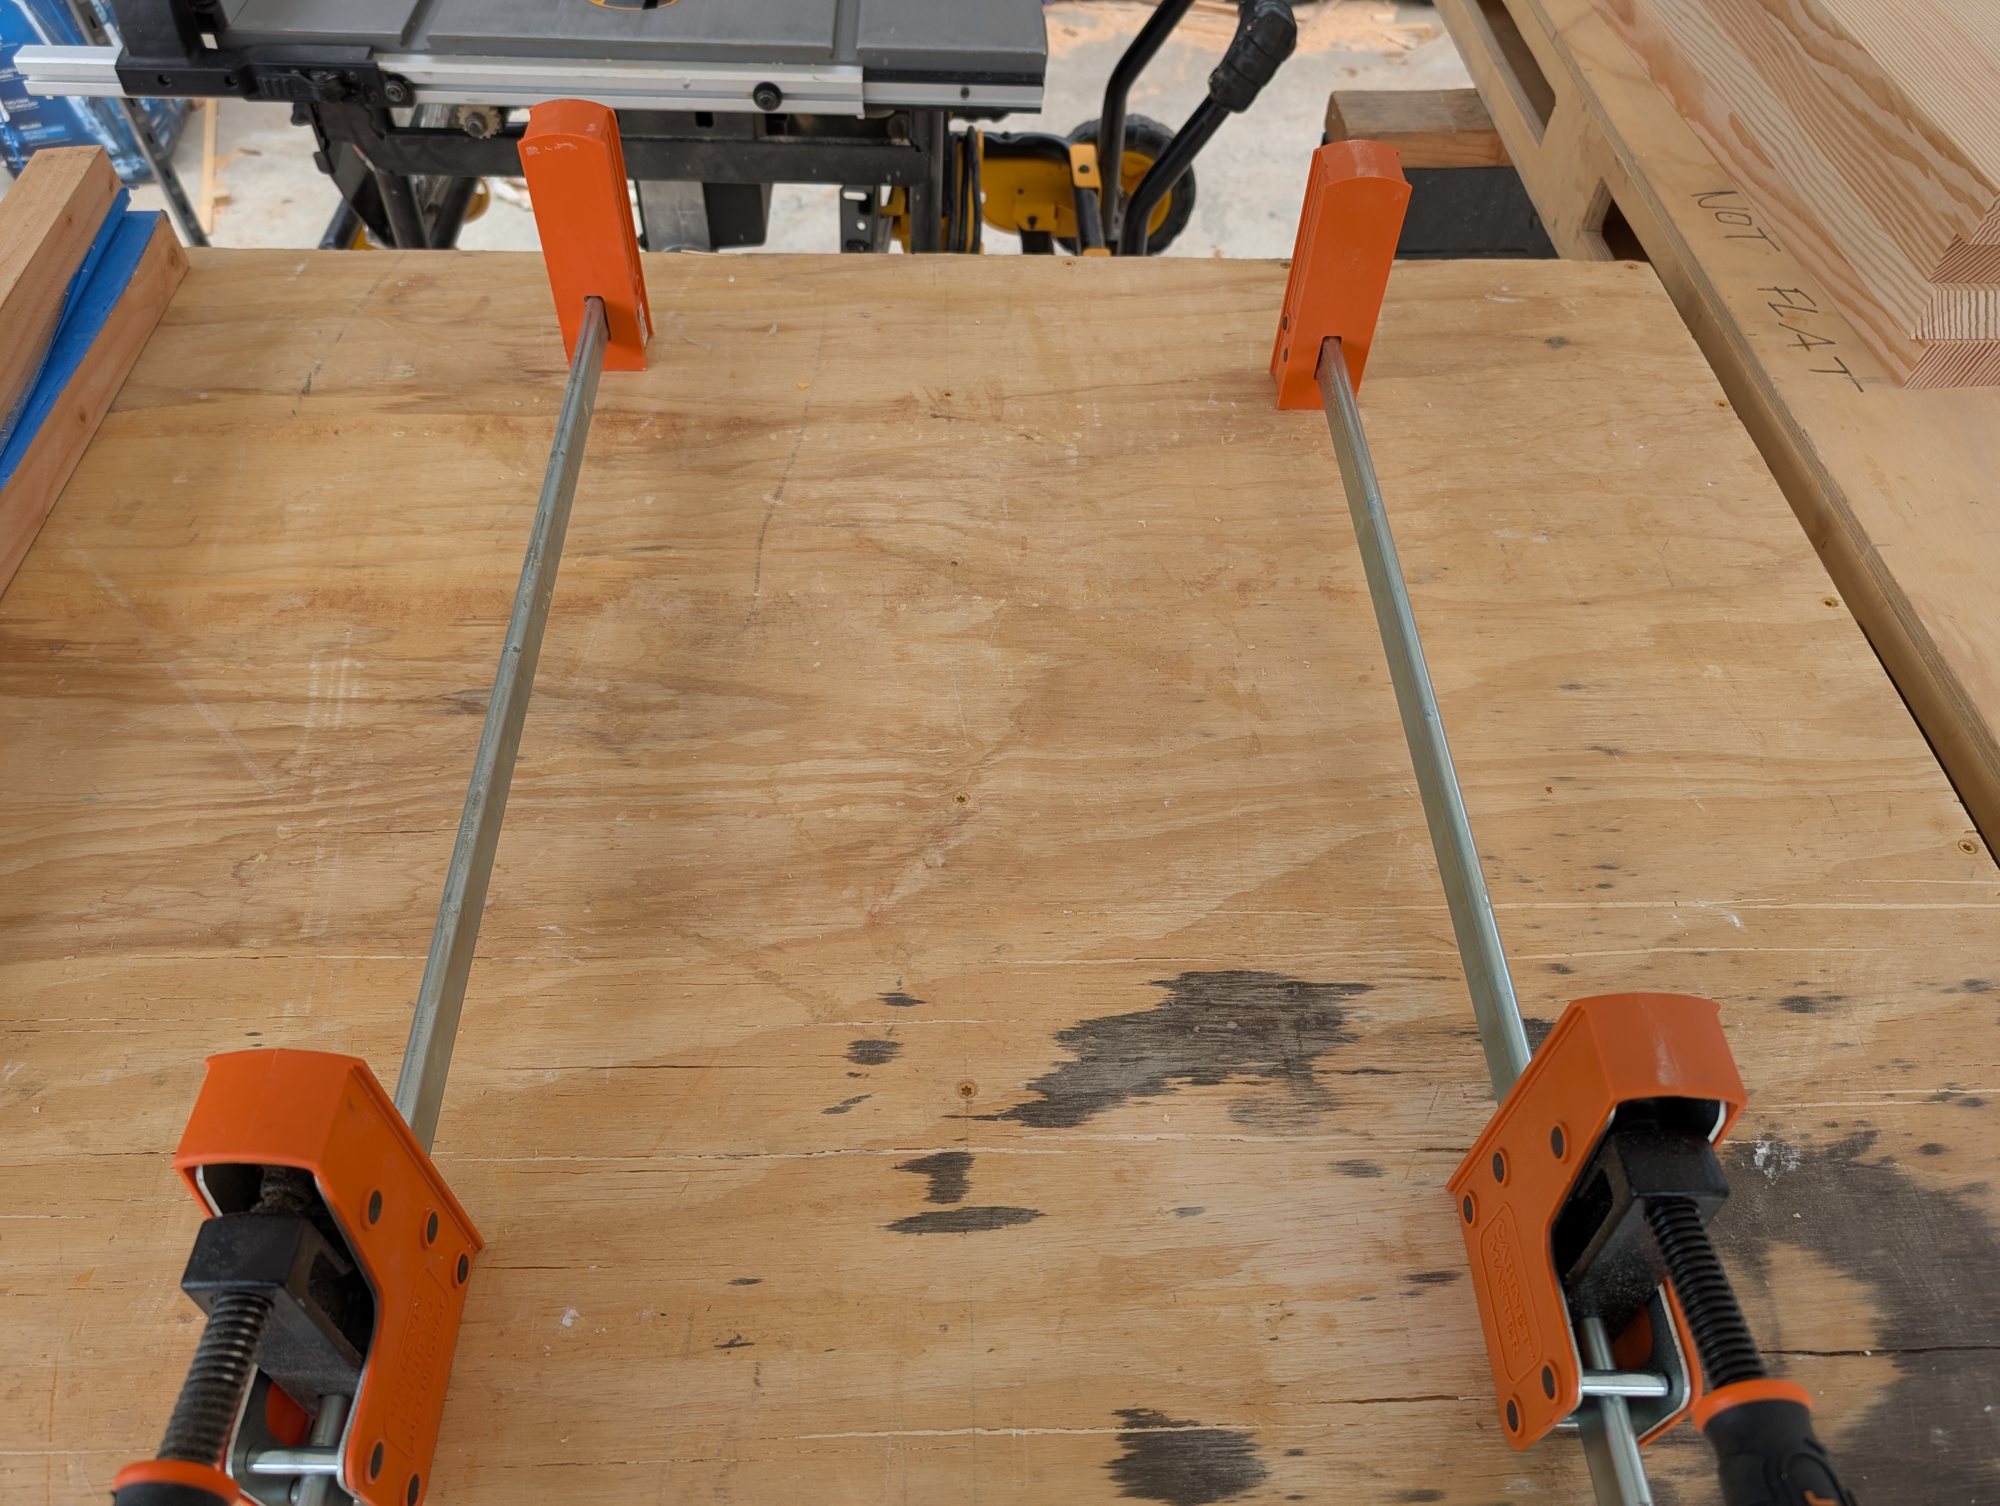
Jorgensen Cabinet Master clamps set out before the boards go on.
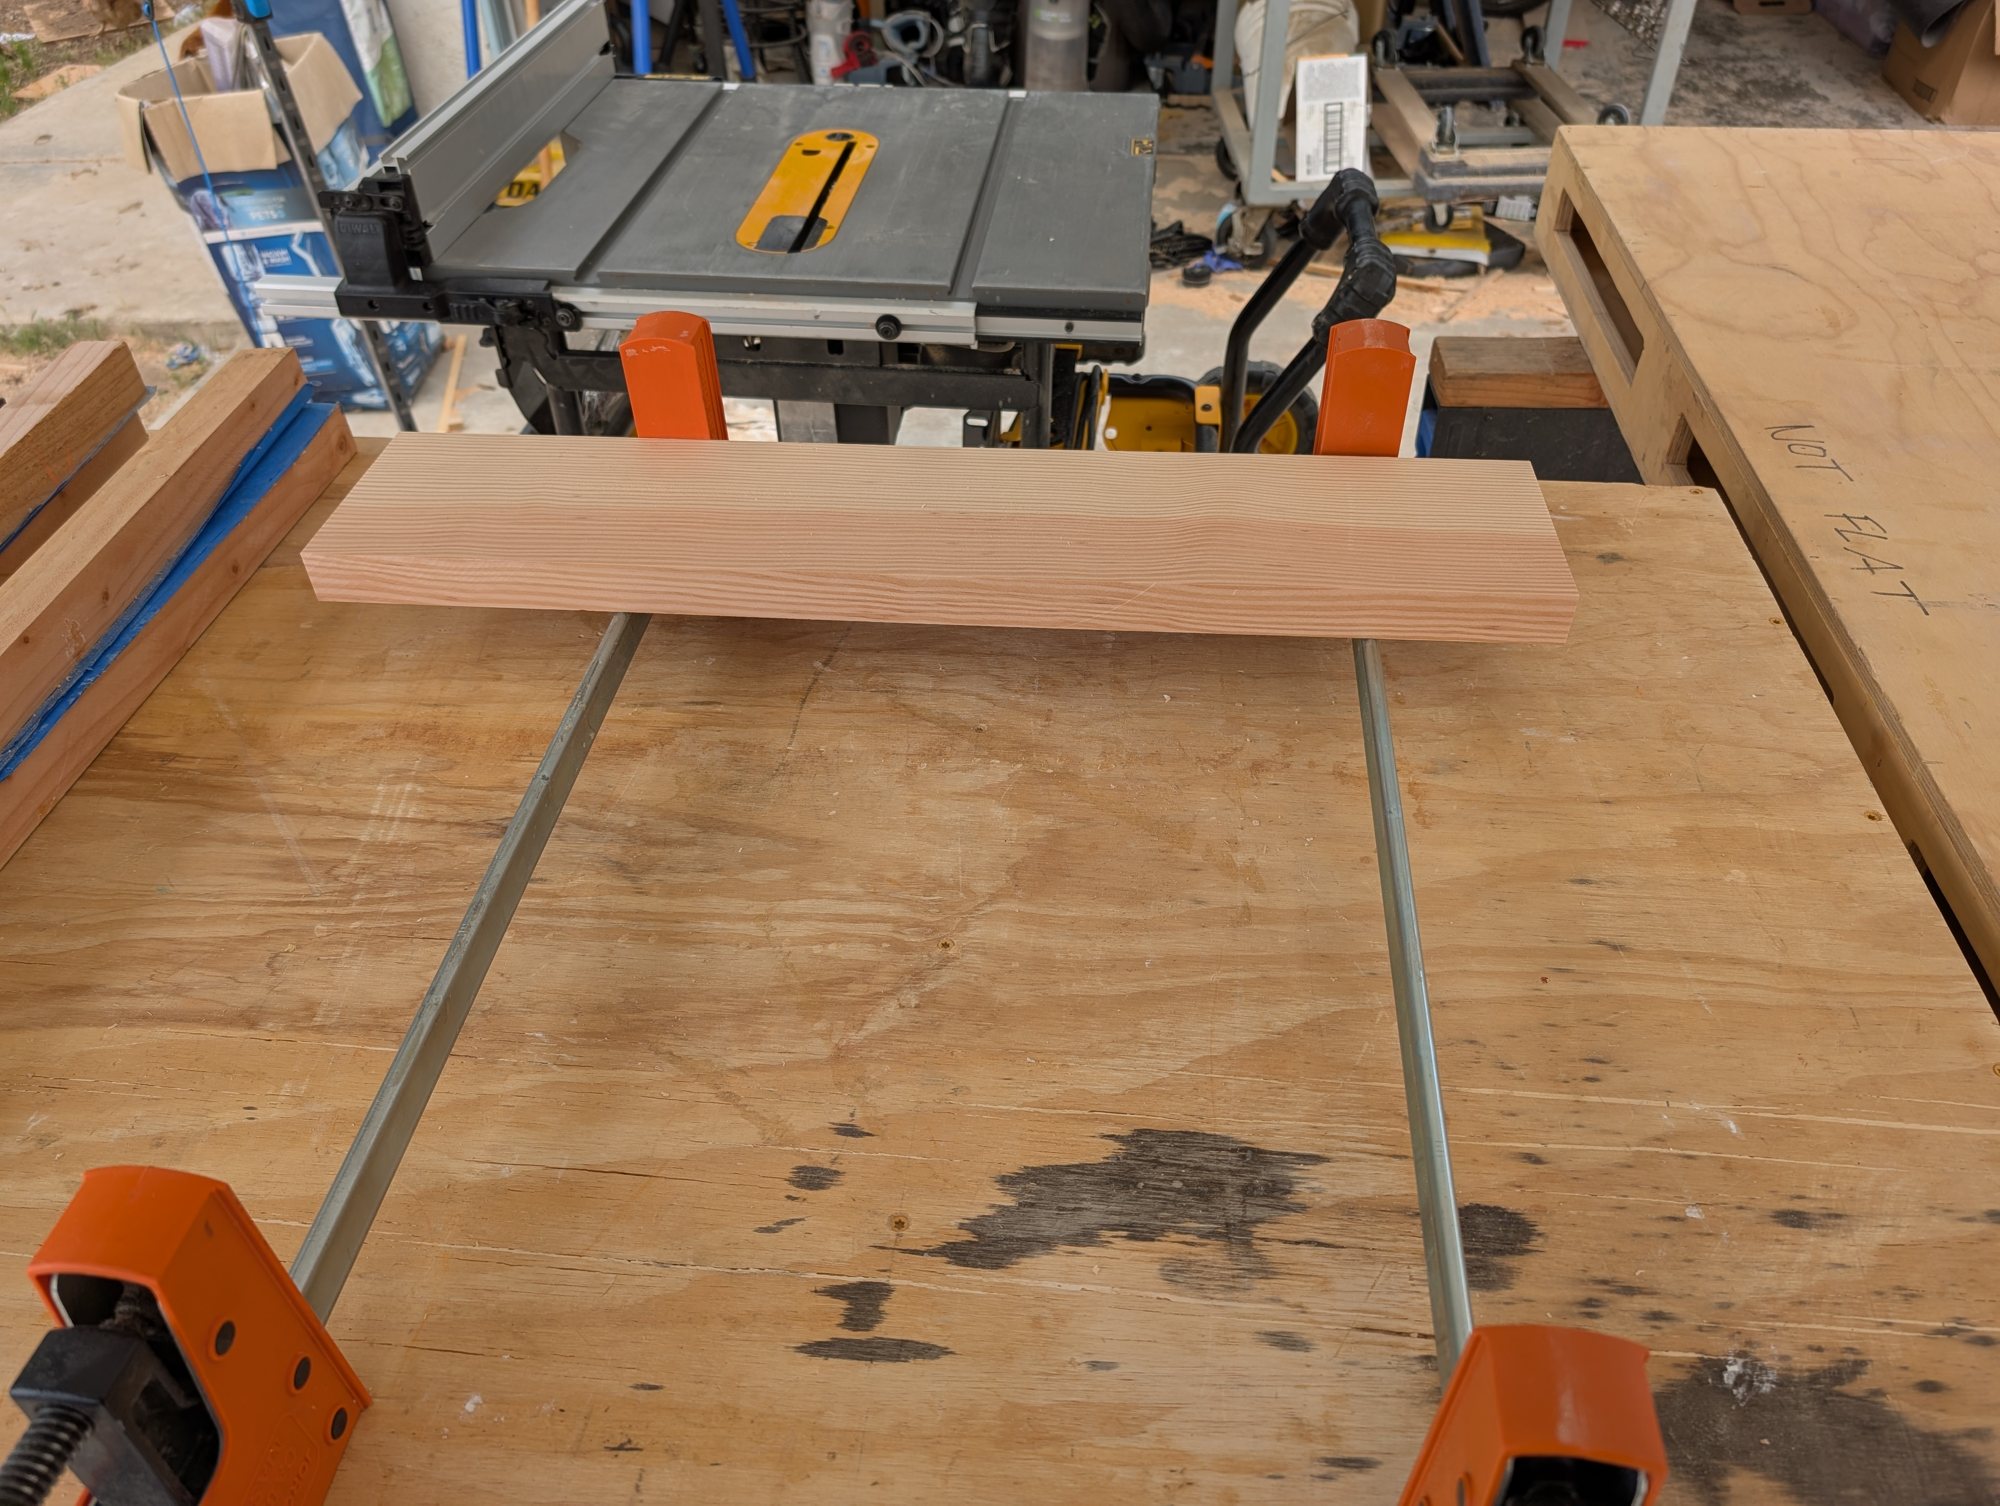
First milled board on the clamp bars.
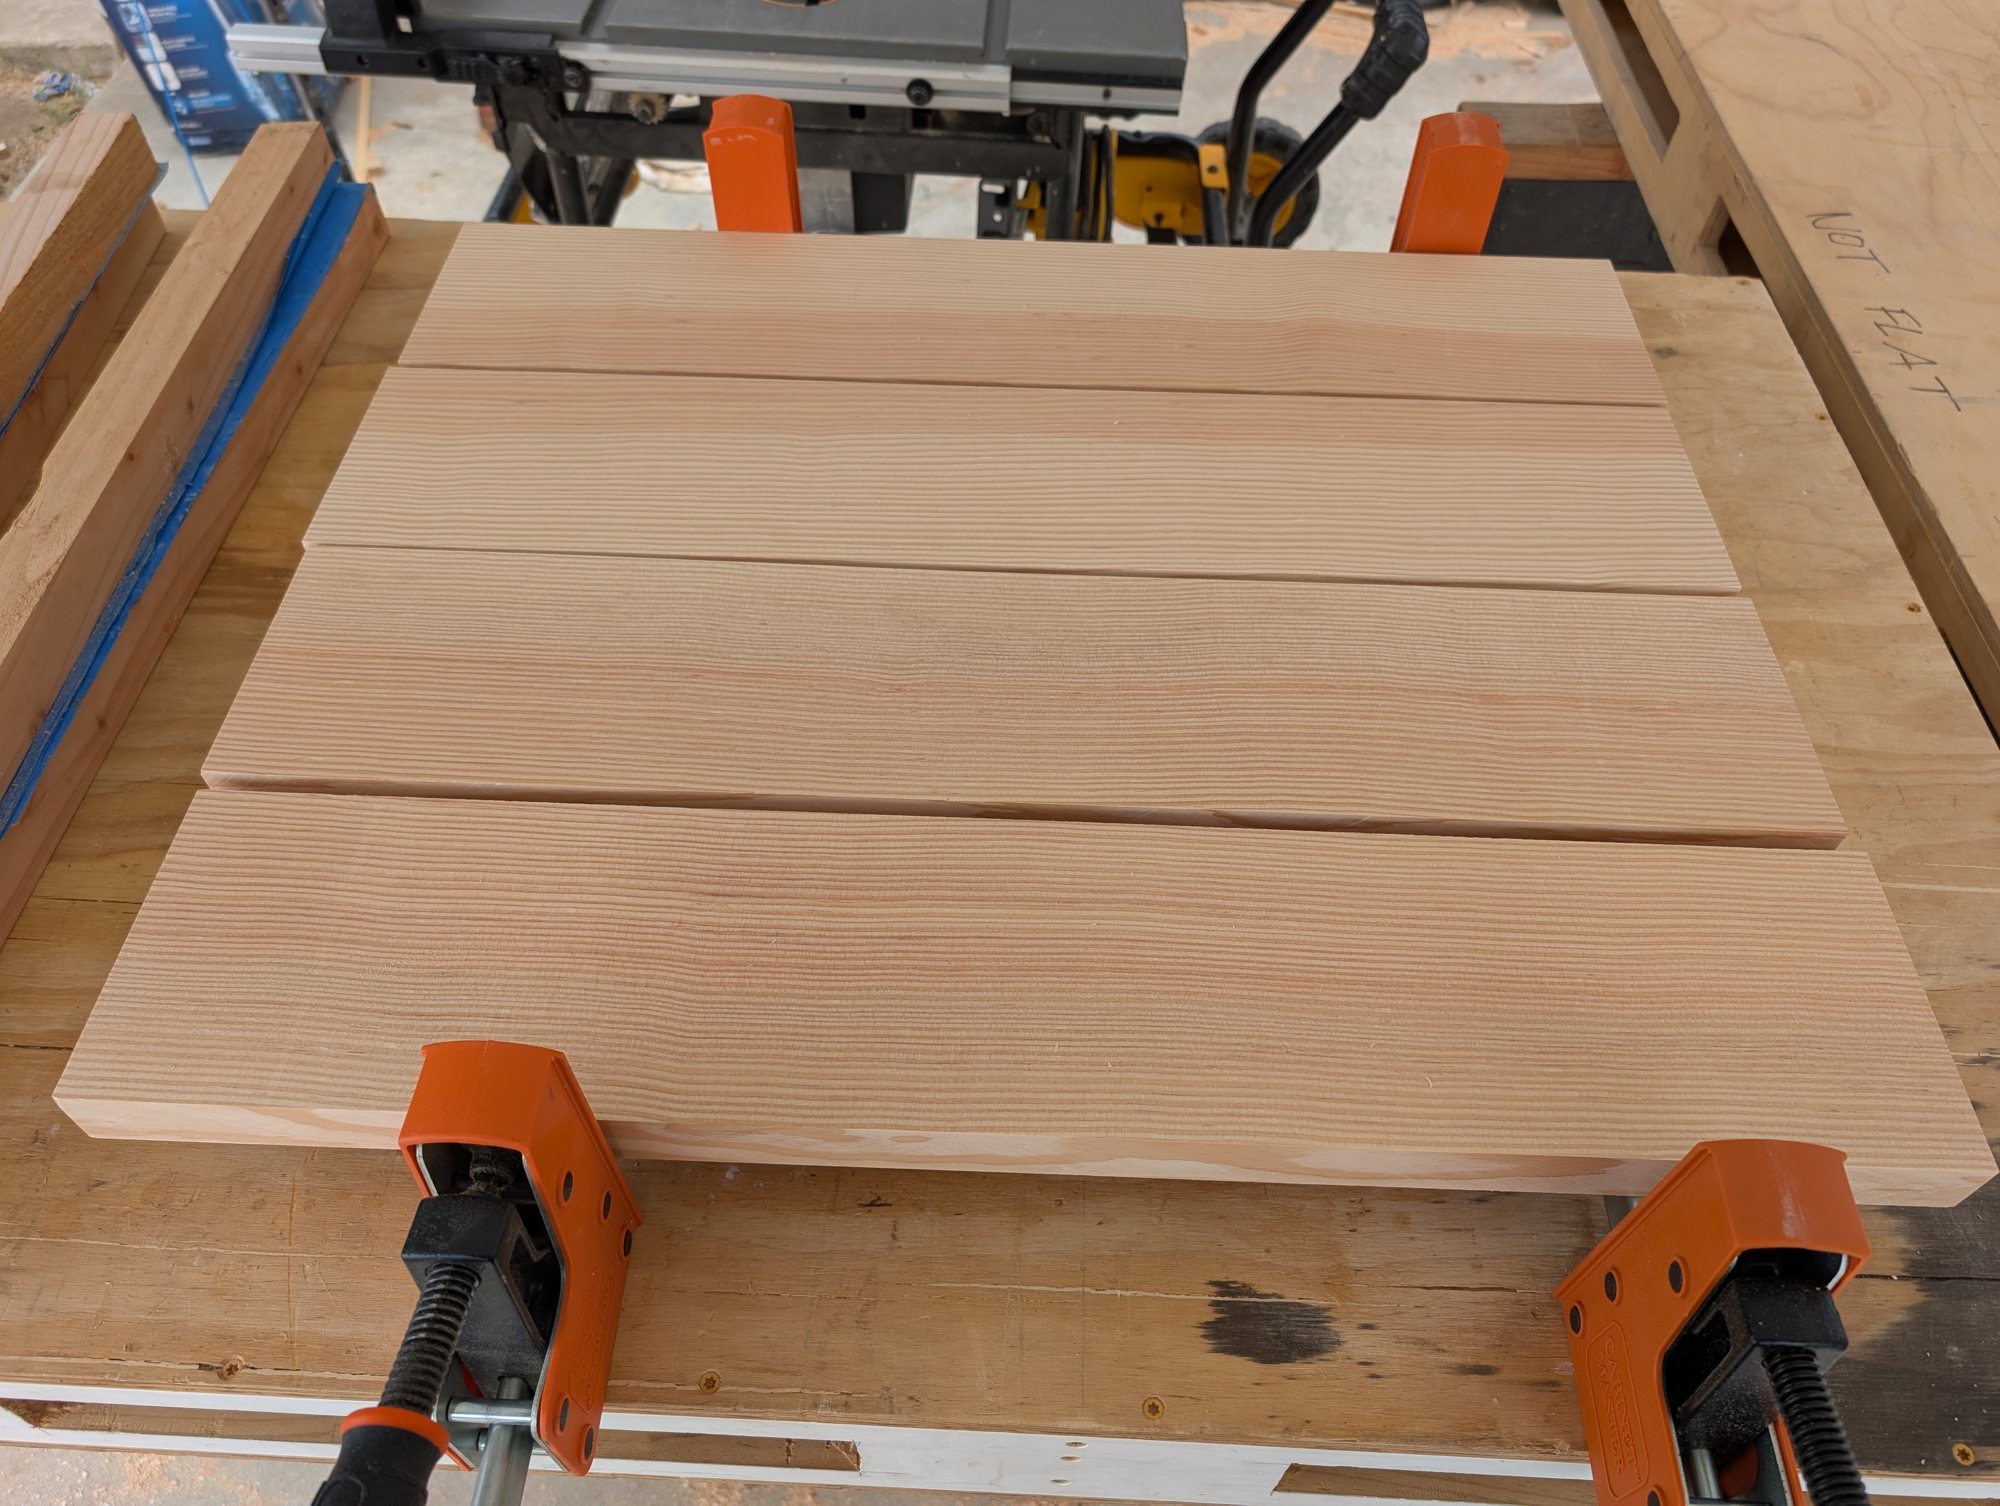
Dry fit. Four boards shuffled for grain and color before any glue comes out.
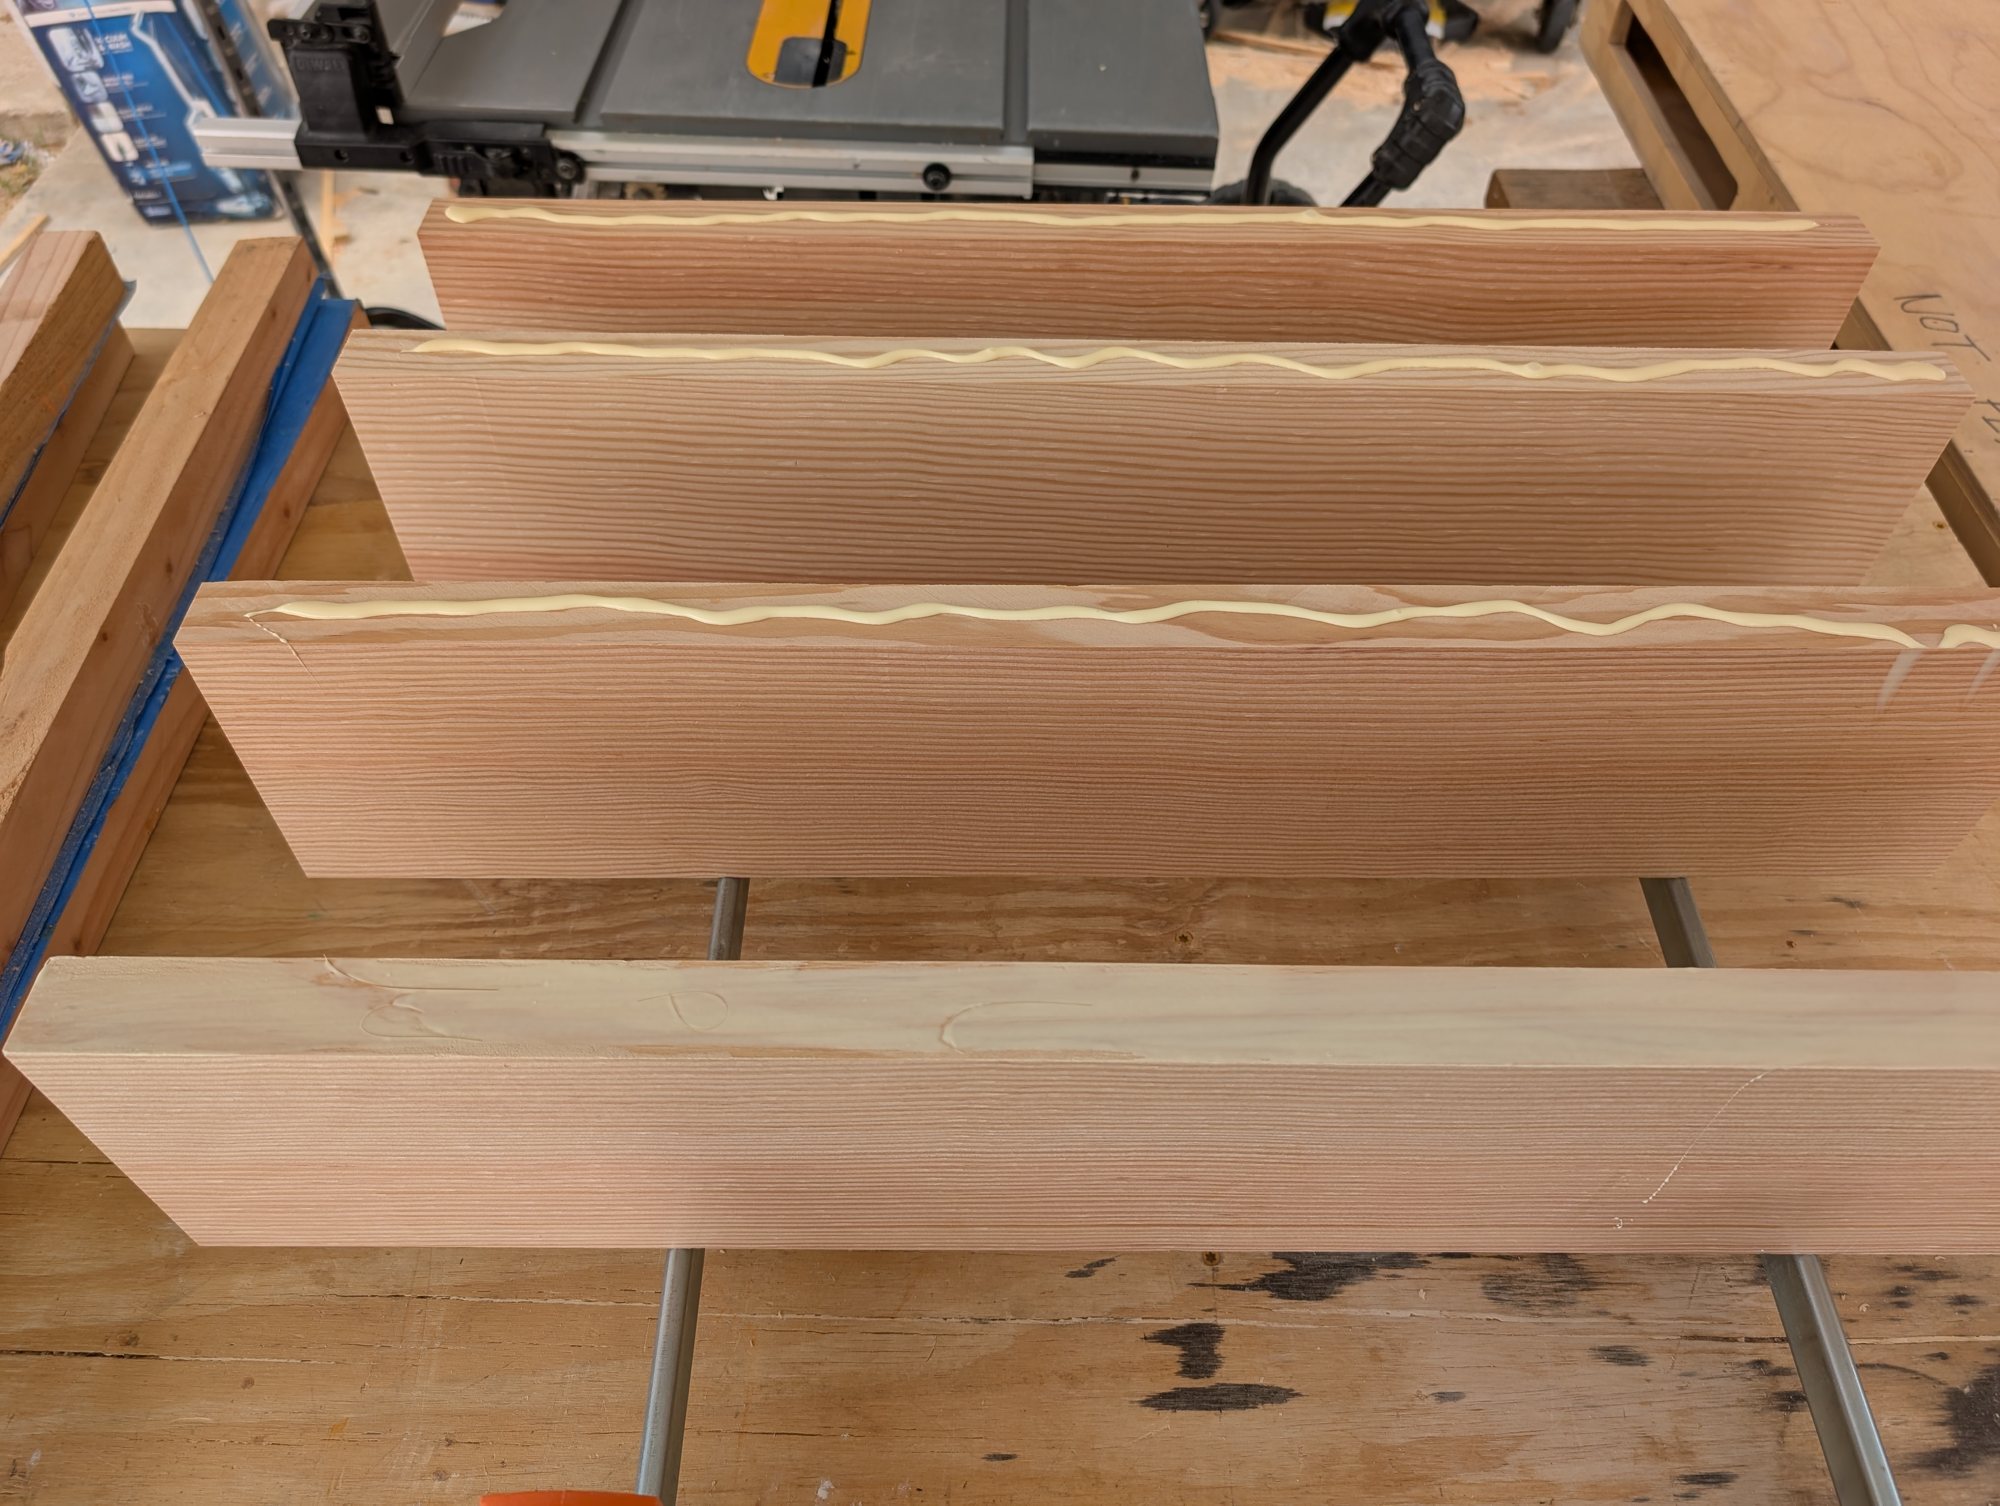
Glue on the edges.
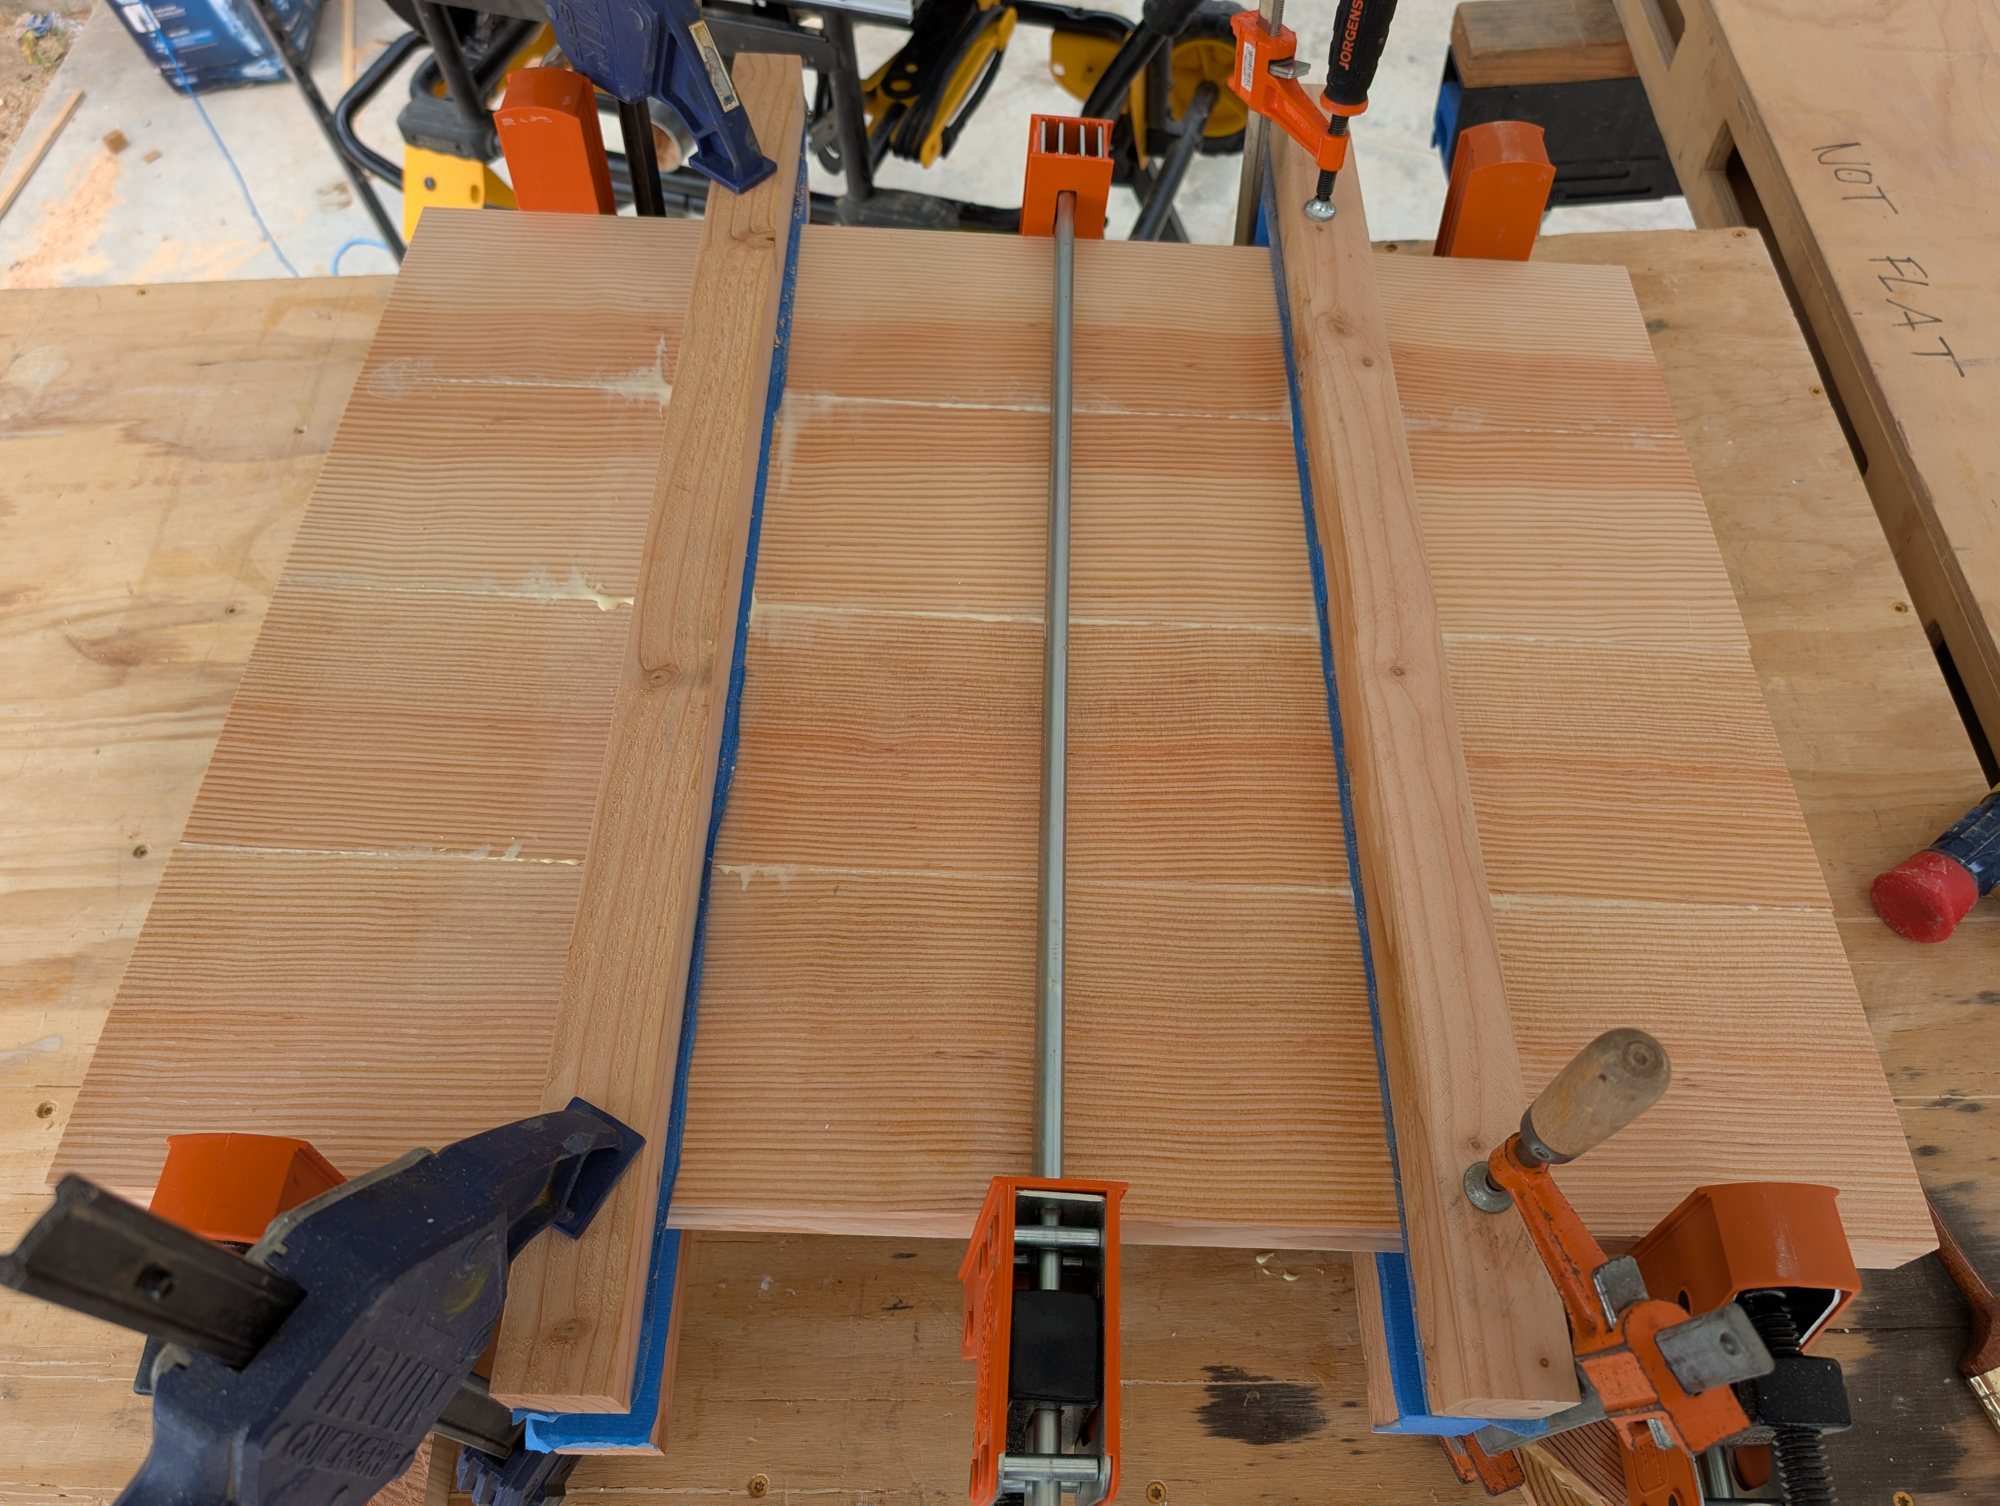
In the clamps with cauls across the top. The cauls keep every board flush with its neighbor while the glue joints close.
-
Leave it alone. At least 15 hours in the clamps. Some glues let you pull clamps a lot sooner, but we weren't in a hurry. The panels sat overnight before anything else happened to them.
-
Miter fold the show edges. Any edge that faces the room got a true miter fold: the face is cut at 45 degrees, folded down, and glued, so the same face grain flows off the top and down over the edge. You do not see end grain or edge grain anywhere on these shelves. Face grain everywhere.
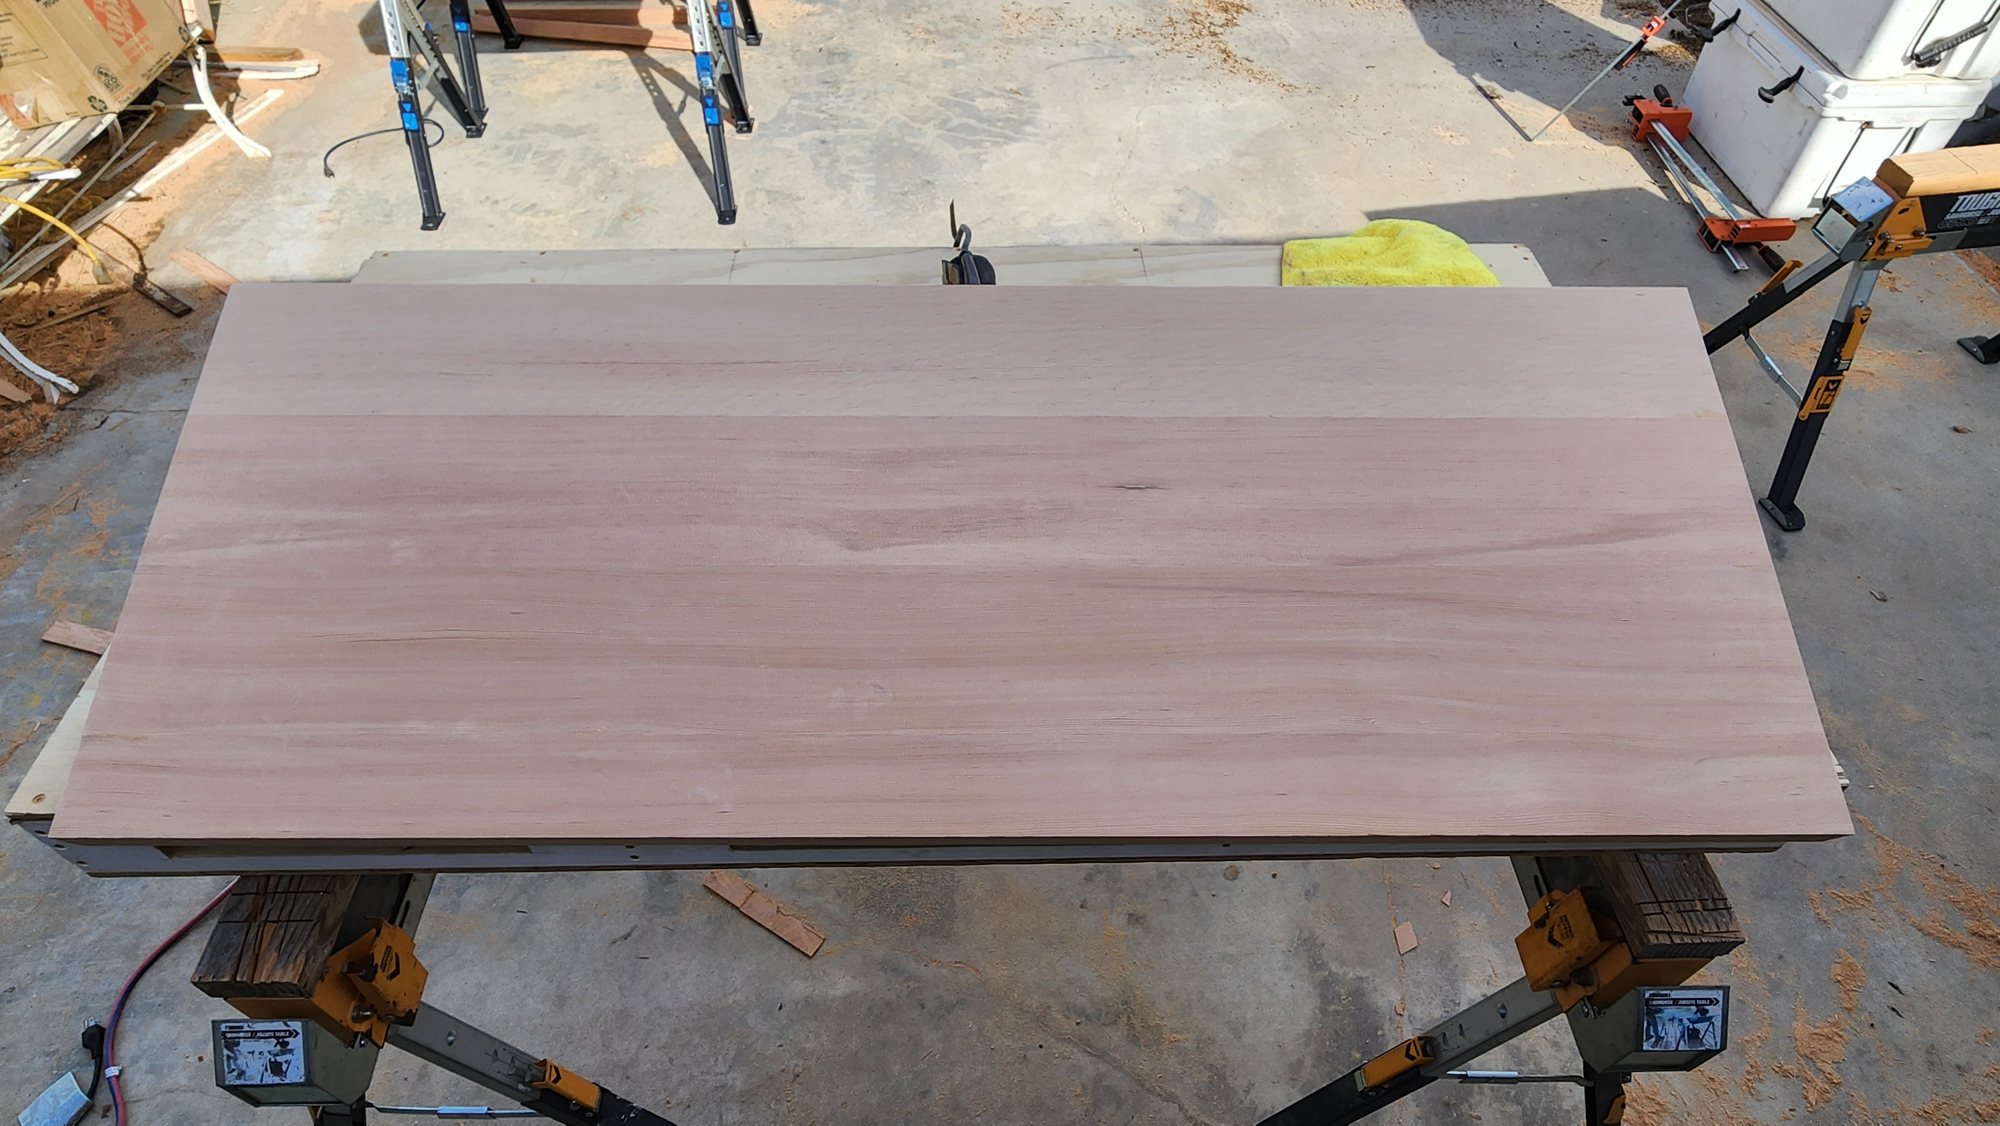
The finished panel from above. Sanded flat, glue lines all but gone.
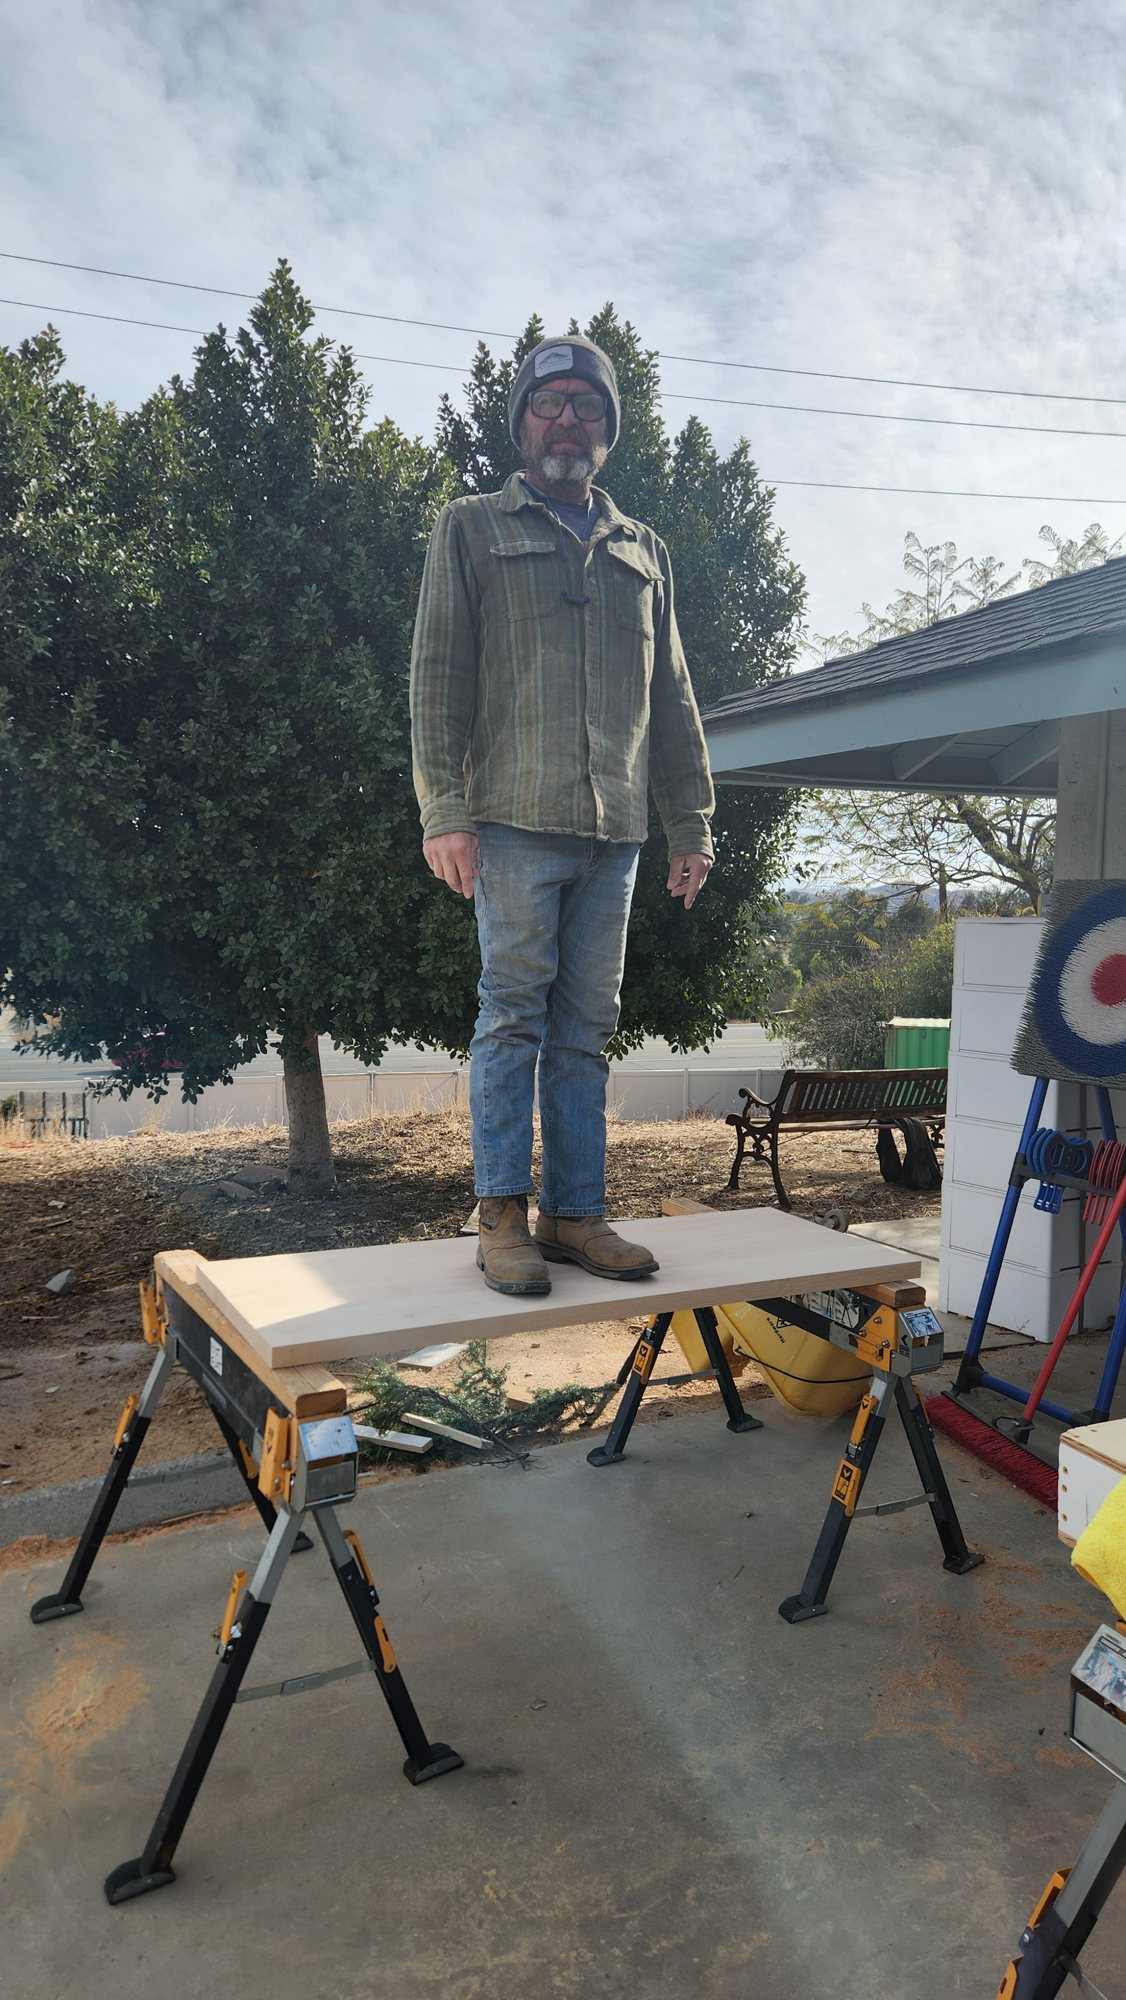
Brian standing on one of the finished vertical-grain fir panels across two sawhorses outside the shop. A stiff, flat panel.
Shop time to get everything glued up: a full day, a long two-person day.
Why this one is different
There is no catalog number for this panel. It's one of a set, milled from boards we picked at the yard with a meter in hand, cut to a thickness that matched the design, with glue edges off our own saw and a miter fold on every edge somebody will touch. Those steps only happen when the people building the piece are the people who decided what it should be.
In one of the finished photos I'm standing on a panel across two sawhorses. That's a picture of a stiff, flat panel, nothing more scientific than that.
This is a peek behind the curtain of what custom actually means. Sourcing high-quality wood, dimensioning it properly, sizing it, gluing it up, and getting the cauls right. A one-of-one handmade panel that then got turned into other stuff.
Thinking about a bench or built-in like this?
If you're in Menifee, Riverside County, or anywhere in the Inland Empire and you want solid wood where it counts, pop over to hsconstruct.com/contact, send a couple of photos of the spot, and tell us what you're after. We'll come out, take a look, and tell you plainly what it would take. You will like the way we do business.
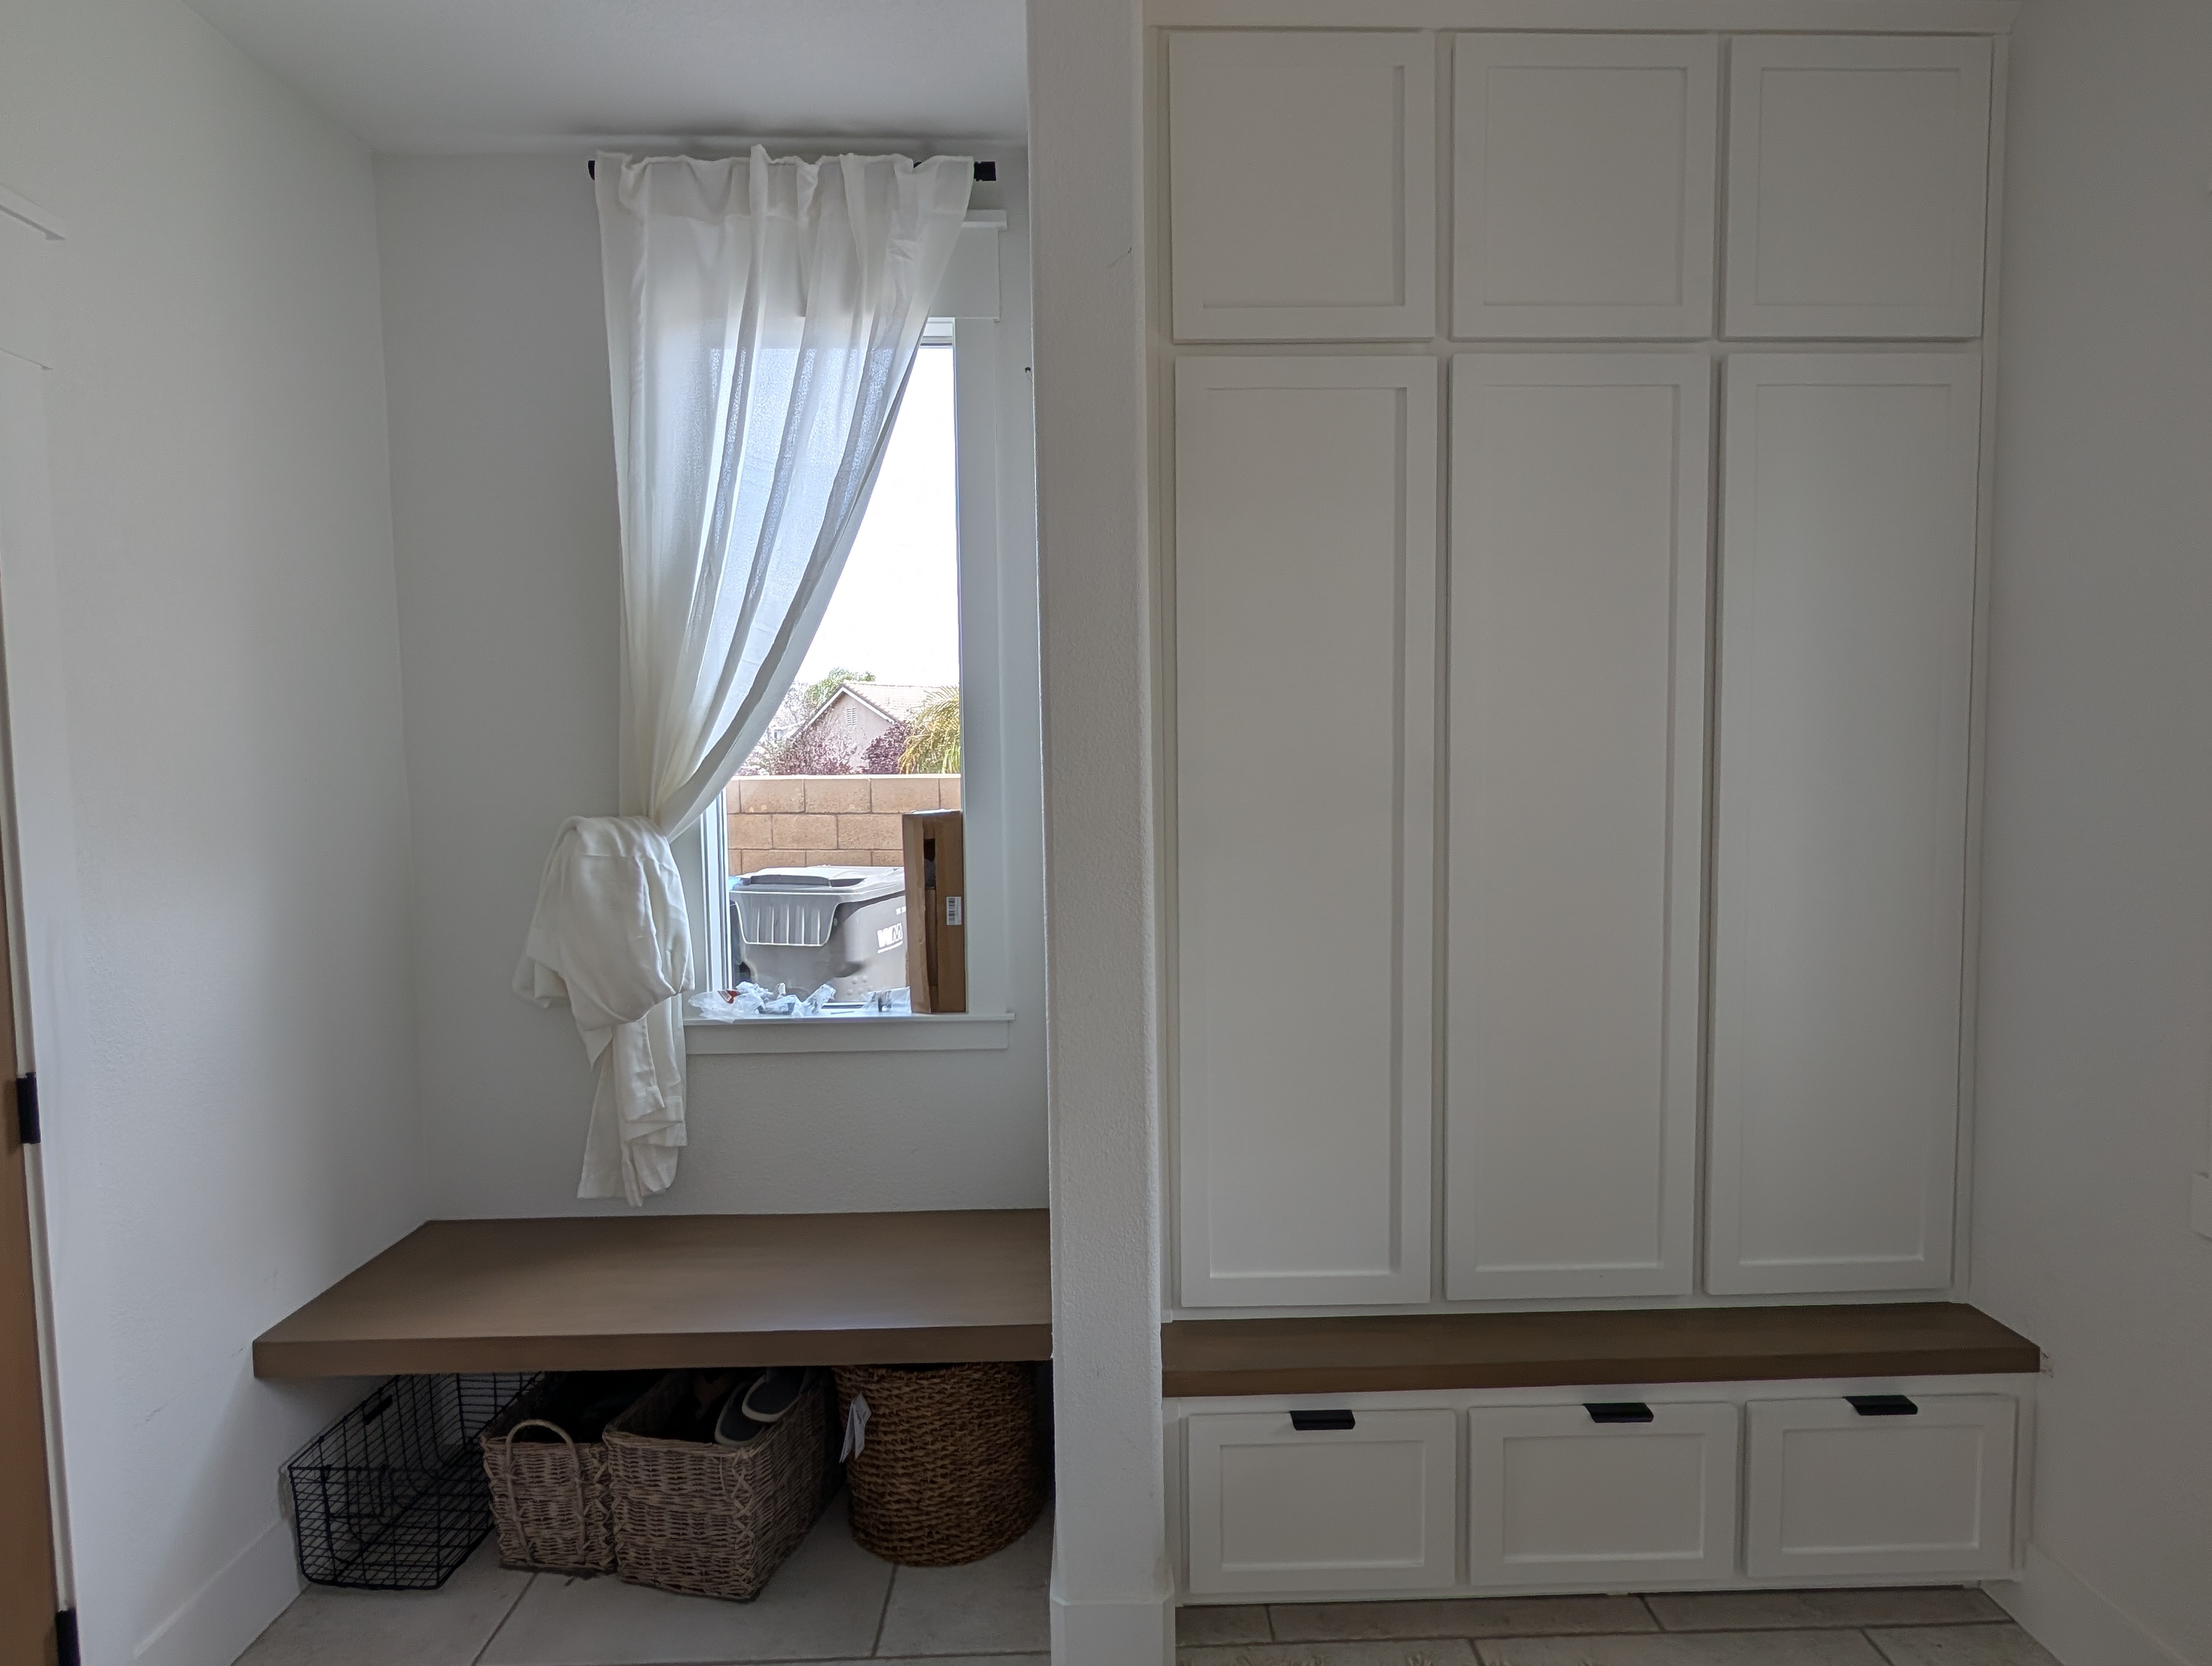
The bench these panels became is in the Rhapsody Ct. mudroom in Menifee, if you want to see where it ended up.
951-338-8058 | brian@hsconstruct.com | hsconstruct.com | CSLB #1123738
More Than Just Glue-Ups
A glued-up panel is one small thing at Holland & Sons, and it's one chapter in a much longer story. Brian has been a finish carpenter since 1991, and his sons now build alongside him, which means every room in your home is fair game. If your space needs more than a bench or a shelf, here's what else we build:
-
Kitchen and bathroom remodels: full custom cabinetry, tile work, and finish carpentry from demo to done
-
Coffered ceilings: grid beam systems that add architectural depth to any room, sized and proportioned to the space
-
Wainscoting and wall paneling: classic raised panel, flat panel, board-and-batten, and shiplap applications
-
Reclaimed wood accents: feature walls, fireplace surrounds, and detail work using salvaged material with real character
-
Beam wraps: hollow wood wraps that give exposed beams the look of solid timber without the structural engineering
-
Crown molding, baseboards, and trim carpentry: the details that make a house feel finished, from a single room to a whole home
-
Cased openings and interior door replacements: clean transitions between spaces that most contractors overlook
-
Media walls, accent walls, and fireplace walls: full-height feature walls with the cabinetry, paneling, and trim built as one piece for the room
-
Built-in cabinets: custom built-in cabinetry for living rooms, offices, dining rooms, and hallways, built in the shop and fit to the wall
-
Mudrooms: lockers, benches, drawers, and hooks sized for the family that uses them
-
Custom built-in entertainment walls and bookshelves: designed for the room, built in the shop, installed to last
Wood, proportion, and rooms that feel right. That's what we do. hsconstruct.com
About the Author
Brian Holland is the owner and lead carpenter of Holland & Sons Construction, a family-run finish carpentry and general contracting company serving Riverside County and the Inland Empire. He entered the trade at 17 in 1991, learned on the job, and has spent every year since building the kind of work that makes rooms feel right, often before a homeowner can articulate why. Many projects start at his vintage drafting table, where he sketches the layout by hand with pencil and paper using a Vemco drafting machine before anything gets built. His sons now apprentice alongside him on every project. Holland & Sons is based in Perris, CA and licensed by the CSLB (#1123738).
Memberships & Credentials: NAHB Member | CBIA Member | NARI Member | BBB A+ Rated | Tanya Holland, NAHB Certified Aging-in-Place Specialist (CAPS) | CSLB #1123738
Related project
This guide is part of our custom built-ins & cabinetry series.
Learn more about Custom Built-Ins & CabinetryHave a project in mind? Let's start a conversation.
Tell us what you are thinking about and we will give you a straight answer about scope, timeline, and investment.
Start a Conversation